Showing posts with label tex-mex. Show all posts

Sunday, November 25, 2012

Bodie's Most Bad-Ass Red Beans & Rice

Usually I hate it when I lose something I was working on (like a recipe) and have to start over from scratch, but in this case it worked out pretty well. What happened is that a couple months ago or so, I came up with what I thought was the best rice and beans I had ever eaten. Actually, it was the best rice and beans I'd eaten- at that time. (There was one time before that, but I never bothered to write anything down, so all I had was an awesome dish with no accurate way to re-create it.) And this time, luckily, I actually managed to write everything down as I made it so I'd be able to re-create it any time. But unluckily, I stored the main copy of the recipe in my Gmail account, thinking it'd be about as safe there as anywhere. And actually it was pretty safe there, so I erased the copy I had on my dry-erase board in the kitchen. But in an effort to clean up my Gmail, I completely deleted a whole bunch of emails, accidentally including the red beans and rice recipe, among a couple other kind of important recipes. (Even though it's unlikely to ever happen again, I'm now using Backupify again. I used to use it a long time ago when it first came out- thankfully, because that means it's still free for me- but didn't really see the need for it, so I stopped.) So there went my most-bad-ass-ever recipe for red beans and rice. But I figured since I'd done it once or twice before, I might be able to do it again.  And not only did I do it again, but I think this one is even better! So yee-haw for happy accidents (though I'm still sticking with Backupify).


What you'll need:

3 c dry pintos or red beans
7 c water

1lb bacon (minus what you eat after smoking it, because it's so damn good) + drippings
2 smoked pork hocks/pig's ears/whatevers
A couple jalapeños and cayennes (if you like yours a little spicier)
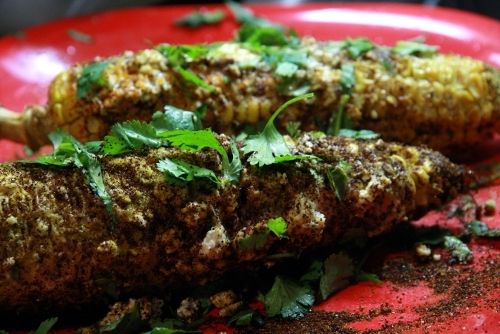
2 each guajillos and pasillas de Oaxaca*

3 T chopped chipotles in adobo (I highly recommend La Costeña brand)
3 T chili powder
3 T toasted cumin
3 T granulated garlic
2 T paprika
2 T mild jalapeño-lime blend**
2 T cider vinegar
2 T dried epazote
2 T dried cilantro
1 T onion powder
1 T oregano
1 1/2 t sugar
1 1/2 t coarse sea salt
1 t thyme
pinch of dill
several grinds of black pepper 

1 can of no-salt-added diced tomatoes
1/2 can of tomato paste
1 can of beer
6 T Louisiana hot sauce
2 T Valentina hot sauce
1 ea. red bell pepper and yellow onion, diced
fresh cilantro and/or green onions (and more Valentina) for garnish


Take your raw bacon (high quality or cheap-ass store brand, it really doesn't make much difference in this case) your smoked pork/turkey/whatever parts, and smoke them again. Really, fire up the grill, load on the wood chips and smoke the hell out of those suckers! Make sure you have some sort of drip pan underneath to catch all of the drippings. If you have a big enough grill and can fit it all on, I'd also recommend smoking your chile powders, cumin, salt, pepper, etc. I don't have a big enough grill to do it all at once though, and by the time the bacon and pork is smoked to the point where I want it to be, the wood chips are spent and I don't feel like doing it all again.
It's almost impossible to oversmoke the smoked pork parts, but I suppose you could, in theory, overdo the bacon since this involves hot-smoking and letting it go too long will result in burnt bacon. I let mine go until it's dark brown and crispy. I've burned the smoked hocks before, but it was only superficial and after cooking down in the beans awhile they were as tasty as ever. Bacon being so thin, however, that wouldn't work.

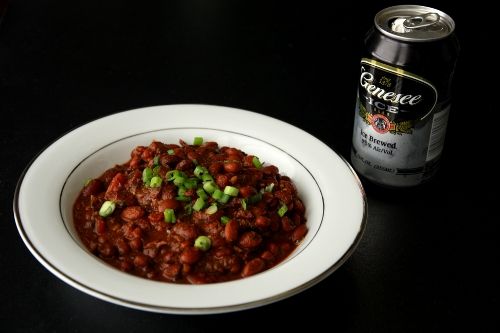
Next come the beans. I have a pressure cooker (Presto, 8 qt.) so that's how this recipe was written. If you don't have one, then cook the beans however you normally would, soaking them overnight or whatever. But with the pressure cooker, I never bother with that. Take the unsoaked beans, add the water, smoked meats, guajillos and pasillas (and the other chiles, if you're using them) and add it all to the pot. Bring it up to high pressure, then turn down to low pressure and set a timer for 21 minutes. When the time's up, release pressure using the cool water method and return to the stove over med-low heat. (When you open the pot, it'll probably look like there's not nearly enough liquid, but once the beer, hot sauce and tomatoes come into play, it'll be perfect.) In a separate pan, sauté the pepper and onions until they're brown and crispy, and deglaze with some of the beer. Scrape it all into the beans, pour in the rest of the beer and wet ingredients and add all your dry seasonings. At this point you just let it simmer away happily on low to med-low for awhile, either until the beans are completely softened up (if they weren't already after the initial pressure cook) or for at least a good 20-30 minutes. While that's going, get your rice cooking and have a few more beers. Speaking of which, every time I've made this, I've used el-cheapo Genesee Ice ($2.99/6-pack!) and it's always come out amazing. I can only imagine how much better it would be if I used a better beer. Then again, if you have to pay for beer, is there a better one than the one that costs $3 for a 6-pack? I'm not sure.


* Pasillas de Oaxaca... not the same as regular pasillas (pasilla negro). Pasillas de Oaxaca, as the name suggests, are from Oaxaca. I don't know much more about the differences between them other than the Oaxacan version is very smoky tasting (which is why I like them) and much harder to find, therefore more expensive than the regular. Like 3x more expensive. Last I checked, they go for around $30/lb. They're so good though. Definitely worth trying out.

** Mild jalapeño-lime blend. It's a custom spice blend I make, most often to put on tortilla chips, but it goes well in stuff like this too. Not available for sale anywhere yet, but it will be soon, so stay tuned for that announcement. But if you don't want to buy it, I'd just sub some canned green chiles and fresh lime juice.


Wednesday, September 5, 2012

My People Call It Maize

Years ago, when I was living in Chicago, I'd see these Mexican food carts, with the vendors selling some sort of corn on a stick. A friend of mine told me they slathered it with mayo, cayenne, parmesan cheese, and maybe some cilantro and lime juice. My first thought was, man that sounds gross. Mayonnaise on corn? The whole thing just seemed weird to me. Fast forward to about a week ago, when I noticed a recipe Saveur posted for Mexican-Style Roasted Corn. I have to admit, the picture kind of sold me on it, so I went out and bought some corn and Queso Fresco. I know their recipe calls for Cotija, but when I got to the store, I couldn't remember for sure if that was it. I thought it was, but the only Cotija I saw looked like overpriced Parm, so I went with Queso Fresco instead. I think I made the right choice.

I made some other, minor, tweaks as well. You can follow their recipe to the letter if you want, but this stuff is dead simple. No recipe needed. They peeled the husks back and tied them with twine; while it does look kinda pretty, it's probably not really necessary. Strip those babies off and throw them in your jerk neighbor's yard or driveway. Saveur soaked their corn in water for a half hour. I didn't soak mine at all, and it came out fine.

Here's a list of my ingredients:

Corn, husks removed
Mayo
Queso Fresco
Chili Powder
Jalapeño-Lime powder (my own blend; not really for sale anywhere- yet!)
Cayenne
Fresh lime juice
Fresh cilantro


Putting it all together is almost self-explanatory, but here's how anyway:

Grill the corn till it's as done as you'd like. Slather on the mayo in whatever quantity you'd like. Roll the corn around in a dish of crumbled Queso Fresco till it's nice and coated, then sprinkle with your choice of chili powder(s). Salt and pepper if you want, then squeeze some fresh lime juice on it and hit it with some cilantro. Then, while guzzling a beer, give your neighbors some shit about their stupid messy lawn/driveway.

Monday, April 30, 2012

Bomb-Ass Buffalo Chicken Quesadilla (updated)

This is one of my all-time favorite things to eat, ever, and definitely, hands-down the best quesadilla I've ever had in my life. Just thought I'd throw that out there. Now if only I could take credit for the basic recipe. Unfortunately I can't- I learned to make it during my very first cooking job, back in the late 90's, at a franchise pizza restaurant chain that no longer includes pizza as part of their name. I just checked their website and they still offer a buffalo chicken quesadilla, however, I've not eaten there in years (they don't have any locations in my area, or in my previous area of St. Paul, MN) so I don't know if it's the same as it used to be when I worked there. But that don't matter either way, because after you read this, you too can partake of the Bestest Bomb-Ass Buffalo Chicken Quesadilla in the History Of Ever in the privacy of your own kitchen (or basement or bedroom or wherever), no 'Pizzeria Something Or Other' locations necessary. As a bonus, it's a total cinch to make.

Necessary stuff:

Pizza/bread dough*
Panko bread crumbs
Vinegar based hot sauce (Frank's, Louisiana, etc.)
Red onions
Chicken, preferably grilled
Cheese, preferably Muenster

Tasty Garnishes, if you like:

Salsa
Guacamole
Sour Cream

Let's start with the chicken, just to get it out of the way. Grilled is best, but pan-fried or baked in the oven should be fine too. Sliced or diced, however you like it cut, just be sure and brine it, please. It really makes a world of difference. I rarely, if ever, cook chicken without first brining it. If you're not familiar with brining, it's basically just a soak in salt (and sometimes sugar, as well as herbs) water to help keep the meat from drying out. It doesn't have to be complicated- I usually go with about 1/4 c salt and 1/2 c sugar to 1 gallon of water. Let soak for about an hour, though as little as 20 minutes should be fine too, depending on how much meat you're doing.

Next up, take a ball of your favorite pizza/bread dough (5-6 oz should suffice for a decent-sized 'dilla, though after trying this one for the first time, you may find yourself going much bigger) and press it out in a bowl/dish of panko bread crumbs. It's hard to describe the exact technique, though I think once you get going, it'll come naturally. You can do it in a large mixing bowl, in a cake pan, or even on a square sheet pan. Basically you want some sort of dish to hold in the bread crumbs while you simultaneously press them into the bread dough/roll it out flat. I find working by hand (i.e. don't use a rolling pin) works best.


I started off with the dough ball in the mixing bowl, then transferred it to the little sheet pan. Press and turn, press and turn. Flip it occasionally, keep it covered with plenty of panko. When it's the size you want, it's just about ready to go. Splash it liberally with your favorite hot sauce so it looks like a scene from Law and Order SVU or whatever, and then toast it up. It's best if you have a grill to toast it on, but if not, putting it on a sheet pan and toasting it under the broiler in your oven until it's nice and golden/slightly charred, works fine too.

At this point, you're halfway home. Cover half of it liberally with your cheese of choice (I think Muenster is best- it's what we used back in the day at the restaurant- and I've recently found that Havarti is a great choice, but a cheddar/jack/mozz mix or colby-jack would probably be decent too), add the chicken, sprinkle liberally with some diced red onions (very important! They don't necessarily have to be red onions, but don't leave these off. I did one time, because I didn't have any, and the difference was profound, profound I tell you!  If you don't like onions or whatever, put them on anyway. You'll somehow like them on this, I promise. Guaranteed, or your money back), and maybe some more cheese and hot sauce on top. You're pretty much home free at this point. Pop it in a very hot oven (400+) until everything's melty/toasty. Shouldn't take more than 10 minutes, tops. Probably 7-8 or so.


Perforate the center of it along the cheese with a knife edge, then fold it over and cut into 4 (or 3 or 2) wedges:


At this point, I like to douse it liberally with Louisiana hot sauce and chow down (Frank's used to be my favorite vinegar-based hot sauce, but since I've tried Louisiana, I'm a convert). I'm not a huge fan of sour cream, but I can see how it would be good on this if you like it, and salsa and guac definitely make for great condiments.


* if you don't have a decent recipe for pizza/bread dough, I've got one I love and use pretty much every time. I was looking on allrecipes.com for a baguette recipe, and found one but used it to make flatbread instead. It was the best flatbread I'd ever had. So I ended up messing around with it and making it even better. Here's my version:
  • 2 1/2 cups bread flour
  • 1 tablespoon white sugar
  • 2 teaspoons kosher or coarse sea salt
  • 2 teaspoons instant yeast
  • 3 T wheat gluten
  • 3 T potato starch (not potato flour) 
  • ~ 1 c warm water
(For what it's worth, for the wheat gluten and potato starch, I use Bob's Red Mill brand.)

Mix all the dry stuff, then add water until a nice dough forms (you should only need slightly less than 1 cup). Because of all the extra gluten involved, this dough will quickly become pretty stiff and hard to knead. And for that reason, I wouldn't bother using a food processor to mix it up. Once you've got the dough ball, it should only take a few minutes of folding and kneading before it gets too stiff to bother with anymore, so to me it's not worth it to get out the food processor just to save a few minutes' work. Plus, unless you've got a super-duty Robot Coupe or something similar, it'll probably just bog down anyway. When it's ready, cover it and stick it in a warm spot for a few hours. I usually let mine rise at least twice, and sometimes I'll let it go all day or overnight while rising.

This recipe makes the best flatbread I've ever had, and it's my go-to recipe every time.