I had to add that cheesy fake sound effect in the title in order to give a tiny little sense of urgency to this post. If I could have found a way to add in some floodlights and a dark stage awaiting a mega rockstar with thousands of screaming fans, I would have done that too, because the title Tacos de Pollo just doesn't quite communicate the awesomeness of what lies ahead. But I thought that "Holy-hell-these-are-so-amazing-that-I-will-totally-kick-Bobby-Flay's-butt-in-a-showdown-and-also-blow-away-the-judges-on-Iron-Chef-with-them" was a little bit much. Even if it is more accurate. So prepare yourselves...
...for a
Taste Sensation.And also for lots of me gushing and ooh-ing and ahh-ing about these tacos. About how awesome they are. About how they're in my top 3 of all-time best things I've ever eaten. About how if I ever found myself on Death Row, these are what I'd request for my last meal. But hey, don't just take my word for it- check out some actual comments they've recieved from real people who've tried them:
"...the best tacos I've ever had."
- my mom
"They're phenomenal."
-Ryan, who works at Sweeney's
"Wow, do you do breakfast, as well?"
- Some hot chick who came in to Sweeney's for lunch on Sunday, when I usually do these for the Daily Special.
" "
-Beth, my boss.
Ok, granted you
could argue that my Mom is biased. You'd be wrong in this case, but you could still argue it.
And I think it's quite fitting that Ryan actually used the word "phenomenal," since I was originally planning on using that word myself, but thought it might be a little too much. But, hey, since
he used it...
And lastly, I know Beth never actually got back to me about whether she liked them or not, but I'm pretty sure that's because they left her speechless. Yes, they're that good.
(Oh, and that comment by the hot chick? I totally made that one up. But that's the
only one, I swear!)
Ok, enough jibber-jabber. Let's get cooking!
First, a rundown of Everything You Will Need. (And I'd like to emphasize the word "need". For the full experience, nothing here should be considered optional.) It's a big list, but don't be intimidated- it goes together easily and will be more than worth the effort. This recipe can be broken down into 3 basic parts- the chicken taco mix, the taco sauce, and the toppings.
Chicken TacosBoneless chicken breasts
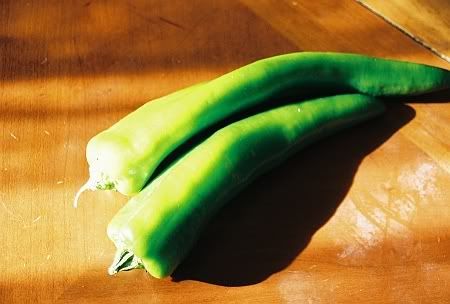
Jalapeño peppers
Fresh, minced garlic
Kosher or Sea salt
Fresh cilantro
Vegetable/olive oil
Fresh lime juice
---
Soft corn tortillas
Taco SauceRegular mayo
Chili powder
Garlic powder
Canned chipotle peppers in adobo sauce
Guajillo peppers
Apple cider vinegar
Fresh, minced garlic
Fresh lime juice
Vegetable/olive oil
Cumin
Paprika
ToppingsTomatoes
Avocados
Black beans
Fresh limes
Colby jack, or cheddar cheese
Now, let's break it down a little more. First, the mix. I don't have specific amounts for any of this, but it's no big deal. For the mix at least, you can get a pretty good idea just by looking. I'll detail that a little more later, but first...
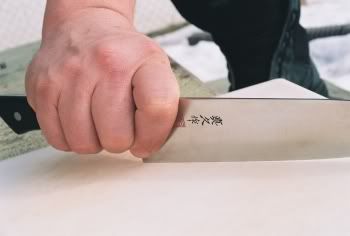
Take 1 or 2 chicken breasts and dice them up. They don't have to be minced (although that would be fine, too) but you do want a small dice. (Quick kitchen tip here: raw chicken is much,
much easier to slice and dice when it's partially frozen.) Add in some finely chopped, seeded jalapeño, some minced garlic, and fresh, chopped cilantro. Sprinkle on some kosher salt, give it a squirt of vegetable or olive oil and a squeeze of lime juice, and mix thoroughly.
When I make these at home for myself, I tend to use 1 large-ish chicken breast, (8 oz. or so) 2-3 jalapenos, and 5-6 cloves of garlic. It's actually pretty difficult to use too much jalapeno, cilantro, and garlic. You want a good, even mix of green and white. If you're seeing
mostly green, then you may have used too much cilantro/jalapeno, but it's not likely that'll happen. Also, with the garlic, your nose can give you a good idea of whether or not you have enough. Don't skimp, though. You want to add lots of flavor. Also, keep in mind that the heat of cooking will mellow the flavor of all of the above, so even if you
do go kind of overboard, it's not like using too much salt- your tacos will still be fine. With the salt however, all you really need is just a pinch. Maybe a heavy pinch, but play it safe if you're not sure, as you can always add more later. As for the lime juice, maybe 1 wedge per breast? I find that 1/2 a lime can handle a couple pounds of mix, but it also kind of depends on how long the mix will be sitting before you cook it. Mostly you're using it to marinate the chicken, but it also contributes some flavor. I find that about 1 hour before cooking is good. If you think your mix may be sitting much longer than that, say 4 hours or more, you may want to use less, or even none at all. On the other hand, if you're going to be cooking it immediately, feel free to get a little more liberal with it. And as for the vegetable/olive oil, it's mostly just to lube the mix, make it less sticky and easier to mix in the bowl, and also possibly saving you from having to oil the pan when you cook it.
Before I move on to the Taco Sauce, I just want to comment on the use of the corn tortilla for this dish. Do not,
do not,
DO NOT say what I think you're about to say. Don't even think it. As I mentioned before, nothing in this recipe should be considered optional. Nothing.
Especially the corn tortillas. I don't care if you're allergic to them; this dish will cure that real quick.* So don't go substituting any stinking
flour tortillas in their place. That is the quickest and easiest way to absolutely kill this meal. It's the equivalent of putting ketchup on a steak-
"¡No lo hagas!"
Once you have all of that prepped up and ready to go, I've found that 4 ounces of mix is just about the optimum amount for one serving. Or, depending on your appetite, maybe only 1/2 serving. Or maybe two. In any case, it will give you just enough for 3 tacos, which will fill an average person up.
Now the Taco Sauce.
There's
kind of a lot of prep involved in this, due to the use of the guajillo salsa, (in effect, you're making two taco sauces) but it's really not as bad as it sounds. (And even if it was, it's worth it.) So let's start with the guajillo salsa first. Guajillos are becoming more and more mainstream. If you live in or near a large city, you should be able to find them at either your local grocery store, or a Co-op/Natural Foods store. And if not, they can be easily obtained online. Penzey's is a well-known outlet that carries them (although they're a little pricey there). I'm pretty sure Spice Barn and Gourmet Sleuth offer them too, (links to both are over on the right) at a reasonable price. It's worth the extra effort, it really is. The guajillo salsa is the one I blogged about earlier. There's a tag for it if you want to read that post, but I'll recap it here. This isn't meant to be a specific recipe, but more of a general formula-
1 dozen guajillo peppers, stemmed and roughly chopped (keep the seeds!)
1 tsp kosher salt
1 tsp crushed red pepper
1/4 c fresh, minced garlic
1/4 c olive oil
1/4 c apple cider vinegar
Add the peppers to a pot on the stove and cover with about an inch of water. Bring to a boil and then let simmer for about 15 minutes or so. You want the water level to go down by about a third, to boost the flavor of the liquid, as you'll be adding some of it to the salsa. Remove from the heat and let cool. Drain the liquid, but don't discard it. Add the peppers to your blender and add about half the reserved cooking water. Add the salt, crushed red pepper, garlic, oil, and 2-3 T of the vinegar. Blend it all up nice and smooth and give it a taste. You shouldn't need to add more oil at this point, but tweak the rest according to taste. I usually find I need to add the entire 1/4 c of vinegar and a little more of the cooking liquid, (it's for flavor as well as adjusting the consistency. I usually go for thick-ketchup-like) as well as more salt and crushed red pepper. None of the flavors should be overpowering any of the others. You want a good dose of the guajillo coming through up front, and an even blend of salt and vinegar right behind that, followed by the garlic and crushed red pepper. (I hate to sound all food-critic-like, but that's just what comes to mind when I taste this.)
Ok, that was probably the most difficult part of this whole project, and that wasn't even that bad. So just set that salsa aside, and let's get started on the rest of the taco sauce!
The only real "recipe" part I have for this is the Chipotle Mayo. I use it as the base for the rest. Chipotle Mayo in and of itself is very,
very good. I never used to like chipotle flavored
anything until I tried this. It goes very well on turkey burgers/sandwiches, as well as pretty much any other kind of burger or sandwich. To make Chipotle Mayo, simply take one can of chipotle peppers in adobo sauce (they're usually 7-7 1/2 ounces) and mix it with 4 cups of mayo. You'll want to either do this in a food processor or chop the peppers first either by hand or in a blender. If you blend all of this together in a blender, the mayo tends to separate, leaving you with an oily mess. (At least, that's been my experience. Not good.) So now you have Chipotle Mayo. And before we go any further, I realize that it
may sound a little odd, using mayo in any form, on tacos. Banish that thought from your mind right now. Seriously. Do whatever it takes to make yourself believe that it's not really mayonaise, but taco sauce, that you're putting on your tacos. Have someone else make it for you and then lie to you if you must, but do not
not use chipotle mayo. I tried it once using lowfat yogurt, and added some mashed up avocados to add a little fat, as well as flair, and the results were no good.
No good at all. So
hazme caso and just use the (chipotle) mayo.
Ok, just a recap on the ingredients, since the list at the beginning was for all the
individual ingredients, including what was needed for the guajillo salsa.
-in no particular order-
Chipotle mayo
Guajillo salsa
Fresh lime juice
Chili powder
Fresh, minced garlic
Cumin
Paprika
Cilantro, chopped
The m.o. here is the same as always- start with the chipotle mayo as your base and add the rest according to taste. You may be thinking, "How will I know if I got it 'right'? Why can't you just make a stinkin' recipe for it? How hard could it be?" (That's what
I'd be thinking, anyway.) But when I first made this, I had no recipe. I just threw a bunch of stuff in a bowl and stirred it all up, and a masterpiece was born. I never use a recipe when I make this. I like the idea of it being slightly different each time. But there's also a little bit of wiggle room in there too- even if yours tastes noticeably from mine, it'll still be great. In fact, I submit that any reasonable combination of the above ingredients will yield fantastic results. So just take a cup or so of chipotle mayo, toss in a tablespoon or two each of fresh minced garlic and chili powder, a few tablespoons each of guajillo salsa and cumin, (preferably toasted- just heat in a skillet over medium until nice and fragrant) a couple hefty pinches of finely chopped cilantro, and a couple squeezes of fresh lime juice. Maybe even a little bit of black pepper, even though it's not on the list. Blend it all up nice and well with a wire whip or other such utensil, and taste for doneness. Add more of whatever you think it might need, according to taste. You'll also want to let it sit for about an hour before using, to let the flavors really meld. And because this uses fresh garlic and lime juice, you also don't want to make up too much at one time. Partly because of the limited shelf life, but also because the garlic really sharpens up after a day or so. Some people like that, but if you're not one of those people, this is something to keep in mind. I briefly considered using garlic powder for large batches, but came up with a better idea instead. What I do at home is to just make up a large batch of chipotle mayo, which will keep just fine for quite awhile, and then just draw from that and add the rest to make the taco sauce as needed.
Time for the toppings...
Here's a recap-
Colby jack, or Cheddar cheese
Tomatoes
Avocados
Black beans
Fresh limes
Fresh cilantro
Personally, I think Colby-jack works much better than Cheddar for this. It seems to have a cleaner, less greasy taste to it, but I've used both, and both will fit the bill. As for the black beans, canned or dried, doesn't really matter. If you use canned, though, I recommend the less-is-more approach. Try to avoid the kind with lime juice/peppers/spices/tequila/etc. and go with just black beans, water and salt. There'll be plenty of flavor from the chicken and taco sauce to go around.
For the limes, you won't actually need more than one- just a wedge or two to squeeze some juice on the finished product. Avocados- when I first started making these, I would use thinly sliced avocado, then I switched to diced. Now I'm considering using mashed, with a little salt, lime juice, crushed red pepper, and a lot of black pepper mixed in. Sort of a guacamole, but I guess not technically one. I've been using that a lot lately on sandwiches anyway, and it just seems like it might be easier to work with on these than diced. Well, maybe not as easy to apply, but it might sit better in the shell, and not fall out so easily when I overload it, which I always do, no matter how many times I tell myself I won't do it anymore.
Alright, so you've got your mix, taco sauce, and toppings all ready to go. Let's get started. There's a couple different ways you could go about this. The
ideal way would be to get yourself a huge flat-top grill like you find in commercial kitchens, so you can easily do everything at once in one spot. But those are very large and extremely heavy, and cost several thousand dollars, and don't run on electricity, so they probably aren't very practical for most people. So scratch that idea. You could try cooking the chicken, tortillas, and black beans all at the same time on your regular kitchen stove, timing it so that they're all hot and ready at the same time and all you do is throw it together. But I find that to be too much of a juggling act. So here's what I do. Throw some black beans in a covered, (and vented!) microwave-safe container and pop them in the reactor for a couple minutes. They'll be hot, but not too hot. They might need another 30 seconds or so later on, when everything else is done. Grab two non-stick pans (I prefer cast iron) one for the chicken mix, and one for the tortillas. Set one of them over about medium-high heat, and the other one over medium-low. The med-low one is for the tortillas. After a couple minutes, when the medium-high pan is nice and hot, drop in the chicken mix and start it cooking. After it's been thoroughly seared, turn the heat down to about medium and continue cooking until it's
mostly done, (about 80-90%) then turn down to the lowest heat setting. Now you start on the tortillas. Make sure you've got a thin, flexible, metal spatula. The thinner the better. I picked one up at Target for about $5 that's basically just a heavy-duty piece of tin foil with a handle. It works great! It's sturdy, but flexible. (In fact, it was designed for delicate foods, like crepes and eggs.) Give the pan a light shot of pan spray, and then grab your first tortilla and run it under some cool tap water for a few seconds. Just long enough to give it a thorough soaking, soften it up a little. Shake off the excess water, and set it lightly in the pan.
Lightly. You do not want to press it down with the spatula. Keep a close eye on it, and when it looks dry (no longer shiny) and a little puffy, that's the time to flip it. Immediately sprinkle on a thin layer of your cheese, and wait. When the cheese is soft and melt-y, it's ready!
A couple quick notes before we move on to the next step- you may have to experiment with different heat settings, as well as different tortilla brands, to find the combination that works for you. As far as heat goes, I've found med-low to be the optimum for my home kitchen, but at work, where we have totally different, commercial equipment, it's medium. And as for tortillas, I've noticed a big difference in quality with different brands. Some tend to fall apart way easier than others. I've thrown away
many tortillas that just fell to pieces in the pan. It tends to happen when you go to flip it for the first time. (Which is why a thin metal spatula is
key.) If you find you're having issues, here's a couple things I've found that help- using medium-high heat, drop the tortilla on the pan for
just a couple of seconds before sliding the spatula quickly underneath it. You don't want to flip it yet. The idea here is just to sear it quickly, and then briefly lift it off the pan before it can stick. Then wait until it looks dry and a little puffy before flipping it. Another thing I've tried that can help, is to leave the tortilla on for a little bit longer before flipping it. The top part will start to peel and flake, but the bottom will toughen up, making it hold together better. You want to do this over medium-low. That's not my preferred solution, though, if I'm having problems, because I
do want the tortilla shell to break apart easily- but in my mouth, not when I'm cooking it! If you try all of the above and still are having problems, don't give up! Experience helps, and your efforts will be greatly rewarded. If all else fails, just stop by Sweeney's in Saint Paul, and I'll be happy to make some for you!
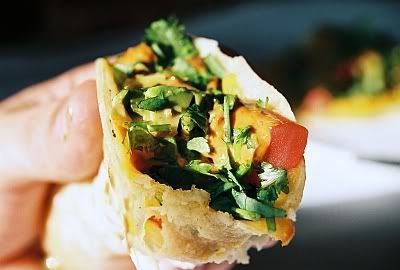
Ok, next. Assuming you're doing these one at a time, you could just wait until you have all three shells with their melted cheese ready and then build them from there, but I have a really hard time doing that. As soon as one is ready, I make it and devour it before the next one starts. Sometimes I'll get the shell going while I'm eating the first one, but rarely can I hold myself back until all three are ready. Whatever you decide, here's the build process:
This exact order is very important. Don't let anyone tell you otherwise. I've worked on these
endlessly since day one, getting everything absolutely perfect, and this is it right here. (Ok, maybe not really, but just try it
once this way before striking off on your own. It'll make my day.)
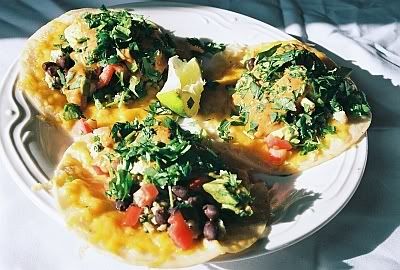
Lay down a thin layer of chicken first. I like to try and make everything in a line, since you're just going to be folding the shell in half anyway, in the traditional store-bought hardshell shape, to eat it. Just kind of makes them a
tiny bit less messy. Next come the black beans, in a line on top of the chicken. (Make sure they've been drained, at least a little.) On top of that go the diced tomatoes. Next is the diced avocado. Then comes a line of taco sauce. On top of that goes a hefty pinch of fresh chopped cilantro. And then top it off with a squeeze of lime juice. Mmmmmmm.......
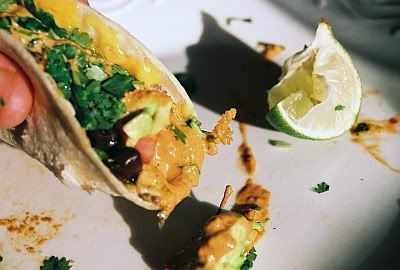
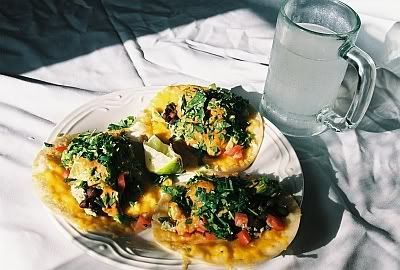
They taste best with a beer, but if that's not an option, Fresca works nicely too...
*****
This will be my last post until I-don't-know-when (right when I'm getting ready to buy a good digital camera, too! No more waiting until the roll of film is all used up to get just a couple specific photos). Mainly because I've run out of recipes and ideas. Unlike a lot of food bloggers, I don't actively try and come up with new things, (with the exception of the muffins, maybe) and a lot of the things I
have come up with have been basically accidental. I play around a lot with food or recipes, and every once in awhile I'll hit on something I really like, as was the case with these tacos. But it doesn't happen very often. I hope to be back with more good stuff to share, but who knows when? Since it could be awhile, I wanted to finish with a really good item. If you make nothing else I've posted about,
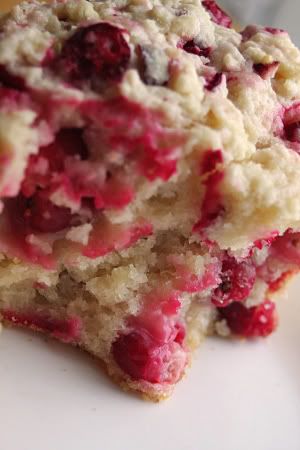
make these tacos. And you really should make the muffins for dessert or breakfast, too; they're
really good. Especially if you sub full-fat (8 grams per cup) yogurt for the sour cream. Ohhh yeah.
Anyway, thanks for reading; thanks for commenting. And maybe consider subscribing to the RSS feed and check back once a month or so to see if there's anything new going on here.
Chow, baby ; )
jb


