Monday, December 26, 2011

Stuffed Red Bell Peppers, Two Ways (Part I)

So the other day, The Cohort** and I were hanging out at my home-away-from-home, K&S International Market, when we found some sweet-looking red bell peppers. I needed to get a couple anyway since I was planning on making some rad Moroccan Sunset Salad, but then she casually mentioned how it'd be cool to make some stuffed peppers with them. Maybe have a 'Throwdown,' or something. Right then and there it's like something inside of me just snapped. I got this wild Charles Manson look in my eyes, stretched my arms out wide and said, 'Girl, you don't know who you be messin' with! Oh, I'll throw down with you, alright! I. WILL. DESTROY YOU!!' Then I heard somebody say something about 'Call 911,' so we quickly left and got our peppers elsewhere. Anyway, the important thing is that we did get them, because these two recipes are pretty damn good, even if I do say so myself. Not that I need to, since Amy will vouch for mine, and I'll vouch for hers. I think she knew I was impressed when, after a couple bites, I got out my camera and started taking pictures. Yeah, I was impressed. More than that, I was nervous. After only a couple bites, I was pretty sure I was going to lose this one. However, I managed to bring it to a draw. Yes, we were the only judges, but we're both pretty fair and honestly concluded that they were both equally good.

We started off on a pretty much level playing field, since neither one of us had ever made them before. (All I had was vague memories of only seeing them as a child- I never could bring myself to try one, even though I liked stuff cabbage. Something about that pale green, overcooked pepper...) We both agreed that we'd use ground sausage, instead of beef, as the base of the stuffing. She mentioned something about using rice as well. I went along with it, even though I had other plans...

So the way it worked is, because we have only one kitchen, and it's a small one, we had to go one at a time so we wouldn't copy or be influenced by each other's recipes, especially since we both had a secret ingredient or two in mind. She went first, but because she's out of town for Christmas, I'm posting mine here first. I kept track of everything I added and all that, just in case it turned out good enough for me to decide to post it here. And surprisingly, it did. (I say 'surprisingly,' not because I didn't think I could come up with something good in this area, but because whenever I try to come up with an actual recipe for something, it's never as good as when I just freestyle it.) So here's my concoction:

3 red bell peppers
1 lb ground sausage (Jimmy Dean, regular)
2 oz ea. minced garlic/shallots (At first, that much seemed like a lot- too much, even- but I ended up going with the whole thing.)

(All spices/herbs listed are dried)

1 can diced tomatoes (Hunts, no salt added)
1T Hungarian paprika
1 T Sriracha
1 3/4 t basil
1 1/2 t ground sage*
1 1/2 t ground rosemary*
1 1/2 t sumac
1 1/2 t onion powder
1 1/4 t oregano
1 t ground coriander
1/8 t nutmeg
1/8 t cayenne
Several grinds of black pepper (assumes you're using a grinder. If not, probably just a pinch or two.)
pinch of dill

*I originally used 1 T each of whole sage and rosemary, but ground them myself, resulting in approx. 1 1/2 t each.

Boursin Cheese

200 ml whole oat groats
375 ml water

Let's start with the oat groats. I discovered them about a year and a half ago or so. Long story short, I made some rice and beans with them, mistakenly thinking they were brown rice. Turned out to be the best rice and beans I'd ever had. Oat groats are like a combination of brown rice and pearl barley- nuttier and chewier than regular rice. They cook up the same, though, so whatever recipe you follow for regular white rice should work the same for the oat groats. I made mine in a rice cooker, and because I figured the groats would absorb some liquid from the tomatoes and whatnot, I cut back slightly on the water, using 375 ml instead of 400. I used Bob's Red Mill brand for this, which should be available pretty much anywhere, but any grocery store with a halfway decent bulk foods section should have some too. Otherwise, there's always Amazon.

While that's going, cook the sausage about halfway, add garlic and shallots and cook until browned. Deglaze with a splash of balsamic vinegar (you may need to drain the fat off first; I was planning on it, but found it unnecessary). Then add in the tomatoes and all the spices. Let simmer on low heat while you blanch the bell peppers.

As far as the blanching goes, I brought some water to a boil, turned it off, and then dropped in the peppers for one minute, after which I dropped them in some cold water. After they came out of the oven, they definitely still had some crunch to them. Not that I consider that underdone, but I guess underdone would be better than overdone. However, if that's not your thing, I'd probably go an extra 30 seconds to 1 minute on the blanching, or keep the water boiling instead of turning it off.

Now let's talk Boursin cheese.


It's a very soft, creamy, spreadable cheese. I'd actually never heard of it until a few months ago at work. (Walmart lists it on their website, so apparently it's available pretty much anywhere.) Fortunately for me, I had some on hand, leftover from a catering event at work. There's other flavors available, but this is the one I used. Not knowing how it would all play out, I decided to make three slightly different versions of my peppers- one with everything but the Boursin, one with the Boursin on top, and one with the Boursin mixed in. (The Boursin is the one thing I didn't really measure out, but it was approximately 2-3 teaspoons for the two that got it.)


From left to right- cheese on top, straight up, cheese mixed in.


For some reason, I mixed up the order for this photo- L-R - cheese mixed in, cheese on top, and straight up.

I also forgot to note how long I put them in the oven for, but it wasn't long- maybe 15 minutes at 350 F. All the filling is cooked already at this point so you're basically just bringing the whole thing up to a hot eating temp, as well as maybe finishing off the peppers.

I really liked all three, but my favorite was definitely with the cheese mixed in. The Cohort also liked all three, but said the one with the cheese mixed in tasted like it should be wrapped up in a tortilla and eaten like a burrito. I can see her point. Maybe I'll even do that sometime.

So this is my version. The Cohort's is up next. Ours are a bit similar (I find it interesting that we both, unbeknownst to the other, used sumac as a secret ingredient) but different enough that it's worth making both versions.


** The Cohort, aka Amy Housewine, aka Amy Crowe, is my friend and roommate. She'll be posting here occasionally, as well as helping me come up with new stuff to make. If you want to get a feel for her writing style, her page is here- The Unicorner of Vengeful Atrocities. (I know, right? She's weird. And she has a thing for unicorns. Plus she's just weird. But she's pretty cool too.) The writing over there is definitely R-rated. She likes to write, and speaks her mind when she does. But that's her blog, and this is mine. Obviously very different, not just in content and style, but in language- i.e. mine's more PG. Yes, it's going to stay that way.

Tuesday, December 20, 2011

Cranberry Awesome Sauce

Yeah, I know Thanksgiving is almost a month gone now and most people don't typically eat cranberry sauce except around then, but this ain't no regular cranberry sauce- it's a cranberry Awesome Sauce!

First off though, I have to mention that all recipe credit goes to my friend and cohort, Amy Housewine*. We went to a large Thanksgiving get-together last month and she wanted to bring a cranberry sauce to share, so she just whipped this one up, very spur-of-the-moment. First time she'd ever made it. And it turned out so good that she decided it was just too good to share, and she didn't bring it! And I agree, it is that good. I'll admit though, as a kid I used to love that gelatinous stuff from a can, and even until recently (like just before I tasted Amy's) I still used to kind of like it. But no more! Hers is just way too good to mess around with anything store-bought. And it's a cinch to make- just 5 ingredients!** As soon as I tasted it, I knew we had to post it here, so I asked her to email me the recipe. She did, and here it is in its entirety:

1 cup orange-pineapple juice
1 cup white sugar
12 oz cranberries
1/2 tsp (or to taste) Saigon cinnamon

Heat juice and sugar on med heat until sugar is dissolved. Add cranberries and cook until they start popping. Add cinnamon. Keep cooking till it's whatchoo want, yo. then put it in a bowl or something.


Photobucket

Dead simple. I love it.

**But she forgot to mention the candied pecans she added. It was something like half a cup or so. Just add them in towards the end of the cooking (or earlier if you want them less crunchy). The pecan flavor goes really, really well with the cranberries. The candied pecans Amy used that day were ones I'd gotten from work; I wrote the recipe down, but lost it (probably for the better, since they likely wouldn't want me putting it on the internet anyway) but as I recall, it's just heavy cream, brown sugar, and pecans; maybe some cayenne pepper. Then toasted in the oven, probably on 250 F or something. No egg whites, like most of the recipes I've seen on various recipe sites (Allrecipes, Simply Recipes, Epicurious, etc). If you don't have, or don't feel like making, candied pecans, regular toasted ones would probably still be just as good.

And of course, like I almost always do, I had to tweak it. Only a tiny bit, though. For starters, I pulsed mine a bit with the stick blender, whereas Amy left hers untouched. It's just a personal preference- I don't like mine too chunky or too smooth.

I figured since we were going to be using candied pecans, I'd cut back on the sugar by 1/4 cup. I've since made it again without the candied pecans (it's better with, in my opinion) and still cut back on the sugar by 1/4 cup. Her original recipe isn't too sweet, I just like sweet things that are a little less sweet than 'normal. I also add a pinch of kosher salt to mine. Pretty much any time I make anything that has a fair amount of either salt or sugar, I always add a pinch or two of the other, for 'balance.' Maybe it's all in my head, but it seems to taste better that way.
Then I made another batch with regular o.j. instead of the pineapple-o.j.- I think it's better with the pineapple-o.j. The difference is subtle, and may have been due more to the brands we used (the pineapple stuff was Dole, the regular o.j. was just a store brand), so more testing is in order, but for now I'm planning on sticking with the pineapple-o.j.

A couple other tweaks/additions to try:

Ground black pepper- a friend of mine adds it as a 'secret ingredient' and says it's wonderful. I tried it, but I think I went too light (2-3 turns of the grinder, set to fine) since I couldn't really taste any difference. I may also try ground pink peppercorns.

Cardamom- One of my favorite spices. Definitely goes well with cinnamon, so I'd imagine it'd fit well in this sauce.


Forget about that whole 'Cranberry sauce is for Thanksgiving' thing. And forget about that cranberry-flavored-crap-in-a-can... This simple, 5-ingredient recipe really is a cranberry Awesome Sauce. Depending on how thick you cook it, it could go great as a syrup over waffles, or spread on biscuits with butter. Just the other night I mixed some in with some Greek yogurt (The Greek Gods brand- it's as thick as cheesecake, and pretty damn awesome), and I have to say, if you want to get fat, that's probably a good way to go about it.


Thanks for an awesome recipe, Amy!


*probably not her real last name.


Wednesday, December 7, 2011

Update to the previous post

I forgot to mention a couple things in the last post about hummus. The main one being this stuff:


Sumak! Or more commonly spelled, Sumac. No matter how you spell it, it's great stuff. And it goes especially well with this sweet potato hummus. If you're not familiar with sumac, it's very tart (which is why it goes so well with this hummus- it adds a great balance to the sweetness) and has just the slightest hint of heat to it. And I do mean slightest; on a scale of 1-10 for your average non-chili-head person (1 being Bell Pepper, 10 being Call An Ambulance Before I Die) it's probably a 2. Maybe a 2 1/2. So don't worry if your taste buds can't handle anything much spicier than mashed potatoes- you'll be safe, I promise. Sumac has about the same look and color as your average chili powder, and is very common in Middle Eastern cooking. More info can be found here, and on Wikipedia. It's becoming more and more common here in the States, and if you live in a decent-sized city with a good Asian market (or better yet, Middle Eastern grocery stores) you're definitely in business as far as finding it. But even if you live out in the middle of nowhere, it can be easily found online, and for not a lot of $$. In general, it goes for around $13-20/lb. but can be had for much less. I think I paid around $4.50 for this 7 oz. jar at a local store, and even have a 12 oz. bag of a different brand that cost around the same. (I'm trying out various brands I find, just to compare. So far, this Indo-European brand, at about $10/lb. compares favorably to Penzey's, at around $22/lb. [+ shipping, if you don't have a local store.] But Penzey's is generally more expensive than other places anyway.) But even at $20+/lb. it's still worth it- a little goes a long way, so a pound is a whole lot.


Bottom line: it's freakin' delicious, and you should try it out.

The other thing I forgot to mention is this weird hybrid of sweet and white potato that I found. It looks like this:


That's the outside. The inside looks like this:


I saw them one day at my (old) local asian market and picked up a few, not really knowing anything about them. So I popped one in the oven and baked it. It tasted like a weird mix between sweet and white potatoes. The white part tastes like your average white potato, and the purple part is sweet. It's an oddly interesting mix when you eat one baked (the potato, I mean). But what I found out is that it makes a really, really good sweet potato hummus variation. You just use the same recipe, but use these instead. Honestly, it doesn't look all that appetizing once it's all blended up- it's actually almost gray-colored- but man does it taste fantastic. It's like regular sweet-potato hummus kicked up a couple notches. Definitely different, and definitely good. These pots are probably a bit hard to find, unless you live in a decent-sized city, though. (No, that wasn't a typo- working in a commercial kitchen for a living, I generally call potatoes 'pots,' at least when it comes to writing/typing the actual word.) I first found them in St. Paul, MN, a town of a few hundred thousand people or so, and I can still find them here in Nashville, but in both cases, generally only at Asian markets. Also, I can't seem to find a standardized name for them. Often in St. Paul, and even around here, they're unlabeled. But sometimes they're labeled as Purple Yams, so I don't actually know what sort of variety of potato they really are. But if you can find them (and they're generally kinda pricey- I think I pay twice what regular white or sweet pots go for) they're totally worth a go. I always use them to make hummus, but even baked (or for whatever) they're really different, and really good.

And one last thing I didn't actually forget to mention in the last post, but have since found out, is that instead of using fresh, minced garlic, try out roasted garlic in the hummus instead! It makes a subtle, but tasty, difference.


Ok, friends, over and out, but before I go- up next we have a really sweet (as in kickass, but also sweet flavor-wise) cranberry sauce, a really kickass new Banh Mi recipe, and a couple other tasty treats. Stay tuned!

Friday, November 25, 2011

Hummina-hummina hummus, II

(As I mentioned in the previous post, me and a buddy got together recently and came up with some hold-on-to-your-hat-they're-so-good recipes. This isn't one of those- they're next- but it's pretty damn good, and one I've been wanting to post for awhile.)


So, a long time ago I tried making hummus for the very first time and found out I was actually pretty damn good at it, and have been hooked on it ever since (well, mine anyway. Maybe I'm biased, but whenever I try somebody else's hummus, I always compare it to mine, and mine always comes out on top). So one day awhile back I came across a recipe online for sweet potato hummus, which I had surprisingly never thought of doing before. I gave the recipe a brief scan just to get an idea of what was in it and then quickly thought to myself that I've got to give this a try, except that mine will be even better. And it is. What's more, I'm even willing to admit that I have never actually even made that hummus recipe, and I still think mine's better. Oh yeah. That's right. Sure, she's got cooler/sexier photos, but whatever. Mine calls for coconut milk, which automatically makes it better than any other sweet potato hummus that doesn't. For real.

Here's the actual recipe:

1 1/4 lb baked sweet potatoes
1 lb garbanzo beans, drained + 1/4 c of the juice (homemade is preferable, but canned will work just fine too)
1 1/4 c coconut milk
1 t ea. kosher salt/pepper/crushed red pepper flakes
1T lemon juice
1T fresh minced garlic
1T cumin

Don't forget- this is hummus; don't feel like you have to follow the recipe exactly. I usually like a little more cumin/salt/garlic/lemon in mine, but when I'm making it for other people, this is one of the few recipes that I do try to stick to. But even when I just whip it up on the fly, without actually following the recipe, and I think it's 'just ok,' or 'not as good as it usually is,' folks have still raved about it to me. Maybe I just happen to hang around a bunch of yes-men, or crazy people, or whatever, but I think this recipe is pretty kick-ass and definitely worth your time (especially since it's super quick and easy to make). It goes great on homemade flatbread, but is also good on veggie sticks or whatever. I've even been known to eat it straight out of the bowl with a spoon.


crappy cell phone pic, because my camera's main lens died :(


As you can see, it's not very orange-colored, as you might expect. The coconut milk really lightens it up, yet the coconut flavor is not too strong. I find it to be quite subtle, in fact. If you like hummus- or maybe even more so if you don't- give it a go. I think you'll be surprised.

Saturday, September 3, 2011

Thai Sticky Rice With Basil And Chicken

Let me just come out and say it at the beginning here- this dish Kicks. Ass. It's definitely one of the Best Things Ever and you owe it to yourself to make it. I've been wanting to post it for a long, long time. This is one of my top favorite dishes of all time, something I could eat daily and not get tired of for a very, very long time. I figure now that I'm finally down here in Nash Vegas and mostly moved in and such, what better way to kick off the first post here in my new town/new life than with such a worthy, tasty dish as this.

The name 'Sticky rice' is slightly misleading; it's not really sticky in the sense that most of us think of when we think 'sticky rice.' While it does stick a little to the cloth when it's done cooking, it's not at all like somebody overcooked their rice and it's just a big pile of sticky, starchy goop. I think 'Chewy rice' would probably be a more accurate title for it.
It's a fairly easy dish to make and most everything is easily obtained. If you live in a smaller town somewhere, you might not be able to find Thai basil (if not, it's definitely worth growing your own) but regular basil is awesome too. Not quite as awesome on this dish as the Thai kind, but pretty damn good in it's own right. Anyway, here's a rundown of what you'll need:

Main Dish:

Boneless chicken parts, small-to-medium dice (breast, thigh, doesn't really matter; whatever you prefer)

Thai Sticky Rice (also known as Sweet Rice or Glutinous Rice. It comes in a purple variety, and probably others, but go with the the white kind for this recipe. The other kind cooks different, in my experience, and I haven't been able to get the same texture for it). You'll also need either a bamboo steamer or a colander, along with a cheesecloth or cloth napkin, for steaming the rice. Cooking it on the stovetop, or using a rice cooker, will not work. I tried it once just to see how it would come out, and it didn't. At all. It has to be soaked and steamed.

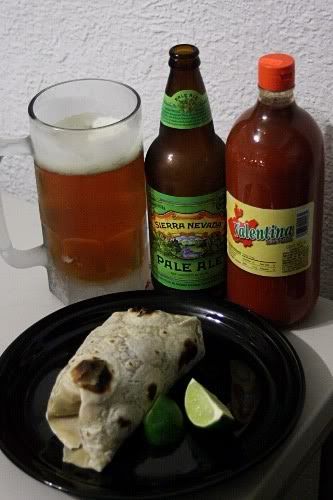
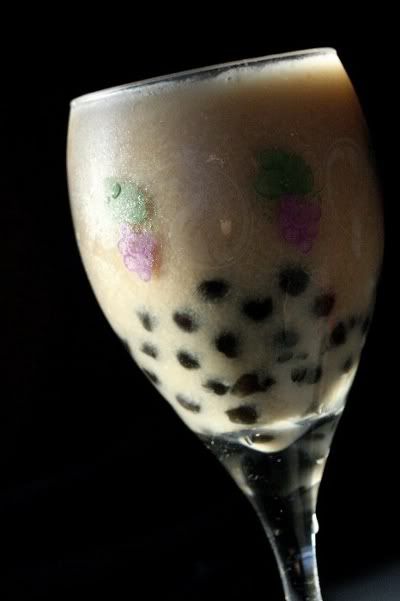
Some type of adult beverage (not for the dish, but for the cook. Cooking's always better/more fun when you're consuming some type of beer/wine/booze)


Marinade:

Fish sauce
Soy sauce (a good kind, not LaChoy, which is not even a real soy sauce)
Teriyaki sauce
Rice vinegar
Fresh lime juice
Dried basil
Fresh minced garlic
Fresh minced ginger
Sugar
Kosher/sea salt
Pepper
Crushed red pepper
Szechuan peppercorns, toasted (those are the things in my header photo. If you don't have a good international market where you live, they can be obtained from Penzey's and other online spice merchants.
MSG (optional, I guess. I always use it, though. I think the whole anti-MSG thing is a bit overblown and I highly recommend the stuff)


The list above is just what I currently typically use. I have no set recipe or list of ingredients or anything like that. If you have other Asian ingredients like Maggi, Soba, or Oyster sauces, they'd probably go pretty well too.

Garnishes:

Fresh basil, preferably the Thai variety

Sriracha, aka Rooster sauce or Cock sauce

Chopped dry-roasted peanuts

Fresh lime juice

Bean sprouts


Making it happen-

Rice-

The rice has to soak for a good 8 hours or so, so you'll want to get that out of the way first. I never bother to measure it out, but when I cook for just myself, I typically use about 1 cup/8 oz. dry rice. I try not to let it soak for more than 10 hours, so if I start it the night before, when I get up in the morning I'll usually just drain the water off and leave it like that until I'm ready. It also doesn't have to soak in the fridge, though I usually put it in there if it's going to be sitting for awhile after I drain the water.

Marinade-

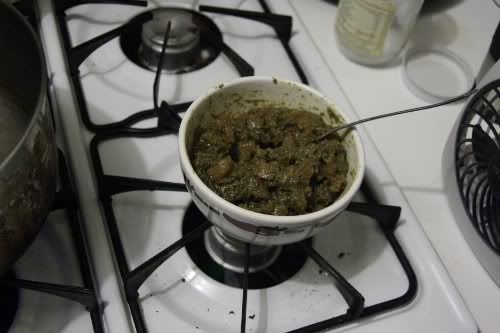
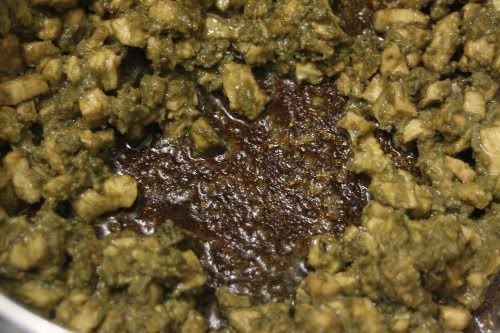
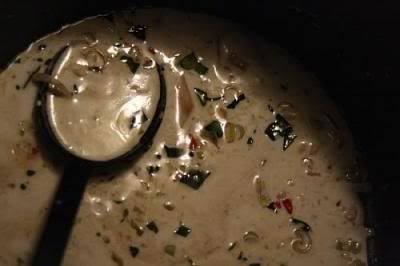
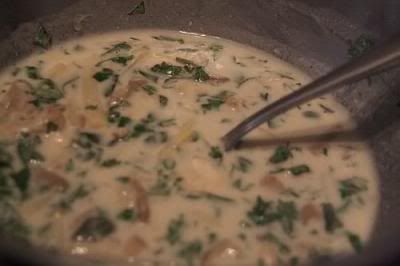
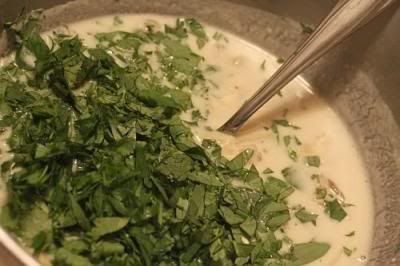
While the rice is soaking, get to work on whipping up some Asian-flavored goodness to marinate that chicken in. Get yourself a good sized metal mixing bowl, toss in a big pinch of salt and a bigger pinch of sugar, add in some hot water to help it dissolve quicker, and mix until it's completely dissolved. Then, little by little, add in splashes of the ingredients listed above until it tastes the way you want. Remember to add more water as necessary (you'll need at least some, so it's not too overpowering) and possibly more salt and sugar. I also typically add the most of the ingredients that are near the top of the list, and go down in volume from there- so more fish sauce than soy, more soy than teriyaki, etc. Go light on the szechuan peppercorns, though. If you're not familiar with them, they're not actually peppercorns, so they're not 'hot' like regular peppercorns. It's hard to describe them, but they have a citrus-y smell and flavor, and if you pop one in your mouth it'll make your tongue kind of tingle and feel a bit numb. That's a good thing. Just be careful not to overdo it; they can be quite strong and I've damn near ruined a dish by using too much. A pinch is all you need to start with. Also, if you don't happen to have any fresh minced garlic (which I don't for this particular batch), the granulated kind is better than nothing.
The main thing to remember is that there is no right or wrong way to do it, and that what you're shooting for is something that's savory and has a good blend of Hot, Sour, Salty, and Sweet (light on the Sweet, but that's just me. Mostly I just use the sugar for a bit of balance. Plus, the lime juice, rice vinegar, and basil add their own bit of sweetness too). That's my main objective whenever I mix this up. If you're not sure because you've never done it before and you don't have much experience with Asian flavors or whatever, don't sweat it, it's easy. E-Z. Taste it often as you go and add whatever you think it might need more of. It won't be the exact same every time, but that's part of the fun of making and eating it. If you're feeling cautious about it, you may want to actually measure stuff out instead of just adding it in random splashes. Also, you may want to start with fairly uniform and equal measurements of things; say, for example, 1 T each of (almost) everything, and then adjust from there. The main reason I don't have an actual recipe for this is because every time I try and come up with one, it never works out. I'm always adjusting and fine-tuning the marinade as I go, and it's really, really hard to keep track of every little dash of whatever sauce I'm adding, and it always seems to come out vastly better when I don't even try, so I finally gave up on that and now I just focus on tasting as I go, adding more of whatever I think it needs here and there. And it never fails to come out awesome.
Once your super-amazingly-awesome marinade is up to your standards, toss in the chicken and let it soak a bit. Depending on how much lime juice you put in, you could probably get away with 20 minutes or so, but I think an hour is good. Two is too, but if you let it go more than four hours, call a physician. No wait, that's something else. Anyway, you get the point.

Also, I was planning on doing a little video clip of me mixing up the marinade, just so you'd have some sort of reference point, but my Flip cam has suddenly disappeared, even though I just had it a few days ago when I originally started writing this post and was planning on doing it then. If it turns up at some point, I'll do the video and then update this post with it, but for now I got nothing.

Cooking the rice/chicken-

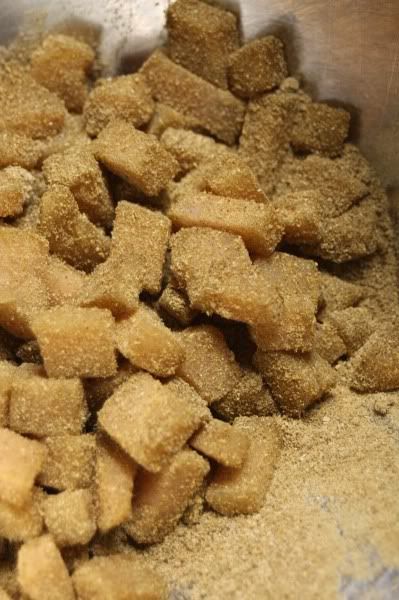
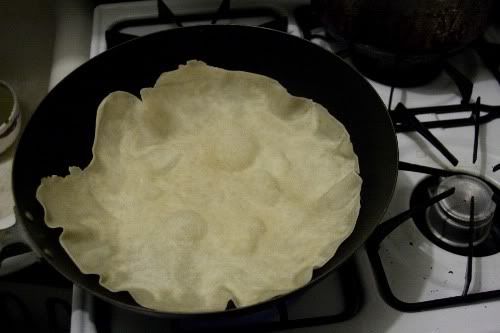
When you're ready to start cooking the rice, you'll need to drain and rinse it thoroughly. Like, put it in a fine-mesh colander and rinse it underneath the faucet until the water starts to run clear. When it's ready, put it into your cheesecloth-lined colander or bamboo steamer and set it on top of a pot of boiling water to steam. Make sure it's evenly spread out and that there's not too much- depending on what you're using and how big it is, you're probably going to have to keep it to 2 cups (dry) or under. Cover it with another cloth and then set a lid on tightly to keep as much of the steam in as possible.
In the past, I used to use one of the more traditional style conical bamboo steamers-


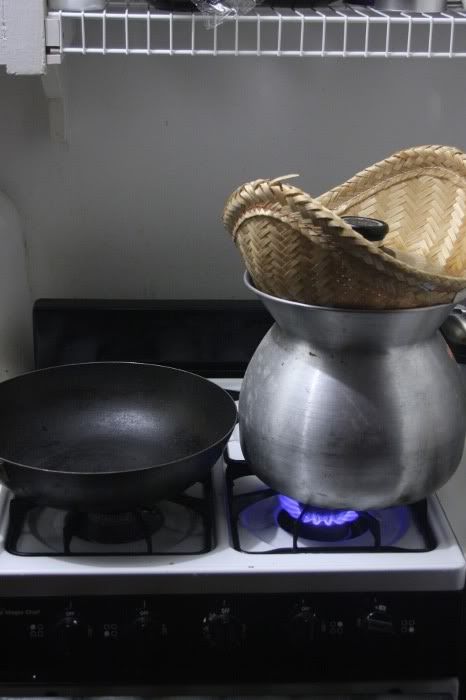
But I don't really like the way those cook. This is a fairly decent sized basket, big enough to cook for 4-5 people, but unless you're cooking only a small amount, like enough for 1-2 people, the cone shape tends to cause the stuff at the bottom to be overdone while the stuff at the top isn't even close, and probably won't ever be. I found this out the hard way while trying to cook for several friends. So now I've switched over to the round kind, which typically has 2 steamer baskets and it's own lid. You see them at Bed Bath and Beyond for 20 bucks or so. I got mine at Williams-Sonoma for about $15. It's a large one with only one layer. (Maybe a bit too large, since I currently don't have any pots that big around, but I make it work.) I like this style a lot better, since it allows for much more even cooking, so you can fit more rice in for more people. Depending on how much rice you're cooking, it usually takes about 20-25 minutes to steam. When you're getting close to that time, just lift the lid and scoop out a small amount with a fork (or a long pair of tongs, if you have them) to test for doneness.
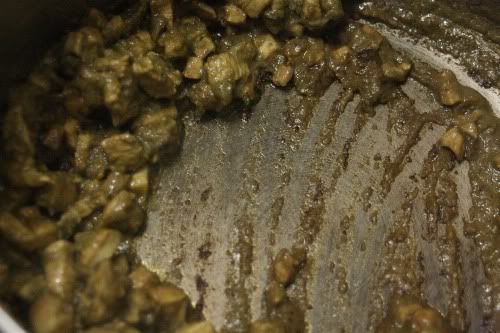
While the rice is cooking, get out your wok and turn that thing on high high high. Let it get super scorching hot. Like, to the point that it starts to smoke. Make sure your chicken has been thoroughly drained, since the liquid will cool the pan down considerably, and the chicken will still throw off some more liquid anyway. Do not do what you might be tempted to do, and what most people probably do, and add oil to the pan. You do that and then when you drop the chicken in it's just going to splash up and burn you in the face. You don't want to be blinded or horribly disfigured, do you? If you're already blind and horribly disfigured, then do whatever you want, but for your own safety, either hold off on the oil until after you add the chicken, or toss the chicken in a little bit- just enough to coat it- before you add it to the pan. Either way, it's not gonna stick (if you're using any kind of decent cookware, that is. Cheapo pans that don't conduct heat well might give you some problems, but use a good wok or cast iron skillet and you'll be golden). If you use no oil at all, then it may stick a little at first, but the super high heat will sear the outside nicely and then the chicken will start throwing off juice, and then that will loosen things up. If you saved any of the marinade (always a good idea, just in case) you could add some of that after a bit to help it along too. The chicken won't take long at all to cook, under 10 minutes easily, so try and time it so that it's done around the same time as the rice, because Thai sticky rice doesn't keep for very long at all. It dries out quite quickly. If you're not sure when to start, just remember the chicken will probably hold for much longer than the rice so if the chicken's done first, not a big deal, you can just hold it warm in a 150 degree oven or whatever.
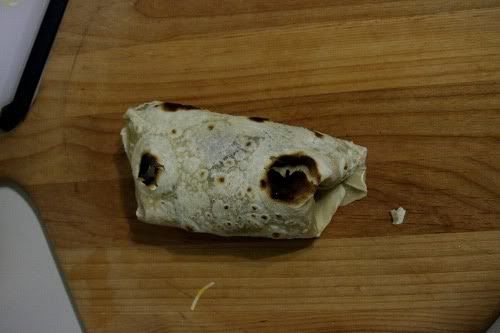
Make sure you have a large plate or bowl ready for when the rice is done. When it's ready, cut the heat and lift the lid (and top cloth, if you're using one); as soon as the steam clears enough for you to grab the cloth napkin or whatever you're using, grab it by its corners and quickly turn it over onto the plate or into the bowl. The cloth will still be wet enough that you can easily remove it from the rice and then lay it back down as a cover, without much, if any, of the rice sticking to it.

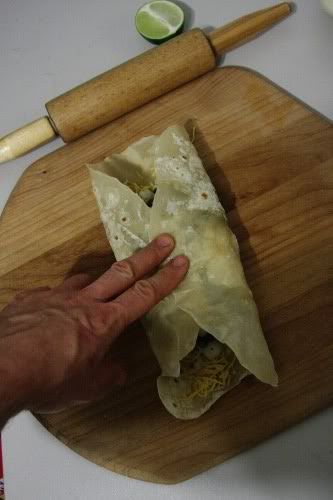
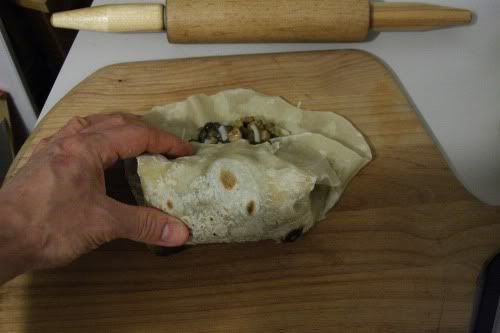
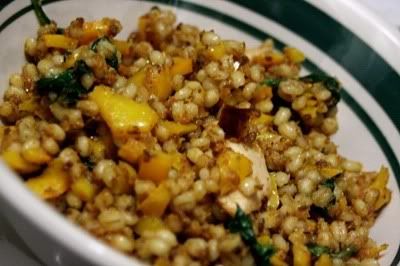
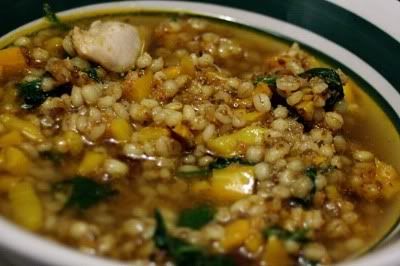
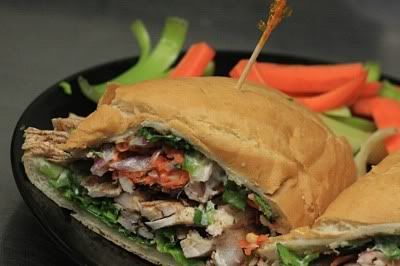
From there, just break off as much or as little as you want and spread a layer of it on a plate. I typically sprinkle some fish sauce on top of that layer, then cover it with a layer of my freshly-wokified chicken, then cover that in a fairly thick layer of Sriracha, fresh Thai basil leaves, fresh lime juice, crushed peanuts, and sometimes bean sprouts (when I'm brave enough to buy them. I've just heard too many horror stories about them. Going to have to start growing my own just to be safe).

It usually ends up looking something like this:


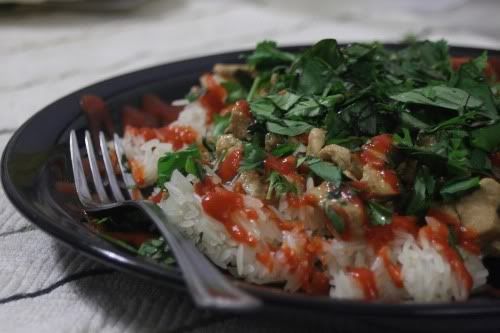
This is what Awesome looks like


Prepare to be blown away when you take a bite. Especially if I happened to make it for you.

Wednesday, August 3, 2011

I love my new job.

So still getting settled in here in town, but I was lucky enough to land a job at the Two Twenty Two, located inside the Country Music Hall of Fame, within two weeks of arriving in Nashville. Check out their menu, and especially their catering menu, and you'll see why I love my job. There really is nowhere else in town I'd rather work.

Another reason I love my job is because of some of the equipment we use, such as this steamer-


That's right, it's a Cleveland Steamer.


(Still got a few more weeks of transitioning to do, then we've got some new stuff in the works. Stay tuned.)

Wednesday, June 22, 2011

Road Trip/Moving/New Stuff

Going to be busy for a bit while I move...


But then I got some tasty new stuff coming- Thai Sticky Rice, a cool Hummus variation, Muhammara, and a Buffalo Chicken Quesadilla; maybe some video versions of stuff like The Tacos (they're way, way quicker and easier to make than the post might lead you to believe).

Going to have a blogging partner too, so she'll probably have some cool recipes to share as well.

Good Times.

Monday, May 16, 2011

Rockin' the Burrito Casbah, Part Dos.

(updated, May 19. See * at the bottom.)

This, in my opinion, is the be-all, end-all of burritos. It pretty much does not get any better. Maybe, possibly, somewhere in a remote town in Mexico, there's a 10th generation Mexican granny who's been making the original burrito recipe that's been passed down through the family of the actual creator of the burrito, and that one might be better than this one- but I doubt it. I'm pretty sure that one bite of this one and that granny would be furiously rewriting the recipe. Luckily for us though, you don't even need a recipe. It's dead simple. Here's pretty much everything you need:

Meat (beef is good, but I almost always use chicken nowadays)
Cheese
Black beans
Onion
Lime
Your favorite hot sauce (I prefer a homemade vinegar-based jalapeño type, but for store-bought stuff, Cholula and Valentina are both excellent)

Flour tortilla dough
Jalapeño-lime spice mix

Let's start with the last two first: Flour tortilla dough recipes abound on the internet. Some list baking powder as an optional ingredient. It makes the tortillas a little puffy, more like the ones you find in the store. I never use it. I like mine not-puffy. They're super easy to make from scratch, so don't waste your money on the store-bought ones-- these are infinitely better. Also, the recipes are flexible so don't feel like you have to follow them exactly; the other day at work, I forgot to bring in a dough ball I'd made at home, so had to make one there instead- but I don't have easy access to the internet at work, so had to kind of go from memory. Technically, the recipe I made was 'wrong,' but it still came out fantastic. There's a recipe here if you want to use that, but this is more or less what I used at work:

Flour Tortilla Dough

2 cups flour
1/2 - 1 t kosher salt
1/4 c or so of fat (whatever I've got on hand. I've used butter, olive, and canola oil. They all work just fine.)
1/2 c or so of water

Mix the flour together with the salt, then add the fat and mix it all up with your hands until it's all nice and crumbly. Add some water and mix it up until you've got a slightly sticky dough ball going. Knead it a bunch of times, then cover it with a damp cloth and let it sit awhile.

And that's pretty much it for the tortilla. When it comes time to make it, if you've got a scale, a 3 1/2 - 4 1/2 oz ball will give you a pretty decent-sized tortilla when it's all rolled out nice and thin.


Jalapeño-lime Spice Mix

There is no specific recipe for this, nor is one needed. Here's what you do need-

Jalapeño powder
Granulated garlic
Kosher salt
Lime juice powder

Start with the Jalapeño powder as a base, and just keep adding the rest of the stuff to it until you think it's ready. I like a lot of lime flavor in mine, followed by the garlic. You won't need a whole lot of salt, but don't skip it altogether either. Jalapeño and lime juice powders can be found Here and Here, among other places.

*****

Alright, here's how you make a totally kick-ass burrito...

Take your meat of choice and dice it up pretty small (as I've mentioned before, way easier if it's partly frozen) then douse it liberally with your jalapeño-lime spice mix.


As you can see, there's a lot of spice mix sitting on the bottom of the bowl. That's partly because the chicken was still a little frozen when I doused it, and the spice mix doesn't stick quite as well like that. But also because I might have gone a little overboard on the spice too (well, not overboard for me, but for some people. My general rule of thumb is: use a LOT). No matter, once the chicken thawed a little more, it all got absorbed. Let it sit like that for at least a couple hours. Overnight is even better. A couple days is really good. When you're ready to make it, the chicken will be thick and goopy, and not very appetizing-looking:


Forget about what it looks like. Think about how it's going to taste. And it's going to taste like the best damn burrito in the world. Also, see that little fan in the right part of the photo? You're going to want a lot of airflow when you start cooking this. Either that, or hold your breath for however long it takes to make. Seriously, use your stove's hood fan, your ceiling fan, and get a couple more from down in the basement. Once you start cooking it, the jalapeño powder really messes with your ability to breathe.

Fire up your pan, add a little oil and let it get hot for a minute or two. Add the chicken and give it a couple stirs, then let it sit for a bit. Stir it up some more, but know that the spice mix will start to really stick to the pan:


That's good. You want that. Let it burn, but keep the heat at about medium so it doesn't totally scorch. Once the chicken is all the way, or at least mostly, cooked, squeeze in a little lime juice to help deglaze the pan. Maybe some white wine. A squirt of water will work, if you've got nothing else. But not too much. Now is when you also add the black beans, along with some of the juice from the can (or cooking liquid if you made them yourself). Let that cook for a minute and it'll dissolve all that baked-on flavor and then you can easily stir it into the rest of the mix:


Once you get to this point, turn it down to low, or even off, and fire up your tortilla-cooking surface. All I've got is a wok, unfortunately, but it does the job.


Set it on about medium-high and let it get pretty hot. Toss your tortilla in/on the pan, and when it starts to bubble up all over, it's ready to flip. It won't take long, so keep a close eye on it. As soon as you flip it, add your cheese. (But if you forgot to shred it, like I did, not a problem, just scramble to try and get it done before your tortilla burns, which you probably won't be able to do in time at this point, so just pull your tortilla from the fire when it's ready and then add the cheese. It'll still be one kick-ass burrito.) Don't let it sit too long on the heat, though. You should probably pull it from the heat before the cheese is even mostly melted; leave it on too long and it'll become brittle and break as soon as you try and roll it.
It's probably easiest to just put the tortilla right on the plate and then add the meat/bean mixture and your diced, raw onion, because then you can just roll it up right there and be done with it, but if your tortilla is too big for the plate before it's rolled (like mine usually are), not a problem- it rolls up easy. If you're not really sure how to properly roll a burrito, it goes kind of like this-

Lay all your stuff in the center and fold over the two sides:


Then take the bottom edge and fold it almost the entire way over to the other side (probably even a little more than what's shown here), tucking it in under itself as best you can:


After that, just tuck in the sides and roll it the rest of the way:


Grab your lime, a big-ass beer or two (that's a 24 oz. in the pic) and a big-ass bottle of decent hot sauce (34 oz. here)...


...and prepare to be blown away by the awesomeness of it.


Yeah, you're welcome.


(If you use steak instead of chicken, lettuce and tomato also go especially well with it too- but not iceberg. Go for something crunchy, like romaine.

*Also, almost forgot! If you make the steak version and want to put a salsa on it, use this one, instead of something else- the two were made for each other!)

Friday, May 13, 2011

My Badass Meat Cleaver

I was going to do a post today on the most awesome burrito in the world- my Jalapeno-Lime Chicken Burrito... But I spent so much time running around town buying booze and weaponry that I probably won't be able to finish it tonight, so in its place I'd like to just show off my new kitchen axe-


The blade is about 7 1/2" x 4" (with a total length of 13"), and it weighs just a hair under 2 1/2 lbs. This will come in mighty handy should I decide to butcher an entire cow, or if I need to chop down any trees. And when
the apocalypse comes and I need to fight off the zombies, I will be prepared.

I'll be sure and keep it close by at all times-


(I'm going to work on the burrito post tonight and try to have it up on Monday sometime. If you like burritos, then you'll want to check this out because I'm of the opinion that you almost certainly have never had a burrito as good as this one. Ever.)

Monday, May 2, 2011

My new favorite cooking show

Epic Meal Time.


"Ain't no cookin' show exists like we exist."


Better than 99.9% of anything I've seen on Food Network.

Thursday, April 14, 2011

Breakfast: It's not just for breakfast anymore. (Updated)

(updated)

Sometimes it can be the soup of the day.

The other day at work, I was trying to think of some sort of new soup I could come up with to possibly do for the soup of the day. They already have a bunch of decent recipes, but sometimes you just want something different. Plus, I just like being able to play around with food, especially when I'm not the one buying it. So, out of the blue an idea popped into my head for some sort of 'breakfast' soup- the original idea involved hash browns (with bacon, onion, and green pepper) eggs, biscuits (or pancakes) and maybe a touch of maple syrup to finish things off. Then I was thinking maybe skip the maple syrup and use salsa instead- sort of a southwestern feel to it or something. I'll admit, at first glance they both sound a little weird, but that's how new, great recipes are made: you play around with your food and do weird stuff to it. Mix flavors that you wouldn't necessarily think would go good together (soup/breakfast). So anyway, today I made a small test batch, and ended up skipping both the salsa and the maple syrup (though I'll probably try them both out later when I make more). And the result? It was excellent! I was actually kind of surprised. It sounded pretty good in theory, but when I actually started making it, I got a little nervous. Then again, since I was at work, using work's ingredients, I didn't really care.

Naturally I don't have a recipe, but thankfully I made a small enough amount today that I was able to somewhat keep track of what went in it. No photos, either, but I'm hoping to get one or two when I make a larger batch next week. Here's the rundown-


2 medium baked potatoes
4 eggs, lightly beaten
1 green bell pepper
1/2 a large onion
5 strips of bacon, diced
3 cheddar biscuits
3-4 slices of American cheese (y'know, to class things up)

(the following amounts are approximate)

1 Tbs garlic powder (I prefer granulated, but restaurants seem to like the powdered stuff better for some reason)
1 Tbs black pepper
1 Tbs dried thyme
2 Tbs Cholula hot sauce
2 qts chicken stock


Fry up the bacon in a large soup pot until it's mostly done. Add in the pepper and onion (diced, or whatever) and cook for a few minutes more. Add the eggs and scramble it all up. When that's ready, toss in your spices and Cholula. (This is probably a good time to add the cheese, too, even though I waited until after I added the chicken stock). Mix all of that up good and then add the chicken stock, and the baked potatoes and biscuits (just coarsely crumbled with your hands. Leave the skin on the potatoes, too; no need to make more work for yourself). Let it get hot and simmer for a minute, then blast it a couple times with an immersion blender.

And that's how it went down today. As I was making it, I realized I should probably add the biscuits and potatoes first and blend those up with the stick blender, and then add the veggies and bacon, but in the end it turned out alright. As far as those biscuits go, this being a restaurant, we use premade frozen ones (which aren't that bad, really. These ones, anyway), but if I was going to make this at home or whatever, I'd definitely make mine from scatch. But for amounts purposes, those restaurant biscuits are small, and I figure two are about equal to one that you'd make yourself. I hope to have a more expanded recipe for this next week, one that includes trying it out with maple syrup, and salsa (but not together) as well as photos. I took one today with my cell phone, but it wasn't anything, so it's not going up.

***

4/25


Apparently the boss didn't like the stuff at all when he tried it the following day, so he dumped it out. Dang. So I probably won't be making any more of that at work then, and since I have none of the stuff on hand (yet) to make it here at home, it might be awhile before pics are taken. But dammit, I liked the stuff, and I do want pics for here, so I'm going to go out and buy the stuff to make it again, I just don't know when. Sometime.

4/29

Ok, so I went out and bought the stuff to make it here at home. Well, most of the stuff. I forgot the onion and pepper, but did remember to pick up the maple syrup. And I don't have Cholula, so I used Valentina instead (awesome stuff, by the way). So here's my updated recipe, and review-

1 medium baked potato
2 eggs, lightly beaten
3 strips of bacon, diced
2 biscuits
2 slices of American cheese
Shredded sharp cheddar (couple ounces or so, I didn't really measure it)

(the following amounts are approximate)

2 Tbs or so minced fresh garlic
2 Tbs Valentina hot sauce
1 Tbs Italian seasoning
1 tsp black pepper
2 qts chicken stock

Ok, so putting it all together is basically the same thing as the original. I didn't have any Thyme, so I used some Italian seasoning that I have instead (it's got all the usual players in it- thyme, basil, oregano, etc... all that stuff).


So, to be honest, I liked the first batch better, even though it's basically the same thing. Maybe it was the onions and peppers, or maybe it's just because our bacon at work is just really, really good (it's made by Hormel, which is what I bought today, but the stuff I got still wasn't as good, even though it was their 'Black Label,' whatever that's supposed to be). Overall, it's a pretty good soup, but really, it just tasted like a spicy, potato-and-bacon soup. So... not really worth the extra effort of adding in the eggs and biscuits. And even though it was pretty good, it's not something I'd rave about to all my friends and talk about selling on the street from a mobile food truck, like I do with other things I've made (tacos). But that's ok, they can't all be winners, right? Plus, I've got a couple more things coming up that I think are good enough to rave about and sell from my food truck (which I'm totally hoping/planning to do).


P.S. I did try it out with the maple syrup, because, well why not? It was... different, as you might imagine. At first it almost kind of tasted like some weird instant oatmeal or something, but then it kind of seemed like it tasted like what you'd imagine it would have tasted like if you'd used sweet potatoes instead of regular ones (which I almost did). Anyway, stay tuned- better things ahead.

Tuesday, April 5, 2011

This is totally on my to-do list for the blog.

Justin Bieber look-alike tries to make a grilled cheese sandwich, while drinking.


I actually had this great idea awhile back to do alcohol reviews here on the blog- mostly beer, some wine, maybe some occasional harder stuff. But since I don't really know critic-speak, I figured the reviews would be kind of boring ("It's good, you should buy it," or, "It tastes like turpentine mixed with piss; don't buy it.") - unless I was writing the review of the alcohol while drinking it. Then it might be could get a little interesting. But I quickly found out that that gets a little expensive, since I was mostly interested in reviewing decent quality beers, not the cheap, mainstream crap that everyone's already familiar with. So then I figured maybe I'd start out with the good stuff, then switch over to some cheaper stuff to stay just intoxicated enough to actually be able to write a review. It didn't really work out. I was always either too sober, or too drunk. But I'm not giving up! Sometime this summer, I'm hoping to get myself a video camera, for the times when I come up with something decent in the kitchen but absolutely cannot work out a recipe for it- I figure I can always film myself making it, that way I can at least show people what it was I did, even if I can't work out an actual recipe for it.

And since I'll be having a friend help me out with the blog this year too, we can film ourselves drinking and cooking and reviewing different boozes.

Excellent.

Friday, March 4, 2011

Stir-fried chicken & barley (or, chicken & barley soup)

So I just whipped this up for dinner tonight, and it was way, way too easy to be as good as it was. I've been messing around with barley for lunch at work a lot lately because we've got a ton of it and hardly ever use it for anything. So since I had to skip lunch at work today, I brought part of it home with me and threw this together-


Super, super simple. No exact measurements were used or are needed here, but this is what I used for ingredients:

Cooked barley
Cooked, shredded chicken
Fresh spinach (hopefully E. Coli-free. I'll find out tomorrow, I guess)
Diced yellow bell pepper
Fresh ground coriander & cumin
Sun-dried tomato paste
Kosher salt
Granulated garlic
Cooking sherry
Extra-virgin olive oil
Chicken stock (optional, but tasty)

Heat up your fry pan nice and hot, splash in a couple glugs of the oil and saute up the bell pepper. After a minute or two, add the spinach until it starts to wilt, then add the barley and chicken and cook for another minute or so. Push it all to the outer edge of the pan and let it get really hot again, then douse it with the sherry and give it a couple good stirs to thoroughly mix it all together. Sprinkle on a hefty dose of coriander, cumin, and the garlic (fresh garlic would have been ideal, but I was too pressed for time to chop any, so I went with the granulated), add a couple pinches of salt, and you're good to go. Sun-dried tomatoes (or paste, in my case) add a nice touch of flavor. I think preserved lemon would have been tasty too, but I was already planning on adding the chicken stock and I wasn't sure if it would clash or not, since this was leftover stock from when I made Pho Ga the other day, so I held off on it. (I think I'll try it next time.) Even though that Pho recipe needs a little tweaking, in my opinion, the broth from it goes really well with this barley dish-


Very good stuff. And it's pretty quick to make, too- since I had the soup stock handy, and the barley and chicken was already cooked and the pepper diced, it took less than 10 minutes to dish this up.

Definitely worth making again.

Tuesday, March 1, 2011

Bubble Tea...

I first discovered bubble tea about 15 years ago or so when I was living in Chicago, right around the time I also discovered Pho, Sticky Rice, and Pad Thai. Bubble tea kind of throws some people off, but I always did like it, as well as some of the many variations on it that include fruit, and a bunch of other weird, jelly-like... things (the Asian version of gummi bears, I guess). Anyway, bubble tea has kind of exploded in popularity over the last several years, and you can find places that sell it almost everywhere nowadays. Problem is, it's kind of pricey. No more expensive than your average latte-type drink at Starbucks, I guess, but those are overpriced too as far as I'm concerned. Luckily, though, it's pretty easy to make at home. Oh wait, you say you don't like bubble tea? Or even regular tea? Well read on, cretin! Because this drink can be made just as easily (easier, actually) without tea or bubbles, and is in fact a tasty and refreshing beverage all on it's own. And who doesn't like tasty and refreshing beverages? Especially ones that become all the more tasty with the addition of alcohol?

I first tried my hand at making bubble tea about 5 years ago. And while what I made was certainly drinkable, and was made with tea and boba (aka tapioca pearls, or the 'bubbles' in bubble tea), it was really kind of plain and ordinary. Certainly nothing I'd recommend to any real fan of bubble tea. But then awhile back, my brother gave me a bag of dried lemongrass that he'd had in his pantry and no longer wanted. I didn't really have any recipes for it or know what to do with it, so I started experimenting with making some sort of lemongrass tea with it, and before long, I came up with a really, really tasty beverage- very good all on it's own, but it also makes a good base for bubble tea too. Here's the basic recipe:

6 c water
6 T dried lemongrass*
4 star anise
1 T cardamom seed, ground*
1 or 2 cinnamon sticks (approx. 2 inch)
1/2 oz (approx.) fresh ginger, sliced
5-6 T brown sugar, not packed
Coconut milk, to taste

Ok, I haven't worked it all out to the point where it's scientifically the best-tasting possible configuration of cooking time and heat level and all that, but generally, for the non-bubble, non-tea version, here's what you want to do: put everything but the sugar and coconut milk in a pot, bring just to a boil then turn down to a slow simmer for about 5 minutes or so. At this point, strain- or let it set for another 5 minutes or so, whatever- and then add the sugar (more or less, according to how sweet you like things) and as much coconut milk as you like. It doesn't have to be coconut milk, of course, but you're probably going to want some sort of creamer in there, be it soy milk, half and half, or whatever. When it comes to coffee, I always drink mine black, and tea- always straight, nothing added. But this drink is different. I've tried it straight and to be honest, it doesn't really taste all that great. It kind of needs sugar and coconut milk
(or whatever. I just think coconut milk blends super well with the flavors of everything else that's in there.) Oh, quick tip on the coconut milk- you want to add it when the 'tea' is just warm- no longer hot, but not cool either- say, around 105-125 degrees F. If the tea is too hot, the oil in the coconut milk tends to separate, and if it's too cool, it tends to not really emulsify. Could just be the kinds of coconut milk that I've been using, but that's been my experience so far. As far as straining the stuff goes, I typically use 'hops' bag (a small fine mesh nylon bag with a drawstring; can be obtained at any homebrew supply store for cheap); everything goes in there before being tossed in the pot. Makes for super easy straining.

So that's my base recipe. Goes great hot or over ice, and has a nice coolness to it from the anise. Very tasty. Very refreshing. But if you want to make an actual bubble tea drink with it,
the process is slightly different (only slightly). First off, when it's done brewing, don't add the sugar just yet. Once the tea blend is done and at the correct temp for your type of tea, start with that. And this varies depending on the kind of tea you're using- black tea, you can probably just throw in with the rest of the stuff while it's boiling (I don't know the specifics of it, I'm not a black tea drinker) but green tea is a little more temp-sensitive: you don't want to boil it, for sure. Different varieties of green tea vary in their optimum time/temperature requirements, so follow the instructions on yours accordingly. Black teas, from what I understand, take around 5 minutes, but for the stuff I drink, I usually go with a temp of around 170 degrees F. and steep for 2-3 minutes. So once the lemongrass blend has finished simmering and the heat is off, I remove the hops bag and just let the tea sit until it cools down enough that I can add in my jasmine tea. Obviously a thermometer is in order when using green/white/oolong tea, but if you're a serious tea nerd you already have one anyway. When the tea is done steeping, strain that out and then add about 1/2 the sugar. The other half goes in the water that you cook the pearls in. I really don't have any specific amounts for that- just remember that a little bit of boba goes a long way, so add as much or as little as you think you might want and cover with about an inch of water. Generally, following the instructions on the bag will give you decent results, but I've seen some that say to boil them for a half hour or an hour, which seems way, way too long to me. For the kind I use, I put them in a pot of water, bring it to a boil, then shut it off and cover for 5 minutes and then strain. But don't drain the cooking water- just strain out the pearls and save the water to add to the rest of the bubble tea; the tapioca pearls themselves add a really nice flavor to it. And remember earlier when I mentioned the addition of alcohol? Well, I've found that a good-sized shot of bourbon added to this drink (with or without the boba) adds a really, really nice touch (almost too nice). And I'm certainly no bourbon connoisseur, but Knob Creek was a really nice surprise for me. Long story short, due to a couple really bad experiences with Jack Daniels several years ago, I swore off all whiskey altogether. Couldn't drink it if I wanted to- even the smell of it was too much to handle. But then recently a friend of mine introduced another friend of mine to Knob Creek, and since I happened to be standing right there (and probably had had a couple of drinks of my own already) I asked for a taste of it, and was instantly hooked. It's very smooth and has a nice carmely finish to it. So that's my recommendation for adding alcohol to this. A lot of people swear by Maker's Mark, but I've tried it side-by-side with Knob Creek- and I'm sticking with Knob Creek.


So- you could make yourself a glass of bubble tea and add the bourbon to that, and it would be very delicious just like that; but what I do is when I strain the pearls after they're done cooking, I rinse them briefly under cold water- not long enough to cool them entirely, just for a few seconds or so until they're no longer hot, but still quite warm- and then put them in a bowl or glass and cover them with the bourbon. That way they soak some of it up, which really adds to the flavor. Very good, indeed.

So there you have it- a very tasty drink, with or without the tea and/or bubbles and/or alcohol (though I think it's best with all three). And again, it goes great hot or iced.


* Note on lemongrass and cardamom: for cardamom, I've used whole and ground- I think ground gives you more flavor, but if you don't have a fine mesh bag to strain everything with, there's the sediment you have to deal with. Whole seeds minimize that, but you'll need more to get the same amount of flavor, and considering how expensive the stuff is (on average, around $45-50/lb, though
Great American Spice has it for under $35/lb, last I checked) I'd just recommend picking up the fine mesh bag and going with ground (assuming you grind it yourself, too). As for the lemongrass, the stuff I've been using is from Penzey's, but I think I'm going to find someplace else, since they seem to have changed the cut size to something much, much finer- almost to the point of being a powder. The original bag that my brother gave me was cut very coarse- it looked like cut grass, or a loose-leaf regular tea, almost. (Kind of like this picture, from Great American Spice.) So when I ran out of that, I went back and bought 1/2 lb. more, and the difference was striking. Even using the fine mesh nylon bag to strain it, some still gets through. But if you don't have one of those bags and instead use a fine mesh strainer, then a considerable amount of it is going to come through.

One final word on the tapioca pearls themselves- the quality can vary quite a bit, and price isn't always a good indicator. Generally, the pastel colored ones are always quite good, if a bit more expensive. But when going with the standard black/brown pearls, if possible, try pinching one of the pearls through the bag- it shouldn't break or crumble. If it does, I'd avoid those. I bought a large bag once awhile ago, and after I cooked and drained them, I noticed that most of them were falling apart in the strainer. I thought maybe I'd just overcooked them or something, so I made some more and saw that they were breaking apart right in the pot before the water even started to boil! So I poured some straight from the bag into my hand and found I could crush them as easily as if they were just crackers or something! I ended up throwing the whole bag out (over 5 lbs.) Decent quality pearls will not fall apart so easily. It should be extremely difficult to crush one between your fingers. In my experience, the good quality brown/black pearls look like tiny little chocolate donut holes, covered with powered sugar. The lesser-quality ones are a lighter brown color and don't have the 'powdered sugar' coating (in my experience, anyway). If you can get a direct recommendation from somebody, all the better.

Friday, February 4, 2011

Bánh Mì


Bánh Mì- I think it's Vietnamese for 'Amazingly Delicious,' or something along those lines.

I've only had two kinds of Bánh Mì- one I bought a couple years ago at a Vietnamese Bakery, and my version. Thankfully I knew better than to judge all Bánh Mì by the version I had back then, because it was just ok- not bad, but nothing to go off and tell all your friends about. So after awhile, I started poking around online to get an idea of just what comprises a Bánh Mì Sandwich, and then came up with my own version, which is far superior to the one I had at the Vietnamese bakery that day. At least one person, after eating one of mine, is reported to have said, 'That's the best thing I've ever stuffed in my face.' She may have been exaggerating, I don't know, but I do know that mine is a mighty fine Bánh Mì indeed.

Typically made with a crusty baguette (which this one is obviously not, but that was mostly due to the need for efficient prep and serving at work- this was just the easiest choice. I prefer baguette, but it was still amazing), pork or other meat, carrots, pickled daikon, cucumbers, and mayo, along with various other things. It's hard to get too specific- it's like asking what a Subway sandwich is typically made with- the variations are pretty numerous. But you can find plenty more info about Bánh Mì, as well as lots of other recipes, here: Battle of the Bánh Mì.

Here's my version:

Gather up the following:

For the sandwich-

Baguette or hoagie bun
Your favorite lettuce
Mayo
Boneless chicken breast
Chinese 5-spice powder
Cilantro

For the Asian slaw:

1/4 c each fish sauce, sugar, rice vinegar
1/4 c + 2 T water
1 t or so kosher salt
Juice from about 1/2 lime
1 T or so minced garlic
A pinch of crushed red pepper
Some red onion, carrot, and jalapeño

Start with the Asian slaw- to speed things up a little, I usually start with hot water to dissolve the salt and sugar quicker, and then just add everything but the veggies. For those, there is no specific amount. Just grab a red onion and slice it as thin as you can, shred a carrot or two on the small holes of a box grater, and slice up the jalapeño into little matchsticks (seeds or not, according to how hot you like things). Toss all that into the mix and set aside to marinate for a couple hours or so. (I've let it go overnight before, but it loses a bit of its fresh taste. It's still good, just not as good.)

As a side note, I'll often use this recipe as a starting point, but never quite follow it exactly. I always tweak it as I go, adding more of one thing or another. If you want to want to play around with it a bit, but aren't quite sure which direction to go in (or maybe you wrote it down for later, but lost it somewhere), a good rule of thumb for this type of thing is that you want a fairly even balance of Hot, Sour, Salty, and Sweet. There's even a pretty good book by that name on this sort of stuff.


While that's marinating, start in on the chicken. Think Subway sandwich again, in that however you prefer to cook it, it'll be good, but for my Bánh Mì, here's how I do it-

Take a couple of chicken breasts, 10 oz. total or so, whatever you think you might need, butterfly them if necessary just so they're not overly thick, and then cook them in a simple salt/sugar brine on a sheet tray in a 350 degree F oven until they're done. I forget what all the science behind it is, but something about a little bit of salt and sugar in the water helps keep the chicken juicier. Most brine recipes that I've seen seem a little strong to me, like 1/4 c each per quart of water, or something like that. I just use a couple teaspoons or so per quart of water, and it always turns out fine. Anyway, when the chicken is done, let it cool a bit, but not completely, and pull it into shreds. Toss in as little or as much 5-spice powder as you like. (Ever had cinnamon sugar on your toast in the morning? That's about the color I go for with mine.) And 5-spice powder goes quite well with orange, so I'll often mix in a little O.J., or granulated orange peel or zest. Let that sit for an hour or so for the flavor of the 5-spice and orange to meld a bit.

That's pretty much it- now you're ready to build. Get your bread of choice all toasted up and crusty, slather it heavily with mayo, then the lettuce; throw on a handful of the shredded chicken, some slaw (drained a little, but not totally), and top with cilantro.


Pretty simple, eh? Yet amazingly tasty. The combination of all the different flavors is really something special.


Oh, and since my last post was a Thai chicken soup, and now this one, maybe you're in the mood for a good Bubble Tea drink for dessert or something? Well, I have one! I was going to post it tonight onto the end of this, but it's late and I don't have time. Possibly tomorrow (Tuesday) but maybe not. If you don't see it here tomorrow, then in a couple weeks (going to be out of town next week). I'll may just add it here at the end of the Banh Mi post, but I may also just do a whole new entry for it, we'll see.

Tuesday, January 18, 2011

Tom Kha Kai (aka Thai Chicken Soup)

I could've swore I posted this here a long time ago, but I guess not. Well, better late than never, I suppose...

Anyone who knows me, or has ever been cooked for by me, knows that, man, I really love Thai food (anything with an Asian feel to it, really.) And I tell you what, I love me a giant bowl of Tom Kha Kai.

Being that this is a soup, there's any number of ways to do it. Here's my way:


(Those chunks of chicken-nugget-looking things are the galanga)

What we have here is the following:

Galanga
Lemongrass
Garlic
Thai bird chilis
Kaffir lime leaves
Scallions (white parts)
Ginger
Sea salt
Black pepper
Brown sugar
Fish sauce

Specific amounts, you say? Recipe? Why, I have no idea what you're talking about; I just eyeball the amounts. If it looks right, it is right. And if it's not right, I'll know it when I taste it, and adjust accordingly (I'm generally, though not always, of the opinion that recipes are for cookbook authors and culinary scaredy-cats).
So, cook this down in a little bit of oil, just until soft, you don't want to brown it. Next, add some coconut milk and chicken stock (I used the low sodium kind for this) and let simmer for about 10-15 minutes. (For the total volume of soup, I used approx. 32 oz. each of coconut milk and chicken stock, and added a little less than half each for this part.)


Afterwards, strain out all of the liquid into another container, dump the veggies, and return the liquid to the pot. Add the rest of the coconut milk and chicken stock, taste and add more salt, pepper, brown sugar, fish sauce accordingly, then add the diced (raw) chicken.

(Helpful tip: chicken, beef, etc., is so much easier to slice and dice when it's partially frozen!)

I think I used about 1 1/2 lbs. or so for this batch. Chop up some mushrooms of your choice- I used fresh oyster mushrooms, but most anything will do- and add those to the pot. Add in some bamboo shoots- I was lucky enough to have some fresh, thinly sliced and slivered ones on hand, and used about a pound. I'm sure water chestnuts would be delicious, but I didn't have any this time (except for that one small can down in the basement, but I didn't feel like bothering with it). Also, at this point I added a couple tablespoons of crack (aka MSG) because I really like the stuff. Apparently, though, some people have issues with it. I'm glad I'm not one of those people. Let simmer until the chicken is cooked all the way through, and then dish it up, adding copious amounts of cilantro and Thai basil as a garnish-


Although, I think copious means something different for me than it does for other people- I practically have a salad on top of mine:


This was the first time I've used Thai basil with this soup; before, I'd always just gone with cilantro (mainly because when I used to make this for myself before, I didn't have easy access to the Thai basil). I highly recommend it. This particular batch was Out. Standing. Fairly easy to make, and make consistently good. Pad Thai, for me, is always hit or miss- sometimes great, usually just ok. But every time I make this, it always ranges from Very Good, to I Want To Marry Whoever Made This. Substitutions generally work well, too. Where I used Thai bird chilis, if you can't get those, you could definitely go with crushed red pepper. I don't know of any fresh substitutes for Galanga, Lime leaves, and Lemongrass, but the dried versions are relatively easy to come by via mail-order, or even at a lot of co-ops and grocery stores nowadays, and are usually reasonably priced. Not as good as fresh, obviously, but better than nothing. When I can afford it, which is almost never, I prefer sesame or peanut oil for cooking the veggies at the beginning (coconut oil would also be excellent) but in this case I just went with canola.

Finally, it's not a recipe, but here are the approximate amounts I used for the ingredients listed:

Galanga- 1 medium finger/knob
Lemongrass- 1 stalk
Garlic- 2-4 Tablespoons
Thai bird chilis- 5-6
Kaffir lime leaves- 8 leaves, or so. (would've used more, but the rest had gone bad)
Scallions (white parts) - 1 bunch
Ginger- 1 medium finger
Sea salt- 1 T
Black pepper- 1 teaspoon
Brown sugar- 2 T
Fish sauce- 2-4 T
Coconut milk- 32 oz
Low-sodium chicken stock- 32 oz
Diced chicken- 1 1/2 lbs.
Oyster mushrooms- 8 oz.
Bamboo shoots- 1 lb.
MSG- 2 T
Cilantro, chopped- 1/2 C
Thai Basil, chopped- 1/2 C

Monday, January 3, 2011

Maybe it's just me, but...

Do you notice anything really stupid about this picture (the main one on the right)?


I got a Williams-Sonoma catalog in the mail the other day, and set it aside for later. This morning when I picked it up to scan through it, that picture was on the second page in, and my very first thought when I saw it was not, 'Wow, a Vitamix, sure wish I had one of those!' (That was probably my second thought), but 'You gotta be f'ing kidding me.'
I get that it's an advertisement for their blender and all, and you kinda gotta show the front of the blender to people, but still, do you have to get a chef (or anyone) to pose behind the thing, looking like he's actually using it like that? Because I'm pretty sure noone who uses a $600 blender would stand behind it and give it the ol' reach-around treatment. I could be wrong about that, but I'm pretty sure that's the case. Who knows, though? Maybe I'm just jealous because I can't afford a $600 blender. Maybe if I had one I'd be posing shirtless with it, wrapping my arms lovingly around it from behind and looking into the camera like I'm doing a scene for some tawdry culinary soap opera? But unless Williams-Sonoma or Vitamix would like to sponsor that little piece of heaven by, I don't know, sending me a free Vitamix Pro or something, I guess we'll never know for sure. So I'm sticking with my original (and totally not bitter or resentful or anything) judgment that it's a stupid photo.