Showing posts with label asian. Show all posts

Saturday, June 16, 2012

Hello Bánh Mì, We Meet Again...

About a year and a half ago, I created one of the two best sandwiches I've ever had in my life, the Bánh mì. Well, I didn't create the original Bánh mì, but I think I probably improved on it with my version. I've had Bánh mì from four other places so far, three of them Vietnamese, and so far mine has been better than any of them. Not just slightly better, either, I mean a whole lot better. Which thrills and saddens me at the same time. Anyway, I've always wanted to experiment and come up with a different kind, something a little more 'traditional,' using pork instead of chicken. But every time I got the urge to make Bánh mì, I went with the tried-and-true and made my old version. Well, earlier this year, I and a foodie friend of mine teamed up and decided that the time for talk was over, we were going to put our heads together and come up with a new version, something at least as good as the old one, something that really rocked. And we did it. On the very first try, even. No tweaking the final recipe necessary.

This new Bánh mì is definitely more work to make. Not so much that it's not worth making, but there's definitely a lot more ingredients and a lot more steps involved. The payoff, however, is so worth it.

I do get a little specific when it comes to seasonings in the ingredients list- for example, this recipe specifically calls for Kwong Hung Seng brand thin soy sauce- but that's for consistency's sake. I don't normally get too hung up on using specific brands in my cooking- one good quality fish sauce is about as good as another- but when we were in the kitchen making this, my friend had a different brand of thin soy sauce, and we tasted both. The Kwong Hung Seng brand was much, much stronger. And because we both, along with everyone else who's tried it so far, think this is a pretty special recipe, I want to make sure that anyone else who wants to make it can make it as close to our original dish as possible.

Here's (almost) everything we used:

Sandwich:

Crusty baguettes (preferably homemade. My recipe is at the bottom.)
Pork loin, 2-3 lbs.
Julienned carrots and/or seeded cucumbers, or both. (Red onions are also pretty kickass.)
Fresh, thinly sliced jalapeños
Fresh cilantro
Fresh Thai basil
Mayo

Pork Marinade:

3 stalks of lemongrass
5 fresh kaffir lime leaves
2 thai chilis
1.75 oz fresh ginger
1.5 oz garlic
3 T Lee Kum Kee premium oyster sauce*
2 T Squid brand fish sauce
1 T Healthy Boy sweet soy sauce**
2 t Datu Puti sugar cane vinegar
2 t Sriracha
1/2 c water
1/2 t sugar
1/4 t kosher salt
1/4 t Kwong Hung Seng thin soy sauce
juice from 1/2 a lime


* There's a big difference between oyster sauces. Lee Kum Kee premium is very good, but I think they have a non-premium version as well, which probably tastes quite different. Other 'premium' brands may be good too... but they may not. The main thing you want to look for is that 'oyster' (or 'oyster extractives,' or something like that) is the first thing on the ingredients list. If it's second or third down, it's probably not going to be nearly as good, and you should keep looking.

** HB sweet soy sauce tastes (to me) a lot like molasses, so if you can't find this brand, or something similar, molasses might be a good substitute.


Sauce:

Your favorite cooking oil
2 large shallots, minced
Xiaoxing cooking wine
Kong Yen rice vinegar (A very good brand. Marukan ain't got nothing on it. Should be available at any Asian market.)
Beer

*****


Let's talk marinade first. When we first made this, we just chopped everything up by hand (rather coarsely), dropped it in a bowl and added in the wet stuff. When it came time to cook the pork, we just kind of shook off the aromatics, leaving them in the marinade. What I recommend now is chopping it up just enough so that you can throw it in your food processor and have that do the rest of the work for you. Mince it up nice and fine; you want lots of surface area. But, since lemongrass is very fibrous and likely won't soften up enough during cooking, even that might not be enough for some people. If you think that might be you, I'd use a blender instead, adding enough of the liquid ingredients to just blend it completely, then stir in the rest. Set it aside in a large bowl and go to work on the pork loin. Slice it up small and thin, nice bite-sized pieces. Submerge as much of it as you can in the marinade and let set for at least 2 hours.


Sauce:

(Originally, we started this in a single pan and then sautéed the pork in the same pan after deglazing, but now I find that kind of impractical, so I do them in separate pans now, adding this to the pork towards the end of cooking as kind of a Bánh mì 'sauce.')

Chop up the shallots and slowly caramelize them using your favorite cooking oil. (We originally used peanut oil, but since then I've been playing around with lemongrass oil and szechuan peppercorn oil.) Take your time with this step. Don't sauté quickly over high heat; you should be able to walk away for 10 minutes and not worry about finding them burned. When they're ready, turn the heat up a little and deglaze with a liberal splash of the Xiaoxing wine, rice vinegar, and beer (we originally used Sierra Nevada Pale, but the last time I made it I used Arrogant Bastard and the two folks who tried it- one of whom was the co-creator- said it was the best so far, for what that's worth). Don't be shy on the amount of liquid, either. A half-cup each is not too much; you're going to simmer it down into a tasty sauce to mix into the pork. Season with a pinch of salt and/or sugar as necessary. When you decide it's ready, either set it aside in the pan, or transfer to a cup or bowl. Ultimately it's going to go in the same pan as the pork and cook down just a little more, so I guess it depends on when you'll be cooking that. When you're ready, get a wok or cast iron skillet and set it on high. You want it hothotHOT. While it's heating up, drain the pork in a colander. A fine mesh sieve is even better- you want as much of the liquid out as you can, so it doesn't splash in the smoking hot oil. When the pan is smoking hot, or just about so, pour in a splash of oil and add the pork. Sear it good, turn the heat down just a little, and then when it looks like it's about halfway done, add in your sauce and turn down the heat to about med-low. At this point, you're mere minutes away from Bánh mì bliss. If you haven't already, now would be a good time to toast your baguettes. When everything is ready, slather the baguettes with a good amount of mayo. Don't skimp, and don't leave it off. The Cohort (Amy) requested no mayo the first few times I made this for her, but this last time she forgot, and I forgot that she doesn't like it on there, so I put it on like normal... And she was blown away. At first, she was none too thrilled that it was on there, and came in the kitchen to remind me that she 'doesn't like it' on there, but just a short time later, after I'd left the house and went out to the garden, she actually called me on my cell phone to tell me how surprised she was by how much she loved it and how it all came together- the 'sauce' combined with the mayo, and everything else- to make the perfect sandwich.

And I was all like, 'Um, duh.'

So yeah, don't leave off the mayo, even if you 'don't like' mayo.


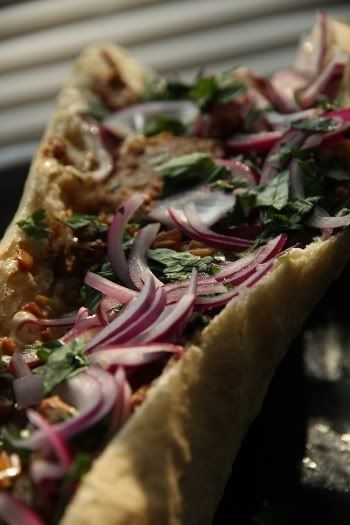
Here's what it looks like:
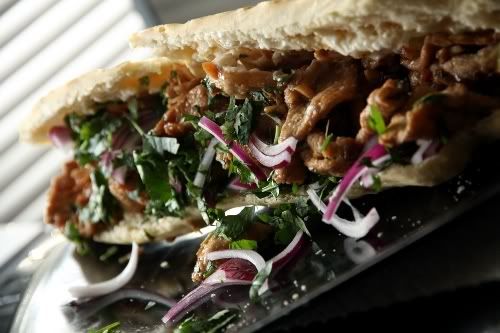


My Bánh mì


If you need a good baguette recipe (or just a good bread recipe in general), here's mine, which I also posted here before:

  • 2 1/2 cups bread flour
  • 1 tablespoon white sugar
  • 2 teaspoons kosher or coarse sea salt
  • 2 teaspoons instant yeast
  • 3 T wheat gluten
  • 3 T potato starch (not potato flour) 
  • ~ 1 c warm water

 I recommend working it by hand, instead of using a food processor, as it's very, very stiff. Besides, it won't take but a few minutes before it's ready to proof. I also recommend letting it rise at least twice. This recipe makes an excellent flatbread, but for baguettes, after the rise just cut off about 6-7 oz (makes a nice, large-but-not-too-large loaf) and shape. Brush with butter or egg wash if you like, cover with plastic wrap and let rise again. It may not rise all that much this time, but that's a good thing. You want that. Mine didn't rise much before it went into the oven. I didn't think too much of it, just figured it'd finish off while it was baking. But it didn't. At first I was pretty disappointed, and briefly considered making some new loaves with the rest of the dough, but in the end I went with it, and it actually turned out perfect. See, the bread is really just a shell, something to hold all that flavorful pork inside so you don't have to use your bare hands or a fork. It does also contribute some flavor and texture, but you really don't want a whole lot of puffy bread getting in the way of the rest of your Bánh mì.


This recipe is definitely a lot more work than my other one, but it's worth every bit. I also can't stress enough that it's totally worth the effort to make your own baguette. Store-bought, even if it's 'artisan,' just can't compare.
Saturday, September 3, 2011

Thai Sticky Rice With Basil And Chicken

Let me just come out and say it at the beginning here- this dish Kicks. Ass. It's definitely one of the Best Things Ever and you owe it to yourself to make it. I've been wanting to post it for a long, long time. This is one of my top favorite dishes of all time, something I could eat daily and not get tired of for a very, very long time. I figure now that I'm finally down here in Nash Vegas and mostly moved in and such, what better way to kick off the first post here in my new town/new life than with such a worthy, tasty dish as this.

The name 'Sticky rice' is slightly misleading; it's not really sticky in the sense that most of us think of when we think 'sticky rice.' While it does stick a little to the cloth when it's done cooking, it's not at all like somebody overcooked their rice and it's just a big pile of sticky, starchy goop. I think 'Chewy rice' would probably be a more accurate title for it.
It's a fairly easy dish to make and most everything is easily obtained. If you live in a smaller town somewhere, you might not be able to find Thai basil (if not, it's definitely worth growing your own) but regular basil is awesome too. Not quite as awesome on this dish as the Thai kind, but pretty damn good in it's own right. Anyway, here's a rundown of what you'll need:

Main Dish:

Boneless chicken parts, small-to-medium dice (breast, thigh, doesn't really matter; whatever you prefer)

Thai Sticky Rice (also known as Sweet Rice or Glutinous Rice. It comes in a purple variety, and probably others, but go with the the white kind for this recipe. The other kind cooks different, in my experience, and I haven't been able to get the same texture for it). You'll also need either a bamboo steamer or a colander, along with a cheesecloth or cloth napkin, for steaming the rice. Cooking it on the stovetop, or using a rice cooker, will not work. I tried it once just to see how it would come out, and it didn't. At all. It has to be soaked and steamed.

Some type of adult beverage (not for the dish, but for the cook. Cooking's always better/more fun when you're consuming some type of beer/wine/booze)


Marinade:

Fish sauce
Soy sauce (a good kind, not LaChoy, which is not even a real soy sauce)
Teriyaki sauce
Rice vinegar
Fresh lime juice
Dried basil
Fresh minced garlic
Fresh minced ginger
Sugar
Kosher/sea salt
Pepper
Crushed red pepper
Szechuan peppercorns, toasted (those are the things in my header photo. If you don't have a good international market where you live, they can be obtained from Penzey's and other online spice merchants.
MSG (optional, I guess. I always use it, though. I think the whole anti-MSG thing is a bit overblown and I highly recommend the stuff)


The list above is just what I currently typically use. I have no set recipe or list of ingredients or anything like that. If you have other Asian ingredients like Maggi, Soba, or Oyster sauces, they'd probably go pretty well too.

Garnishes:

Fresh basil, preferably the Thai variety

Sriracha, aka Rooster sauce or Cock sauce

Chopped dry-roasted peanuts

Fresh lime juice

Bean sprouts


Making it happen-

Rice-

The rice has to soak for a good 8 hours or so, so you'll want to get that out of the way first. I never bother to measure it out, but when I cook for just myself, I typically use about 1 cup/8 oz. dry rice. I try not to let it soak for more than 10 hours, so if I start it the night before, when I get up in the morning I'll usually just drain the water off and leave it like that until I'm ready. It also doesn't have to soak in the fridge, though I usually put it in there if it's going to be sitting for awhile after I drain the water.

Marinade-

While the rice is soaking, get to work on whipping up some Asian-flavored goodness to marinate that chicken in. Get yourself a good sized metal mixing bowl, toss in a big pinch of salt and a bigger pinch of sugar, add in some hot water to help it dissolve quicker, and mix until it's completely dissolved. Then, little by little, add in splashes of the ingredients listed above until it tastes the way you want. Remember to add more water as necessary (you'll need at least some, so it's not too overpowering) and possibly more salt and sugar. I also typically add the most of the ingredients that are near the top of the list, and go down in volume from there- so more fish sauce than soy, more soy than teriyaki, etc. Go light on the szechuan peppercorns, though. If you're not familiar with them, they're not actually peppercorns, so they're not 'hot' like regular peppercorns. It's hard to describe them, but they have a citrus-y smell and flavor, and if you pop one in your mouth it'll make your tongue kind of tingle and feel a bit numb. That's a good thing. Just be careful not to overdo it; they can be quite strong and I've damn near ruined a dish by using too much. A pinch is all you need to start with. Also, if you don't happen to have any fresh minced garlic (which I don't for this particular batch), the granulated kind is better than nothing.
The main thing to remember is that there is no right or wrong way to do it, and that what you're shooting for is something that's savory and has a good blend of Hot, Sour, Salty, and Sweet (light on the Sweet, but that's just me. Mostly I just use the sugar for a bit of balance. Plus, the lime juice, rice vinegar, and basil add their own bit of sweetness too). That's my main objective whenever I mix this up. If you're not sure because you've never done it before and you don't have much experience with Asian flavors or whatever, don't sweat it, it's easy. E-Z. Taste it often as you go and add whatever you think it might need more of. It won't be the exact same every time, but that's part of the fun of making and eating it. If you're feeling cautious about it, you may want to actually measure stuff out instead of just adding it in random splashes. Also, you may want to start with fairly uniform and equal measurements of things; say, for example, 1 T each of (almost) everything, and then adjust from there. The main reason I don't have an actual recipe for this is because every time I try and come up with one, it never works out. I'm always adjusting and fine-tuning the marinade as I go, and it's really, really hard to keep track of every little dash of whatever sauce I'm adding, and it always seems to come out vastly better when I don't even try, so I finally gave up on that and now I just focus on tasting as I go, adding more of whatever I think it needs here and there. And it never fails to come out awesome.
Once your super-amazingly-awesome marinade is up to your standards, toss in the chicken and let it soak a bit. Depending on how much lime juice you put in, you could probably get away with 20 minutes or so, but I think an hour is good. Two is too, but if you let it go more than four hours, call a physician. No wait, that's something else. Anyway, you get the point.

Also, I was planning on doing a little video clip of me mixing up the marinade, just so you'd have some sort of reference point, but my Flip cam has suddenly disappeared, even though I just had it a few days ago when I originally started writing this post and was planning on doing it then. If it turns up at some point, I'll do the video and then update this post with it, but for now I got nothing.

Cooking the rice/chicken-

When you're ready to start cooking the rice, you'll need to drain and rinse it thoroughly. Like, put it in a fine-mesh colander and rinse it underneath the faucet until the water starts to run clear. When it's ready, put it into your cheesecloth-lined colander or bamboo steamer and set it on top of a pot of boiling water to steam. Make sure it's evenly spread out and that there's not too much- depending on what you're using and how big it is, you're probably going to have to keep it to 2 cups (dry) or under. Cover it with another cloth and then set a lid on tightly to keep as much of the steam in as possible.
In the past, I used to use one of the more traditional style conical bamboo steamers-


But I don't really like the way those cook. This is a fairly decent sized basket, big enough to cook for 4-5 people, but unless you're cooking only a small amount, like enough for 1-2 people, the cone shape tends to cause the stuff at the bottom to be overdone while the stuff at the top isn't even close, and probably won't ever be. I found this out the hard way while trying to cook for several friends. So now I've switched over to the round kind, which typically has 2 steamer baskets and it's own lid. You see them at Bed Bath and Beyond for 20 bucks or so. I got mine at Williams-Sonoma for about $15. It's a large one with only one layer. (Maybe a bit too large, since I currently don't have any pots that big around, but I make it work.) I like this style a lot better, since it allows for much more even cooking, so you can fit more rice in for more people. Depending on how much rice you're cooking, it usually takes about 20-25 minutes to steam. When you're getting close to that time, just lift the lid and scoop out a small amount with a fork (or a long pair of tongs, if you have them) to test for doneness.
While the rice is cooking, get out your wok and turn that thing on high high high. Let it get super scorching hot. Like, to the point that it starts to smoke. Make sure your chicken has been thoroughly drained, since the liquid will cool the pan down considerably, and the chicken will still throw off some more liquid anyway. Do not do what you might be tempted to do, and what most people probably do, and add oil to the pan. You do that and then when you drop the chicken in it's just going to splash up and burn you in the face. You don't want to be blinded or horribly disfigured, do you? If you're already blind and horribly disfigured, then do whatever you want, but for your own safety, either hold off on the oil until after you add the chicken, or toss the chicken in a little bit- just enough to coat it- before you add it to the pan. Either way, it's not gonna stick (if you're using any kind of decent cookware, that is. Cheapo pans that don't conduct heat well might give you some problems, but use a good wok or cast iron skillet and you'll be golden). If you use no oil at all, then it may stick a little at first, but the super high heat will sear the outside nicely and then the chicken will start throwing off juice, and then that will loosen things up. If you saved any of the marinade (always a good idea, just in case) you could add some of that after a bit to help it along too. The chicken won't take long at all to cook, under 10 minutes easily, so try and time it so that it's done around the same time as the rice, because Thai sticky rice doesn't keep for very long at all. It dries out quite quickly. If you're not sure when to start, just remember the chicken will probably hold for much longer than the rice so if the chicken's done first, not a big deal, you can just hold it warm in a 150 degree oven or whatever.
Make sure you have a large plate or bowl ready for when the rice is done. When it's ready, cut the heat and lift the lid (and top cloth, if you're using one); as soon as the steam clears enough for you to grab the cloth napkin or whatever you're using, grab it by its corners and quickly turn it over onto the plate or into the bowl. The cloth will still be wet enough that you can easily remove it from the rice and then lay it back down as a cover, without much, if any, of the rice sticking to it.

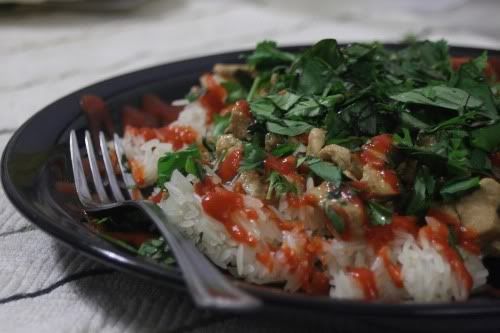
From there, just break off as much or as little as you want and spread a layer of it on a plate. I typically sprinkle some fish sauce on top of that layer, then cover it with a layer of my freshly-wokified chicken, then cover that in a fairly thick layer of Sriracha, fresh Thai basil leaves, fresh lime juice, crushed peanuts, and sometimes bean sprouts (when I'm brave enough to buy them. I've just heard too many horror stories about them. Going to have to start growing my own just to be safe).

It usually ends up looking something like this:


This is what Awesome looks like


Prepare to be blown away when you take a bite. Especially if I happened to make it for you.

Tuesday, January 18, 2011

Tom Kha Kai (aka Thai Chicken Soup)

I could've swore I posted this here a long time ago, but I guess not. Well, better late than never, I suppose...

Anyone who knows me, or has ever been cooked for by me, knows that, man, I really love Thai food (anything with an Asian feel to it, really.) And I tell you what, I love me a giant bowl of Tom Kha Kai.

Being that this is a soup, there's any number of ways to do it. Here's my way:


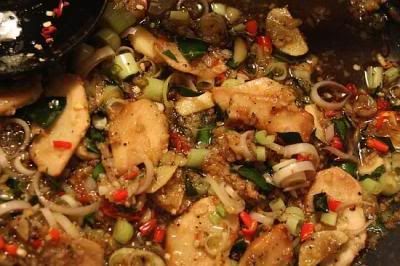
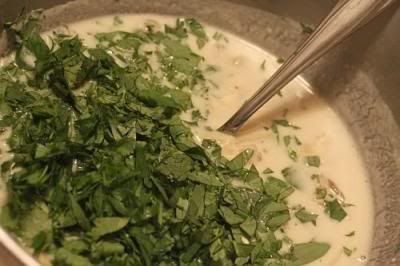
(Those chunks of chicken-nugget-looking things are the galanga)

What we have here is the following:

Galanga
Lemongrass
Garlic
Thai bird chilis
Kaffir lime leaves
Scallions (white parts)
Ginger
Sea salt
Black pepper
Brown sugar
Fish sauce

Specific amounts, you say? Recipe? Why, I have no idea what you're talking about; I just eyeball the amounts. If it looks right, it is right. And if it's not right, I'll know it when I taste it, and adjust accordingly (I'm generally, though not always, of the opinion that recipes are for cookbook authors and culinary scaredy-cats).
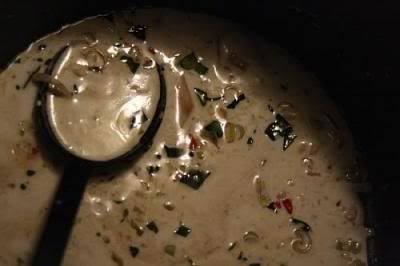
So, cook this down in a little bit of oil, just until soft, you don't want to brown it. Next, add some coconut milk and chicken stock (I used the low sodium kind for this) and let simmer for about 10-15 minutes. (For the total volume of soup, I used approx. 32 oz. each of coconut milk and chicken stock, and added a little less than half each for this part.)


Afterwards, strain out all of the liquid into another container, dump the veggies, and return the liquid to the pot. Add the rest of the coconut milk and chicken stock, taste and add more salt, pepper, brown sugar, fish sauce accordingly, then add the diced (raw) chicken.

(Helpful tip: chicken, beef, etc., is so much easier to slice and dice when it's partially frozen!)

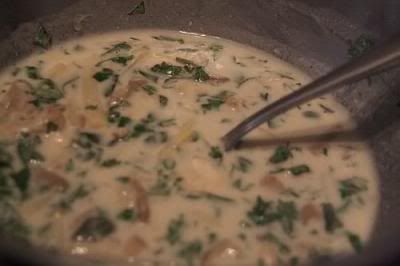
I think I used about 1 1/2 lbs. or so for this batch. Chop up some mushrooms of your choice- I used fresh oyster mushrooms, but most anything will do- and add those to the pot. Add in some bamboo shoots- I was lucky enough to have some fresh, thinly sliced and slivered ones on hand, and used about a pound. I'm sure water chestnuts would be delicious, but I didn't have any this time (except for that one small can down in the basement, but I didn't feel like bothering with it). Also, at this point I added a couple tablespoons of crack (aka MSG) because I really like the stuff. Apparently, though, some people have issues with it. I'm glad I'm not one of those people. Let simmer until the chicken is cooked all the way through, and then dish it up, adding copious amounts of cilantro and Thai basil as a garnish-


Although, I think copious means something different for me than it does for other people- I practically have a salad on top of mine:


This was the first time I've used Thai basil with this soup; before, I'd always just gone with cilantro (mainly because when I used to make this for myself before, I didn't have easy access to the Thai basil). I highly recommend it. This particular batch was Out. Standing. Fairly easy to make, and make consistently good. Pad Thai, for me, is always hit or miss- sometimes great, usually just ok. But every time I make this, it always ranges from Very Good, to I Want To Marry Whoever Made This. Substitutions generally work well, too. Where I used Thai bird chilis, if you can't get those, you could definitely go with crushed red pepper. I don't know of any fresh substitutes for Galanga, Lime leaves, and Lemongrass, but the dried versions are relatively easy to come by via mail-order, or even at a lot of co-ops and grocery stores nowadays, and are usually reasonably priced. Not as good as fresh, obviously, but better than nothing. When I can afford it, which is almost never, I prefer sesame or peanut oil for cooking the veggies at the beginning (coconut oil would also be excellent) but in this case I just went with canola.

Finally, it's not a recipe, but here are the approximate amounts I used for the ingredients listed:

Galanga- 1 medium finger/knob
Lemongrass- 1 stalk
Garlic- 2-4 Tablespoons
Thai bird chilis- 5-6
Kaffir lime leaves- 8 leaves, or so. (would've used more, but the rest had gone bad)
Scallions (white parts) - 1 bunch
Ginger- 1 medium finger
Sea salt- 1 T
Black pepper- 1 teaspoon
Brown sugar- 2 T
Fish sauce- 2-4 T
Coconut milk- 32 oz
Low-sodium chicken stock- 32 oz
Diced chicken- 1 1/2 lbs.
Oyster mushrooms- 8 oz.
Bamboo shoots- 1 lb.
MSG- 2 T
Cilantro, chopped- 1/2 C
Thai Basil, chopped- 1/2 C

Tuesday, October 12, 2010

Fresh Thai Rolls (Spring Rolls) Made Easy(er)

I love fresh Thai rolls. Love them. I could eat them as an entire meal for any meal of the day and be happy. But making them kinda sucks. They're not terribly difficult, and in fact it's probably the thought of making them rather than the actual process that sucks, since once I get going it never seems as bad as I thought it would be. Problem is, getting going is the hard part. (Kind of like writing new posts for this blog; I've got plenty of stuff in mind, but actually sitting down to do it never seems to happen.) Anyway, for me the hardest part about making them was always the spring roll wrappers- you dip them in hot water to soften them, but then they always end up folding over themselves or sticking to the work surface with lots of ripples in them, or whatever; basically the wrapper part was always just a pain in the ass. But then I found out one day that it was because I was soaking them for too long (too long being about 5-6 seconds, total). Seems pretty obvious, but for some reason I never caught on, and anytime I talked to someone else who made them, they always had the same problem. It doesn't help that a lot of the recipes you see out there tell you to soak them for too long anyway- I just saw one over on About.com that said to soak them for 30 seconds! Better to go with the one over on Allrecipes.com that says to just dip it in the water for 1 second. That really is all it takes- you basically just want to get it wet, because when you take it out and set it on the table, it's going to keep absorbing the residual water and soften up to just the right amount to make it easy to roll. And, since it'll still be somewhat stiff when you take it out of the water, it'll be completely flat when you lay it on the table, no wrinkles or ripples, no moving the edges around in an effort to get it 'right.' And that's pretty much all I'm going to say about that, because this post isn't exactly about how to make Thai spring rolls- it's more like how to make a Thai spring roll salad. That's right, sort of a cheater's Thai spring roll. I was making myself some one day, marveling at how much easier they were to make now that I wasn't over-soaking the wrappers, when it occurred to me to just mix it all up in a bowl like a salad- everything's exactly the same, just a whole lot quicker and easier to make! I haven't looked back since. I make this a lot now, far more than I ever made actual spring rolls. The following is the recipe that I came up with and tend to always use (I really like it a lot) but there's tons of Thai spring roll recipes all over the internet, so tweak away- there's no 'one' right recipe to make a spring roll. A lot of recipes I've seen call for bean thread noodles, but I like plain old rice noodles in mine; some call for shrimp, I use chicken (more work, but it's cheaper); I typically don't use cucumbers, but they go well in this. Whatever you like. If you've never made fresh Thai rolls before, this recipe should be a good start, though. I think you'll like it.

This is also kind of a large recipe, since we ended up putting the salad on our banquet menu at work. So I had to come up with something to be able to feed a lot of people, and this is it. (I admit it, I'm too lazy to bother sizing it down for just a few people. Usually when I make it for just myself, I don't even follow the recipe anyway, as far as amounts go- I just mix it all up until it tastes how I want. But for the purposes of this blog, and to make it easier for folks who've never tried making these before, here you go) :

Thai Spring Roll Salad

8 oz rice noodle (dry)
1lb boneless chicken breast
1lb chopped romaine (Napa cabbage is also good)
crushed peanuts
fresh mint
fresh basil
(cilantro is good too, but isn't part of the recipe)

Marinade/dressing

2t salt
3/4c sugar
1c rice vinegar
1c fish sauce
1c + 2T water
1-2 t crushed red pepper
1T fresh lime juice
2T chopped garlic
1 lg or 1 1/2 medium carrots, shredded
1/2 onion, sliced very thin

The way I typically do this is to use warm-to-hot water to dissolve the sugar and salt quicker. Then just add everything else to the bowl and mix it up good. Also, you may want to set some marinade aside for extra dressing for the salad.

Cook the chicken breast on a sheet pan in a 350 degree F oven in a sugar/salt water brine (just dissolve equal parts sugar and kosher salt in some water. I don't have an exact amount as I tend to go by how it tastes- just slightly salty/sweet- but I think 1/4 to 1/2 cup each per gallon of water is somewhere in the ballpark). When it's done let it cool a bit, but while it's still warm pull/shred it and toss into the marinade and let set for 1-2 hrs.

Soak the rice noodles in hot water (+/- 190-200 F) until soft (white) about 5-7 minutes, then chop them up as big or small as you like. (They tend to be pretty sticky, so I sometimes add a little oil to lube things up, but only a tiny bit- just the bare minimum.) Add to bowl with the romaine, drain the chicken, mix into salad, toss in mint, basil, crushed peanuts (in whatever amount you like. I didn't really see the point in trying to come up with an amount for this recipe. I like fresh herbs, so I tend to use a lot. Whatever works for you).


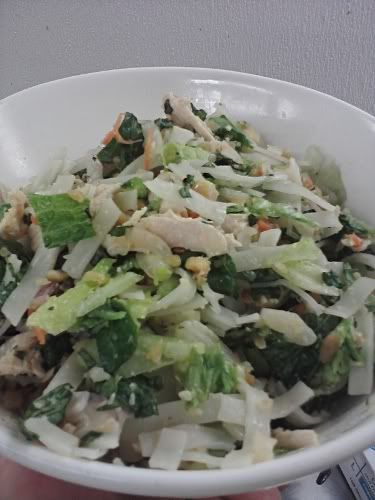
(pic taken with my cell phone camera...)

And that's pretty much it. Use the extra marinade as a dressing, if you like, but keep in mind that it tends to wilt the lettuce pretty quickly, so if you're making this awhile ahead of time you'll want to hold off on that (as well as be sure and really drain the chicken thoroughly).

Bon Appetit!