Showing posts with label spicy. Show all posts

Friday, January 25, 2013

What's Going On...

(Update, 2/27: Going to look at a commercial rental kitchen  today; it's almost certain that we'll take it, and once we do, the next step is getting the Dept. of Agriculture to come in and inspect our process, make sure everything's kosher. Once that happens, we're pretty much going live. So (fingers crossed) ... within a week.


So in a previous post or two, I mentioned that I had a super-awesome-for-me announcement coming up, and that it would be up this month for sure. And so here it is (sort of) -

A friend and I are starting a spice company. A super bad-ass spice company. Well, sort of a spice blend company, as opposed to just your ordinary, all-purpose 'We sell basil and thyme and black pepper and stuff,' company. See, we won't be selling thyme and black peppercorns and dried basil (though we're looking into dried Thai basil, since no one else seems to carry that). Our feeling is that you can get good quality 'regular' herbs and spices pretty much anywhere nowadays. Our focus is on unique and/or exotic/unusual stuff that you have to search high and low for, and maybe go through several different sources to get everything you want (like we've had to do in our own personal spice-buying ventures). Basically we're taking all of the flavors and spices and spice blends that we love to use in our own personal kitchens, and offering them for sale, in one convenient place, to other 'fellow seekers of the exotic.' Naturally, we came up with the idea after several beers. But it wasn't just the beer. We'd been snacking on some flatbread with store-bought Za'atar that we thought was pretty good, as well as a dried Zhug spice blend, that we also thought was pretty good. We decided to try and come up with our own version. And we did, and both of them were so, so much better than the stuff we'd paid money for that we just thought, 'We should just start our own spice company!' And so that's what we're doing.

Our standards are pretty high; we've bought plenty of different spices and spice blends from plenty of different companies. And while most are good, even our favorite companies offer some products that are, in our opinion, just plain mediocre. But that's just our opinion, right? Hell, maybe other people really like the stuff that we don't, and think it's just peachy. And that's fine. But our whole thing is that we won't carry anything that we don't absolutely love and think kicks ass. No, we don't expect everyone will love our stuff as much as we do; however, if someone were to say to us, 'Y'know, I really don't dig on your Za'atar that much, I've had better pre-packaged stuff from my local Ethnic Mart,' we honestly wouldn't be able to say, 'Yeah, so have we.' Bottom line: if we were selling beer, we sure as hell wouldn't be selling Bud Light. It may be one of the most popular beers in the U.S. (if not the most popular), so we might sell a ton of it, but we think it tastes like watered-down ass, so we just wouldn't carry it.

Here's some of what we plan to offer:

Za'atar

Zhug (aka Skhug) a Yemeni hot sauce/condiment (though ours, along with all our other stuff, is a dried spice version)

Jalapeño-Lime snack seasoning (hot and mild)

Vadouvan 

A Tostitos w/ Hint of Lime clone, based on the recipe I came up with years ago, but slightly different, and much better. (Also, better than the commercial variety.)

Harissa

Chermoula

Ras el Hanout


...as well as some other various blends, both our own original ideas as well as more well-known standard flavors, like Jamaican Jerk. In addition to blends, we also plan on carrying more exotic single spices like Ethiopian Cardamom (Korarima), Szechuan peppercorns, Omani/Loomi, Sumac, etc.


Unfortunately, we're not quite official yet, so I can't announce the company name or URL, but soon. Target date for going live is Feb. 1st.

We're starting off small, so we've got a long road ahead of us, but we couldn't be more excited!


Sunday, November 25, 2012

Bodie's Most Bad-Ass Red Beans & Rice

Usually I hate it when I lose something I was working on (like a recipe) and have to start over from scratch, but in this case it worked out pretty well. What happened is that a couple months ago or so, I came up with what I thought was the best rice and beans I had ever eaten. Actually, it was the best rice and beans I'd eaten- at that time. (There was one time before that, but I never bothered to write anything down, so all I had was an awesome dish with no accurate way to re-create it.) And this time, luckily, I actually managed to write everything down as I made it so I'd be able to re-create it any time. But unluckily, I stored the main copy of the recipe in my Gmail account, thinking it'd be about as safe there as anywhere. And actually it was pretty safe there, so I erased the copy I had on my dry-erase board in the kitchen. But in an effort to clean up my Gmail, I completely deleted a whole bunch of emails, accidentally including the red beans and rice recipe, among a couple other kind of important recipes. (Even though it's unlikely to ever happen again, I'm now using Backupify again. I used to use it a long time ago when it first came out- thankfully, because that means it's still free for me- but didn't really see the need for it, so I stopped.) So there went my most-bad-ass-ever recipe for red beans and rice. But I figured since I'd done it once or twice before, I might be able to do it again.  And not only did I do it again, but I think this one is even better! So yee-haw for happy accidents (though I'm still sticking with Backupify).


What you'll need:

3 c dry pintos or red beans
7 c water

1lb bacon (minus what you eat after smoking it, because it's so damn good) + drippings
2 smoked pork hocks/pig's ears/whatevers
A couple jalapeños and cayennes (if you like yours a little spicier)
2 each guajillos and pasillas de Oaxaca*

3 T chopped chipotles in adobo (I highly recommend La Costeña brand)
3 T chili powder
3 T toasted cumin
3 T granulated garlic
2 T paprika
2 T mild jalapeño-lime blend**
2 T cider vinegar
2 T dried epazote
2 T dried cilantro
1 T onion powder
1 T oregano
1 1/2 t sugar
1 1/2 t coarse sea salt
1 t thyme
pinch of dill
several grinds of black pepper 

1 can of no-salt-added diced tomatoes
1/2 can of tomato paste
1 can of beer
6 T Louisiana hot sauce
2 T Valentina hot sauce
1 ea. red bell pepper and yellow onion, diced
fresh cilantro and/or green onions (and more Valentina) for garnish


Take your raw bacon (high quality or cheap-ass store brand, it really doesn't make much difference in this case) your smoked pork/turkey/whatever parts, and smoke them again. Really, fire up the grill, load on the wood chips and smoke the hell out of those suckers! Make sure you have some sort of drip pan underneath to catch all of the drippings. If you have a big enough grill and can fit it all on, I'd also recommend smoking your chile powders, cumin, salt, pepper, etc. I don't have a big enough grill to do it all at once though, and by the time the bacon and pork is smoked to the point where I want it to be, the wood chips are spent and I don't feel like doing it all again.
It's almost impossible to oversmoke the smoked pork parts, but I suppose you could, in theory, overdo the bacon since this involves hot-smoking and letting it go too long will result in burnt bacon. I let mine go until it's dark brown and crispy. I've burned the smoked hocks before, but it was only superficial and after cooking down in the beans awhile they were as tasty as ever. Bacon being so thin, however, that wouldn't work.

Next come the beans. I have a pressure cooker (Presto, 8 qt.) so that's how this recipe was written. If you don't have one, then cook the beans however you normally would, soaking them overnight or whatever. But with the pressure cooker, I never bother with that. Take the unsoaked beans, add the water, smoked meats, guajillos and pasillas (and the other chiles, if you're using them) and add it all to the pot. Bring it up to high pressure, then turn down to low pressure and set a timer for 21 minutes. When the time's up, release pressure using the cool water method and return to the stove over med-low heat. (When you open the pot, it'll probably look like there's not nearly enough liquid, but once the beer, hot sauce and tomatoes come into play, it'll be perfect.) In a separate pan, sauté the pepper and onions until they're brown and crispy, and deglaze with some of the beer. Scrape it all into the beans, pour in the rest of the beer and wet ingredients and add all your dry seasonings. At this point you just let it simmer away happily on low to med-low for awhile, either until the beans are completely softened up (if they weren't already after the initial pressure cook) or for at least a good 20-30 minutes. While that's going, get your rice cooking and have a few more beers. Speaking of which, every time I've made this, I've used el-cheapo Genesee Ice ($2.99/6-pack!) and it's always come out amazing. I can only imagine how much better it would be if I used a better beer. Then again, if you have to pay for beer, is there a better one than the one that costs $3 for a 6-pack? I'm not sure.


* Pasillas de Oaxaca... not the same as regular pasillas (pasilla negro). Pasillas de Oaxaca, as the name suggests, are from Oaxaca. I don't know much more about the differences between them other than the Oaxacan version is very smoky tasting (which is why I like them) and much harder to find, therefore more expensive than the regular. Like 3x more expensive. Last I checked, they go for around $30/lb. They're so good though. Definitely worth trying out.

** Mild jalapeño-lime blend. It's a custom spice blend I make, most often to put on tortilla chips, but it goes well in stuff like this too. Not available for sale anywhere yet, but it will be soon, so stay tuned for that announcement. But if you don't want to buy it, I'd just sub some canned green chiles and fresh lime juice.


Wednesday, September 5, 2012

My People Call It Maize

Years ago, when I was living in Chicago, I'd see these Mexican food carts, with the vendors selling some sort of corn on a stick. A friend of mine told me they slathered it with mayo, cayenne, parmesan cheese, and maybe some cilantro and lime juice. My first thought was, man that sounds gross. Mayonnaise on corn? The whole thing just seemed weird to me. Fast forward to about a week ago, when I noticed a recipe Saveur posted for Mexican-Style Roasted Corn. I have to admit, the picture kind of sold me on it, so I went out and bought some corn and Queso Fresco. I know their recipe calls for Cotija, but when I got to the store, I couldn't remember for sure if that was it. I thought it was, but the only Cotija I saw looked like overpriced Parm, so I went with Queso Fresco instead. I think I made the right choice.

I made some other, minor, tweaks as well. You can follow their recipe to the letter if you want, but this stuff is dead simple. No recipe needed. They peeled the husks back and tied them with twine; while it does look kinda pretty, it's probably not really necessary. Strip those babies off and throw them in your jerk neighbor's yard or driveway. Saveur soaked their corn in water for a half hour. I didn't soak mine at all, and it came out fine.

Here's a list of my ingredients:

Corn, husks removed
Mayo
Queso Fresco
Chili Powder
Jalapeño-Lime powder (my own blend; not really for sale anywhere- yet!)
Cayenne
Fresh lime juice
Fresh cilantro


Putting it all together is almost self-explanatory, but here's how anyway:

Grill the corn till it's as done as you'd like. Slather on the mayo in whatever quantity you'd like. Roll the corn around in a dish of crumbled Queso Fresco till it's nice and coated, then sprinkle with your choice of chili powder(s). Salt and pepper if you want, then squeeze some fresh lime juice on it and hit it with some cilantro. Then, while guzzling a beer, give your neighbors some shit about their stupid messy lawn/driveway.

Monday, April 30, 2012

Bomb-Ass Buffalo Chicken Quesadilla (updated)

This is one of my all-time favorite things to eat, ever, and definitely, hands-down the best quesadilla I've ever had in my life. Just thought I'd throw that out there. Now if only I could take credit for the basic recipe. Unfortunately I can't- I learned to make it during my very first cooking job, back in the late 90's, at a franchise pizza restaurant chain that no longer includes pizza as part of their name. I just checked their website and they still offer a buffalo chicken quesadilla, however, I've not eaten there in years (they don't have any locations in my area, or in my previous area of St. Paul, MN) so I don't know if it's the same as it used to be when I worked there. But that don't matter either way, because after you read this, you too can partake of the Bestest Bomb-Ass Buffalo Chicken Quesadilla in the History Of Ever in the privacy of your own kitchen (or basement or bedroom or wherever), no 'Pizzeria Something Or Other' locations necessary. As a bonus, it's a total cinch to make.

Necessary stuff:

Pizza/bread dough*
Panko bread crumbs
Vinegar based hot sauce (Frank's, Louisiana, etc.)
Red onions
Chicken, preferably grilled
Cheese, preferably Muenster

Tasty Garnishes, if you like:

Salsa
Guacamole
Sour Cream

Let's start with the chicken, just to get it out of the way. Grilled is best, but pan-fried or baked in the oven should be fine too. Sliced or diced, however you like it cut, just be sure and brine it, please. It really makes a world of difference. I rarely, if ever, cook chicken without first brining it. If you're not familiar with brining, it's basically just a soak in salt (and sometimes sugar, as well as herbs) water to help keep the meat from drying out. It doesn't have to be complicated- I usually go with about 1/4 c salt and 1/2 c sugar to 1 gallon of water. Let soak for about an hour, though as little as 20 minutes should be fine too, depending on how much meat you're doing.

Next up, take a ball of your favorite pizza/bread dough (5-6 oz should suffice for a decent-sized 'dilla, though after trying this one for the first time, you may find yourself going much bigger) and press it out in a bowl/dish of panko bread crumbs. It's hard to describe the exact technique, though I think once you get going, it'll come naturally. You can do it in a large mixing bowl, in a cake pan, or even on a square sheet pan. Basically you want some sort of dish to hold in the bread crumbs while you simultaneously press them into the bread dough/roll it out flat. I find working by hand (i.e. don't use a rolling pin) works best.


I started off with the dough ball in the mixing bowl, then transferred it to the little sheet pan. Press and turn, press and turn. Flip it occasionally, keep it covered with plenty of panko. When it's the size you want, it's just about ready to go. Splash it liberally with your favorite hot sauce so it looks like a scene from Law and Order SVU or whatever, and then toast it up. It's best if you have a grill to toast it on, but if not, putting it on a sheet pan and toasting it under the broiler in your oven until it's nice and golden/slightly charred, works fine too.

At this point, you're halfway home. Cover half of it liberally with your cheese of choice (I think Muenster is best- it's what we used back in the day at the restaurant- and I've recently found that Havarti is a great choice, but a cheddar/jack/mozz mix or colby-jack would probably be decent too), add the chicken, sprinkle liberally with some diced red onions (very important! They don't necessarily have to be red onions, but don't leave these off. I did one time, because I didn't have any, and the difference was profound, profound I tell you!  If you don't like onions or whatever, put them on anyway. You'll somehow like them on this, I promise. Guaranteed, or your money back), and maybe some more cheese and hot sauce on top. You're pretty much home free at this point. Pop it in a very hot oven (400+) until everything's melty/toasty. Shouldn't take more than 10 minutes, tops. Probably 7-8 or so.


Perforate the center of it along the cheese with a knife edge, then fold it over and cut into 4 (or 3 or 2) wedges:


At this point, I like to douse it liberally with Louisiana hot sauce and chow down (Frank's used to be my favorite vinegar-based hot sauce, but since I've tried Louisiana, I'm a convert). I'm not a huge fan of sour cream, but I can see how it would be good on this if you like it, and salsa and guac definitely make for great condiments.


* if you don't have a decent recipe for pizza/bread dough, I've got one I love and use pretty much every time. I was looking on allrecipes.com for a baguette recipe, and found one but used it to make flatbread instead. It was the best flatbread I'd ever had. So I ended up messing around with it and making it even better. Here's my version:
  • 2 1/2 cups bread flour
  • 1 tablespoon white sugar
  • 2 teaspoons kosher or coarse sea salt
  • 2 teaspoons instant yeast
  • 3 T wheat gluten
  • 3 T potato starch (not potato flour) 
  • ~ 1 c warm water
(For what it's worth, for the wheat gluten and potato starch, I use Bob's Red Mill brand.)

Mix all the dry stuff, then add water until a nice dough forms (you should only need slightly less than 1 cup). Because of all the extra gluten involved, this dough will quickly become pretty stiff and hard to knead. And for that reason, I wouldn't bother using a food processor to mix it up. Once you've got the dough ball, it should only take a few minutes of folding and kneading before it gets too stiff to bother with anymore, so to me it's not worth it to get out the food processor just to save a few minutes' work. Plus, unless you've got a super-duty Robot Coupe or something similar, it'll probably just bog down anyway. When it's ready, cover it and stick it in a warm spot for a few hours. I usually let mine rise at least twice, and sometimes I'll let it go all day or overnight while rising.

This recipe makes the best flatbread I've ever had, and it's my go-to recipe every time.


Monday, May 16, 2011

Rockin' the Burrito Casbah, Part Dos.

(updated, May 19. See * at the bottom.)

This, in my opinion, is the be-all, end-all of burritos. It pretty much does not get any better. Maybe, possibly, somewhere in a remote town in Mexico, there's a 10th generation Mexican granny who's been making the original burrito recipe that's been passed down through the family of the actual creator of the burrito, and that one might be better than this one- but I doubt it. I'm pretty sure that one bite of this one and that granny would be furiously rewriting the recipe. Luckily for us though, you don't even need a recipe. It's dead simple. Here's pretty much everything you need:

Meat (beef is good, but I almost always use chicken nowadays)
Cheese
Black beans
Onion
Lime
Your favorite hot sauce (I prefer a homemade vinegar-based jalapeño type, but for store-bought stuff, Cholula and Valentina are both excellent)

Flour tortilla dough
Jalapeño-lime spice mix

Let's start with the last two first: Flour tortilla dough recipes abound on the internet. Some list baking powder as an optional ingredient. It makes the tortillas a little puffy, more like the ones you find in the store. I never use it. I like mine not-puffy. They're super easy to make from scratch, so don't waste your money on the store-bought ones-- these are infinitely better. Also, the recipes are flexible so don't feel like you have to follow them exactly; the other day at work, I forgot to bring in a dough ball I'd made at home, so had to make one there instead- but I don't have easy access to the internet at work, so had to kind of go from memory. Technically, the recipe I made was 'wrong,' but it still came out fantastic. There's a recipe here if you want to use that, but this is more or less what I used at work:

Flour Tortilla Dough

2 cups flour
1/2 - 1 t kosher salt
1/4 c or so of fat (whatever I've got on hand. I've used butter, olive, and canola oil. They all work just fine.)
1/2 c or so of water

Mix the flour together with the salt, then add the fat and mix it all up with your hands until it's all nice and crumbly. Add some water and mix it up until you've got a slightly sticky dough ball going. Knead it a bunch of times, then cover it with a damp cloth and let it sit awhile.

And that's pretty much it for the tortilla. When it comes time to make it, if you've got a scale, a 3 1/2 - 4 1/2 oz ball will give you a pretty decent-sized tortilla when it's all rolled out nice and thin.


Jalapeño-lime Spice Mix

There is no specific recipe for this, nor is one needed. Here's what you do need-

Jalapeño powder
Granulated garlic
Kosher salt
Lime juice powder

Start with the Jalapeño powder as a base, and just keep adding the rest of the stuff to it until you think it's ready. I like a lot of lime flavor in mine, followed by the garlic. You won't need a whole lot of salt, but don't skip it altogether either. Jalapeño and lime juice powders can be found Here and Here, among other places.

*****

Alright, here's how you make a totally kick-ass burrito...

Take your meat of choice and dice it up pretty small (as I've mentioned before, way easier if it's partly frozen) then douse it liberally with your jalapeño-lime spice mix.


As you can see, there's a lot of spice mix sitting on the bottom of the bowl. That's partly because the chicken was still a little frozen when I doused it, and the spice mix doesn't stick quite as well like that. But also because I might have gone a little overboard on the spice too (well, not overboard for me, but for some people. My general rule of thumb is: use a LOT). No matter, once the chicken thawed a little more, it all got absorbed. Let it sit like that for at least a couple hours. Overnight is even better. A couple days is really good. When you're ready to make it, the chicken will be thick and goopy, and not very appetizing-looking:


Forget about what it looks like. Think about how it's going to taste. And it's going to taste like the best damn burrito in the world. Also, see that little fan in the right part of the photo? You're going to want a lot of airflow when you start cooking this. Either that, or hold your breath for however long it takes to make. Seriously, use your stove's hood fan, your ceiling fan, and get a couple more from down in the basement. Once you start cooking it, the jalapeño powder really messes with your ability to breathe.

Fire up your pan, add a little oil and let it get hot for a minute or two. Add the chicken and give it a couple stirs, then let it sit for a bit. Stir it up some more, but know that the spice mix will start to really stick to the pan:


That's good. You want that. Let it burn, but keep the heat at about medium so it doesn't totally scorch. Once the chicken is all the way, or at least mostly, cooked, squeeze in a little lime juice to help deglaze the pan. Maybe some white wine. A squirt of water will work, if you've got nothing else. But not too much. Now is when you also add the black beans, along with some of the juice from the can (or cooking liquid if you made them yourself). Let that cook for a minute and it'll dissolve all that baked-on flavor and then you can easily stir it into the rest of the mix:


Once you get to this point, turn it down to low, or even off, and fire up your tortilla-cooking surface. All I've got is a wok, unfortunately, but it does the job.


Set it on about medium-high and let it get pretty hot. Toss your tortilla in/on the pan, and when it starts to bubble up all over, it's ready to flip. It won't take long, so keep a close eye on it. As soon as you flip it, add your cheese. (But if you forgot to shred it, like I did, not a problem, just scramble to try and get it done before your tortilla burns, which you probably won't be able to do in time at this point, so just pull your tortilla from the fire when it's ready and then add the cheese. It'll still be one kick-ass burrito.) Don't let it sit too long on the heat, though. You should probably pull it from the heat before the cheese is even mostly melted; leave it on too long and it'll become brittle and break as soon as you try and roll it.
It's probably easiest to just put the tortilla right on the plate and then add the meat/bean mixture and your diced, raw onion, because then you can just roll it up right there and be done with it, but if your tortilla is too big for the plate before it's rolled (like mine usually are), not a problem- it rolls up easy. If you're not really sure how to properly roll a burrito, it goes kind of like this-

Lay all your stuff in the center and fold over the two sides:


Then take the bottom edge and fold it almost the entire way over to the other side (probably even a little more than what's shown here), tucking it in under itself as best you can:


After that, just tuck in the sides and roll it the rest of the way:


Grab your lime, a big-ass beer or two (that's a 24 oz. in the pic) and a big-ass bottle of decent hot sauce (34 oz. here)...


...and prepare to be blown away by the awesomeness of it.


Yeah, you're welcome.


(If you use steak instead of chicken, lettuce and tomato also go especially well with it too- but not iceberg. Go for something crunchy, like romaine.

*Also, almost forgot! If you make the steak version and want to put a salsa on it, use this one, instead of something else- the two were made for each other!)

Friday, December 17, 2010

Rockin' The Burrito Casbah

The humble bean and cheese burrito- mediocre convenience store freezer fare? Not when you make it yourself from scratch! Behold! The homemade tortilla, homemade refried beans, the homemade jalapeño salsa! One bite of this and even the girliest girl will slobber all over herself to get some more.


I humbly submit to you that I. Freaking. Rock.


*****

I had this for dinner last night and tonight. Both times I was freaking out at how delicious it was. And dead simple to make too (especially if you make up a large batch of tortilla dough and refried beans in bulk in advance, but even if you don't, only slightly more work; and the payoff is huge). I never, ever would have thought a bean and cheese burrito could be so good. Usually when I make burritos I go for chicken, or beef, or bacon, but I've had a huge bag of pinto beans lying around for awhile now and my pressure cooker just waiting for a chance to get used, so I finally made up a batch of beans and threw this thing together. It's almost too easy to make; you really can't do it wrong. As for the refried beans, there's recipes all over the place on how to make them, but I don't bother with any of them. Here's how I do mine- cook off a large batch using your preferred method. Mine would be the pressure cooker. If you don't have one, I can't recommend them highly enough. You can take unsoaked beans and have them completely done and ready to go in under 30 minutes! And that includes the time waiting for the water to come to a boil and build up pressure, as well as the slow method of releasing pressure (running the pot under cool water in the sink). So get yourself a large amount of cooked and slightly cooled pintos and throw them in the food processor. Add in a little of the cooking liquid, some oil, and whatever seasonings you think you might like in whatever amounts seem good. I tend to go very light on the salt since the salsa already has plenty in it, but here's what I tend to use:

Jalapeño powder
Granulated garlic
Mexican oregano
Lime juice
Epazote (a Mexican herb, kind of similar to oregano)
Black pepper
Cumin

and whatever else I've got lying around that sounds like it might be good. (Chipotle powder is excellent, and I've found that a pinch or two of cinnamon adds a really nice touch as well.) You'll want it just a little on the thin side, since it'll thicken up as you cook it. Whip it all up and then toss it in a pot with as much cheddar as you like (I recommend setting up some sort of double boiler so it doesn't all stick to the pan on the bottom) and then it's pretty much good to go. You definitely want the homemade tortillas for this. They're just so much better than store-bought. There's quite a few recipes out there for them, and they're all more or less the same. I tend to use this one a lot, but this one looks good too. I've never made them with the baking powder though, so I'm not sure what sort of a difference that makes. The dough freezes really well too- I usually make up a double batch and then roll them out into roughly golf-ball-sized portions and then freeze them on a sheet tray, then toss them into a zip top bag. As far as cooking them goes, an extra large cast-iron skillet would be great, but all I've got is a wok. Seriously. Works just fine, though. As far as the salsa goes, THIS recipe is where it's at! So, so good. I make mine slightly different, though- for one, I'm not a fan of serranos, so I use all jalapeños, and I don't strain mine, either. Seems like a waste. Once it's ready I just blend it all up with my stick blender and call it good. No, make that call it great, actually. I freaking love this salsa. If you decide you want to go with a store bought variety though, Valentina is pretty damn good, and Tapatio goes pretty well on burritos too.


Here are those links again-

Flour tortilla 1
Flour tortilla 2
Vinegar based hot sauce


Give it a whirl. I think you'll be surprised at how good a bean and cheese burrito can really be. I know I was.

Tuesday, February 16, 2010

My most favoritest chicken sammich ever.

Oh hell yeah...


You see that? That's what a chicken sandwich should look like. Or a burger, for that matter. Pretty much any kind of sandwich. In fact, that's what a real sandwich does look like- messy; falling over; sesame seeds falling off; toppings spilling out. Not all perfect and cookie-cutter like the pics in chain restaurant menus and on tv. But whatever, we all know this already. So, let's talk about this sammich, shall we? I'm not sure who came up with it. But it's what we tend to eat at work most days. In fact, I eat it- on average- 4 days a week for lunch, and have been for at least the past year, and I'm not the least bit tired of it. Not even close. It's dead simple, too. So simple, in fact, that it doesn't even sound all that exciting or praise-worthy, or even worthy of a blog post. It almost sounds like an average chicken sandwich, albeit one with a little kick to it.

But it's not.

Ignore it at your peril. It's your loss if you do.


(check out that homemade bun action!)

But if you're interested, read on...


So like I said, I've been eating it an average of 4 days a week for lunch for at least the past year and am not the slightest bit bored with it. It's just so damn good. (Worth firing up the grill in the wintertime for, that's for sure!) And fairly quick and easy to make. All the ingredients are pretty much available anywhere. Homemade-bun-action is not necessary (I don't bother at work, but I've made them at home a couple times- I plan on doing a post on them here at some point). Ingredients are as follows-

Chicken breast
Lettuce, Tomato, Onion (LTO, as we say at work)
Nacho-sliced pickled jalapeños
Chipotle peppers in adobo sauce
Mayonnaise
Hamburger bun (Duh, right? But I've used plain old white bread before- a 'decent' quality, of course- when I didn't have any buns, and I have plans to use hoagie buns next. Mostly because I need to use them before I have to toss them.)
American cheese

And that's it. Now, I know a lot of folks turn their nose up at the lowly American cheese. And I know that it's sort of 'ghetto' in the foodie world. But it really works on this sandwich. It really does. Don't believe me? Go on, then. Try it and see. You'll be surprised. (C'mon, one time won't hurt. You know you want to.) Oh, and full disclosure here, the cheese used on the sandwich in these particular photos was Muenster. Muenster is one of my favorites (you should totally try it on pizza instead of Mozzarella!) but in the case of this sandwich, I actually prefer the American, I must say. I just used Muenster because I had it, and didn't have any American. Muenster rocks the grilled cheese sandwich, but for this sandwich, trust me- use American. Ok, let's put it all together...

First things first, though. You should really marinate the chicken in some sort of marinade, or at least brine it to help keep it tender and juicy. As far as a marinade goes, I really like this one, even though it was originally meant for steak. I tried it once with steak and didn't think it lived up to its name, but then again, I'm not much of a red meat eater anymore. Most of the meat I eat nowadays is chicken, so I tried it on that and liked it very much. But if you don't want to bother with making that up, then a simple brine of sugar/salt water does wonders. I usually dissolve 4-6 T each of sugar and salt (kosher, of course) per gallon of water and allow the chicken to soak in that for about an hour. Now when it comes to cooking, the chicken is really best grilled. Grilled over an open flame, that is, be it gas or charcoal. But if you don't have a grill, or if it's wintertime where you live (as it is here) and you don't feel motivated to fire the thing up, I have cooked the chicken under the broiler in my oven, as well as on one of those indoor electric grills (though not the 'Foreman' type- a review is planned for the future). Both worked sufficiently well, though grilling over open flame is definitely preferred.

While the chicken is cooking, make up some delicious chipotle mayo (if you don't already have some. It keeps for quite awhile in the fridge, so can be made well in advance). Although there really is no specific 'recipe' for chipotle mayo- you basically just chop up the can of chipotles (or run through the food processor/blender) and mix with mayo until it tastes the way you want- the general ratio I use is one can of chipotles (~ 7 oz./200 grams) to 4 cups mayo. You can throw the whole mix in the food processor and mix it all that way, if you like, but I've found that mayo doesn't stand up to a blender very well. It tends to un-emulsify. Lately, I've just been using a knife to chop the peppers by hand, and mix them into the mayo with a wire whip.

Before I go any further, I just want to point out the obvious- not all brands of chipotle in adobo/jalapeño slices are created equal. Not by a long shot. At work, we use Casa Fiesta chipotles, and Pasado (or El Pasado, I can't remember which it is) jalapeños, both of which are excellent, but neither of which I've seen in stores around here. So these are my picks, based on what I've found around my area-


San Marcos jalapeños are excellent, as are La Costeña chipotles. However- and this to me is very weird- San Marcos chipotles are not so good (I'd use them if I couldn't find something else I liked) and La Costeña jalapeños are downright yucky. Totally mushy, no crunch at all. I took one bite and threw the can away. (I would not use them if I couldn't find something else I liked.) Other brands I've tried that suck are Mrs. Renfro's, and Bakers and Chefs (Sam's Club). No offense to either of those brands, I have no doubt they make other quality products, but their jalapeño slices are just plain yucky. If you're not sure, it's best to try different brands until you find something you like. Just buy the smallest size available, one or two brands at a time until you hit the jackpot. I like the San Marcos jalapeños so much that I went out and bought one of those #10 size cans of them (around 4 lbs./1.8 kg, I think).

***


Mmmmm.... homemade hamburger buns!

I'm trying out different recipes for homemade burger buns. This one was pretty good, but I've only tried it once or twice. I want to make it at least one more time, as well as try out some of the others I've found before posting a review about them.


There's really not much else to say here- melt the cheese on the chicken, spread a generous amount of chipotle mayo on the bun (preferably homemade) add the jalapeños, lettuce, tomato, and onion, and prepare for a flavor explosion.

Wednesday, July 23, 2008

Taco Seasoning

Just a quickie here. I remember when I was a kid, tacos were one of my favorite meals. And these days, they're one of the favorite meals of my two nephews. Maybe you loved them as a kid, or have kids of your own who love them now. I say ditch those little yellow packets of taco seasoning mix that you get at the store for $1 and make your own. It's just as good (I think it's better), quick and easy, and probably cheaper since you can make it from bulk spices, all of which you probably have lying around already.

You will need:

1/2 c chili powder
1/2 c cumin
1/4 c garlic powder
1/4 c dried onion flakes
3 T crushed red pepper
2 T kosher salt
2 1/2 T pepper
2 T onion powder

Frank's Red Hot
Fish sauce


Simply mix up all the dry ingredients thoroughly, and you'll have enough spice mix to handle 10 lbs. of ground beef. Make as you normally would, except that I highly recommend the addition of a little Frank's and a few drops of fish sauce, depending how many people you're feeding. Add Frank's to taste, but as for fish sauce, I make 10 lbs at a time at work and use maybe a tablespoon. (Depending on how thoroughly you drain your hamburger, you may have to add a little vegetable oil and/or water. I try not to drain it all the way, myself; fat is where the flavor is, right?)

No, I'm not kidding about the fish sauce. You won't taste a few drops, but you'll know it's there. I love the stuff anyway, but the other day I was listening to The Splendid Table, and they said adding a dash to different foods adds Umami. So now I've been using it in just about everything, not just Asian dishes. (Even before I started using it all the time, I was of the opinion that fish sauce could rightly be called a liquor. It really can be intoxicating, in a way.)


As I said, I used to love these as a kid. I rarely eat them like this anymore because I have a chicken taco recipe that is almost beyond words, so I try and eat those as much as possible.
That recipe is coming soon. You don't want to miss it, trust me.

Tuesday, April 8, 2008

Southwest Steak Sammich

Mmmmm, my mouth is watering just thinking about this. It's super tasty! (Of course it is, otherwise I wouldn't post it.) Not surprisingly, it's also made with our old friend the guajillo. I think of the guajillo as the Hugely Underrated Actor of the chile world. Think Jeff Daniels, John C. Reilly, or Bill Pullman, or whoever else you think is awesome but not nearly as famous as they should be. That's the guajillo. I think I've mentioned before that I think it's going to explode on the scene in a big way, though. Pace has come up with a salsa that uses them. However, I've been told it's not as good as mine. No surprise there. They really should have consulted me for advice first. No surprise there, either, though; nobody ever listens to me.

Anyway, let's get this Sammich show on the road, shall we?

This came about as a result of one of those happy accidents. I was experimenting at work, trying to come up with I-don't-know-what; something. I ended up with a sort of salsa. It wasn't bad by itself, but not good enough to use solely as a salsa. It needed some support. So I had this idea that I'd marinate some steak in it overnight and make sort of a Philly cheesesteak sandwich. Which I did, and it was excellent. The original was just the marinated steak, onions, mushrooms, mayo, and mozzarella on a hoagie bun, but with some input from some of my coworkers, it evolved slightly into what it is today. You're going to love it, trust me. There is a little bit of prep involved, namely the marinade, so it's not like you can just throw this together in ten minutes, but it's super easy to do, and you can make up the marinade in bulk and freeze it, and once that step is out of the way, it will take about 10 minutes to do! I've only tried this with steak, but I'm sure it will go well with any other meat, and maybe even tofu, if you're the vegetablearian type.

On to the marinade!

I do have a recipe for this, just not with me right now, and even though I know you don't need one because you've been reading this blog and you know that recipes are for jerks, I'll come back and post it in a day or two anyway. If I don't forget.

But for now...

bunch of guajillos, stemmed
salt
brown sugar
lime juice
water

That's it! Just chop them up roughly and cover with a couple inches of water. The chopping part isn't exactly necessary, I just do it so they'll sit better in the pan- Guajillos are kind of long and tend to stick out of the water in all sorts of different directions if you leave them whole. Add a couple pinches of salt, a small handful of brown sugar, and the juice of one or two limes. Once the salt and sugar are dissolved it should have sort of a raisin-y taste to it. Adjust as necessary. Then just cook until you think it's done. I usually reduce it by about half. Next, blend it in your blender, or in the pot with your handy-dandy immersion blender. (If you don't have one of those things, you need one. Trust me.) Sometimes at this point, I'll throw in a jalapeno or two, but it's your sammich today- make it however you like! Now your marinade is done! Make sure it's cooled down (actually, you might want to do that before you add it to the blender- could end up with a big mess, otherwise.) and add the protein. This stuff goes a looooong way, though- 2 Tbs will easily cover a pound of meat. Let it marinate overnight, or at least 6 hours, and then gather up the following players-

Hoagie bun
onions
mushrooms
colby-jack cheese
chipotle mayo
anything else you think would go good on a Philly-style sandwich

First off, about the chipotle mayo- I'm sure they sell commercial stuff, but I wouldn't waste my money. It's too easy to make on your own (not to mention most likely cheaper) using your favorite regular mayo and a can of chipotle peppers. Simply take one can of chipotles in adobo sauce and add to 4 cups regular mayo. You can chop up the peppers by hand with a knife and then add to the mayo, or just blend the whole thing in a food processor. I'd avoid using a blender- it can easily break down the mayo into oil. At least, that's what happens to us at work. Then again, our blender only has two speeds- super fast, and supersonic. I'd still avoid the blender. Also, I found a recipe for chipotle mayo from scratch awhile back, but haven't gotten around to trying it yet, so I won't post it here right now, but it might be worth looking into. A quick search on the Food Network's website should turn something up. Even if you don't want to bother with all that, just using a good quality regular mayo, mixed with the chipotles is really, really good. I used to really not like the flavor of chipotle at all, until The Amigos at work started making this stuff and one day just for the heck of it I tried it. Now I love the stuff.

Break out the fry pan, melt some butter, add the steak and veggies and a pinch of salt and pepper and cook until done. (Normally I don't like well-done steak, but in this case med-rare doesn't seem to cut it for some reason.) Toast your bread, slather on the chipotle mayo, add the meat and veggies and cover liberally with cheese. Lots and lots of cheese. Then pop the whole thing in a hot oven for a few minutes to melt said cheese. Alternately, you can just add the cheese to the steak/veggies mix while it's in the fry pan. We do that a lot at work, and it works well. Except we cook ours on a flat-top, not in the fry pan, but you get the idea.

It's quite messy, so have plenty of napkins handy.


I kind of like to eat mine with a knife and fork. However you choose to do it, I think you'll agree...


this one rises far above the level of "sandwich".


Truly, once you've had this one, you've had yourself a Sammich.

Friday, March 21, 2008

Thai Peanut Sauce

Boy howdy, have I got the goods for you today! This is it right here, folks. This is The One. I'm fairly certain that no matter what I happen to come up with after this, even if I live to be a hundred, it will not be as good as this stuff. And it's not so much the peanut sauce itself, although it is excellent, as what you're going to do with it when it's ready. More on that later. For now, though...

It all started one day many years ago when I was living in Chicago...
Ah, y'know what? Never mind all that. Let me just sum it up-

Years ago, I discovered Thai Peanut Sauce (and sticky rice!).

And for a long time I used store-bought peanut sauce. This stuff, to be exact-


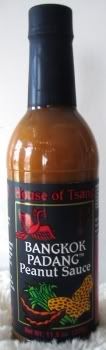
And it's actually very good. The only downside is that it's quite expensive- $4+ for about 11 oz. So after awhile I tried looking online for a recipe to make it at home, but I really couldn't find one. I mean, I found a bunch, but none of them sounded any good. Try it- do an online search for "Thai Peanut Sauce" and see what comes up. I think you'll be as disappointed as I was. Not to worry, though, you've come to the right place this time! And I even have an actual recipe for it, although as always, I encourage you to use it as a guideline only. The only reason I even worked one up is because at Sweeney's, where I work, they have a Thai Chicken Pasta dish- basically just chicken and linguine tossed in a peanut sauce- yeah, I know, "Thai" in name only. Anyway, shortly after I started working there, the boss tried my peanut sauce and liked it much better than the one they were using (no surprise there) so he told me to come up with a recipe that we could use at work, or else he'd fire me and I'd have to go back to working in those culinary coal mines known as franchise restaurants (yes, I'm thinking of you specifically, Ruby Tuesday, with your pre-cooked chicken!*). Ok, he wasn't quite that blunt about it, but I didn't want to take any chances, y'know? Sweeney's = good, franchise chains = coal mines in the 1800s.
So anyway, here's the recipe we use at work:

10 T garlic
10 T ginger
12 c coconut milk
12 c peanut butter
1 3/4 c packed brown sugar
1 1/2 c fish sauce
chili garlic sauce
juice from 3 limes + 1/2 c tamarind juice

Ok, let's break it down a little. First off, I know this is a lot. But I didn't resize it for several reasons- 1. I'm really bad at math. (And it took me a really long time to come up with those measurements specifically for work so I figure since I put so much effort into it, it should stay as is, y'know?) 2. You'll want a lot of this stuff on hand, believe me. 3. It keeps for quite awhile in the fridge, but even better, it freezes well, so you can just make a whole lot at once and not have to worry about it again for awhile. There's a few more reasons too, but that should suffice for now.
Ok, remember, this recipe should only be used as a guideline. At work we need a recipe for the sake of consistency. And because I can't really get the guys there to grasp the idea of "this is how it should taste, so just keep adjusting it until it tastes like this". It never seems to work out very well. So we use a recipe. (Or, they do. I do it my way, which is better.)
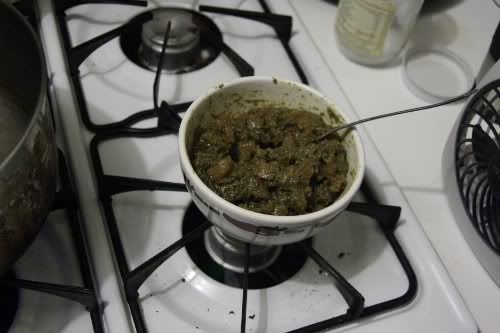
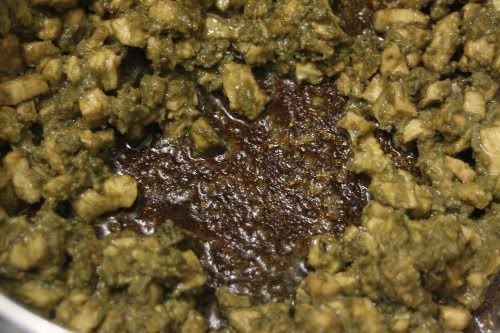
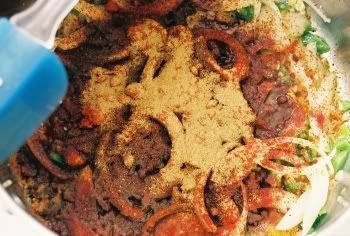
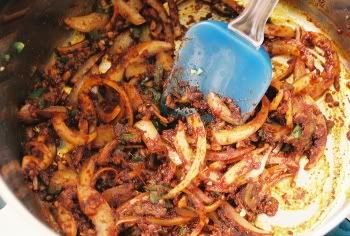
To start things off, I usually use more garlic and ginger than what's called for; usually around 12 Tbs. Also, at work we use water instead of coconut milk (that's what I used originally, but coconut milk is sooo much better. Don't skip it if at all possible.) Mince up the garlic and ginger nice and fine (make sure to use fresh garlic, not the stuff in the jar!) and heat it in some oil over medium- sesame oil is best for this. But you don't want to saute it- i.e. don't cook it till it's brown, just till it's nice and fragrant. Then add the coconut milk, fish sauce, peanut butter, chili sauce, and brown sugar. Heat over low. And I mean 
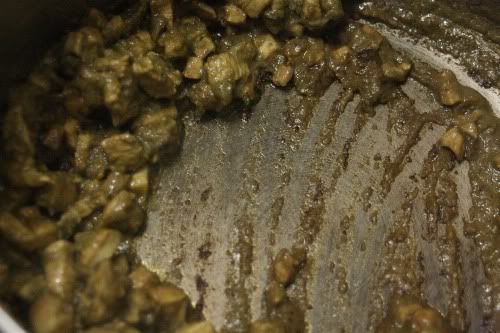
low. Peanut butter will overcook very easily, and when it does the oil separates and it looks all nasty and can't be made to look un-nasty, so take your time with this. If you're using an electric stove, be sure and set it on the lowest setting. Also, if you use a wire whip to stir it, it will blend up nice and smooth in no time. Just keep cooking over low until it's as thick as you'd like it to be. It doesn't take long at all. I usually make mine to about the consistency of a thick ketchup. (Keep in mind that you'll be adding lime and tamarind juice at the end.)
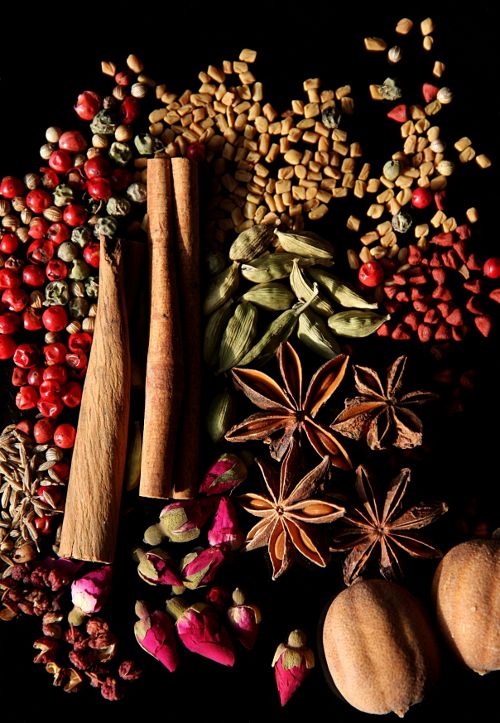
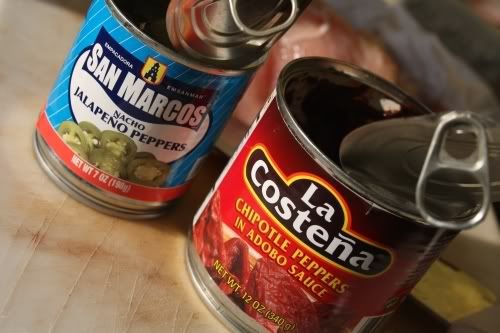
About that chili garlic sauce... I use, and highly recommend, this stuff-
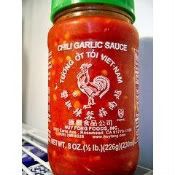


made by Huy Fong Foods. It's fairly readily available, even in small-town stores. How much you use is totally up to you. I didn't include a specific amount in the recipe because at work we use crushed red pepper, but I really, really recommend that you don't skip using this. It's too good. (I buy it by the gallon.) Luckily for me, I live in a town with one of the largest Hmong populations in the U.S. so Asian food stores are more common than Starbucks around here.
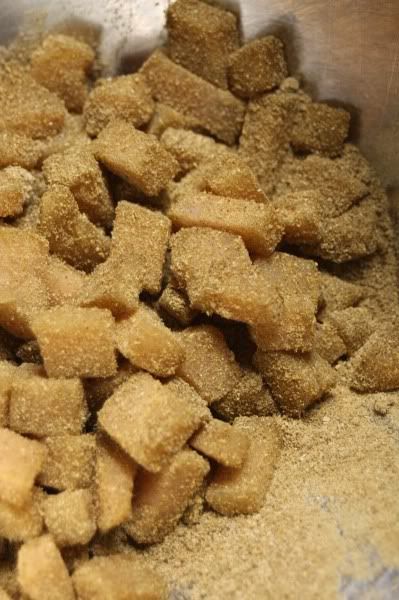
As for the brown sugar- when the recipe says "packed", it means packed- as tight as you can get it in there. And here's a tip- just pack it once and then weigh it out, then next time you make it you don't have to bother with all that cramming into the measuring cup! (I believe 1 3/4 c weighs about 14-16 oz.) I also prefer dark brown sugar to light.
As for the fish sauce, the main thing to look for is a minimum of ingredients- water, fish, salt. A lot of brands have sugar added, but in my experience, it's not very noticeable in most. The online Asian store ImportFood.com mentions 4 they like a lot. I found Three Crabs brand to be very sweet. I'd avoid using it, at least for this recipe. I personally don't like it at all (supposedly it's quite popular, though) and it's pretty expensive which is another reason I don't use it. I've used both Squid brand and Golden Boy a lot and can definitely recommend both.
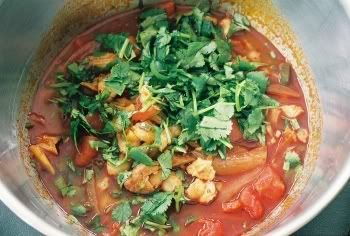
Once you get the peanut sauce to the thickness you'd like, turn off the heat and add the juice of 3 limes plus 1/2 c. tamarind juice. How do you get tamarind juice? Chez Pim has a tip near the bottom of her post on pad thai. In a nutshell, you take a block of Tamarind Paste-


and soak it in 4 cups of hot water until soft, then strain. If you have to, in a pinch you can use cranberry juice- it's taste is pretty darn close. Just don't tell Pim I said that- she's kind of a purist and all and might rip me a new one. Actually, now that I think about it, maybe you should tell her. After all, she's kind of a big name in the food blog world and if she rants about me on her blog... (even bad publicity is still publicity, is all I'm sayin'.)
Also, I find that adding just a little o.j. to the mix at the end really adds a nice touch.


I think that about sums things up. If you can't find any of the ingredients in your area, ImportFood.com has everything you need, and there are other online Asian stores as well.
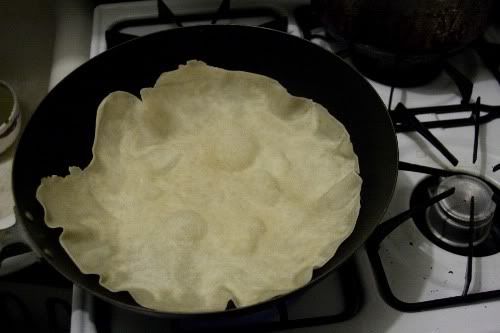
Now, on to the real star of the show- sticky rice! If you've not had this before, you really need to add this to your list of Things To Do Before I Die. And then get to it ASAP. Not just any ol' sticky rice from any ol' asian restaurant, though. Try it my way first. Seriously, if you could scoop up all of Heaven and plop it in a bowl to eat, it would taste like this. I am not lying or exaggerating. Not even a little. The name "sticky rice" is kind of a misnomer, though; it's not really "sticky" in the sense that you think of when you picture regular rice that's been overcooked. "Chewy rice" would be a more accurate way to describe it. But I guess that doesn't sound as cool, does it? Yeah, let's stick with Sticky.

I'm going to try and sum this up quick. (Or you can look Here. I swear I'm not trying to plug ImportFood.com- it's just a convenience for me, since they're the main one I'm aware of, but there are other Asian food sites online to order from as well. I encourage you to check them out.)
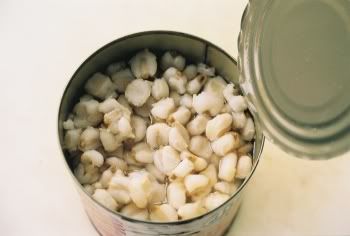
Sticky rice is also known as "glutinous rice" and "sweet rice". When it's dry, it looks kind of like a smaller version of puffed rice cereal-


When cooked, it becomes more translucent-


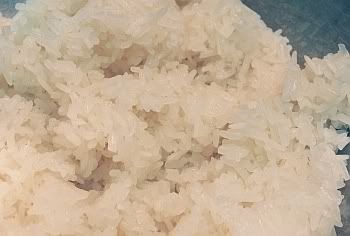
(it won't have that pinkish hue- that's just from the light in the room,
and I never got around to correcting it in Photoshop)


You don't have to cook it in a bamboo steamer, or if you want to get really food-nerd about it, one of those sticky rice steamer baskets (which I have, of course). You can use a regular colander and pot. You will need some sort of cheesecloth-type fabric to line the basket with, though. I've found regular cheesecloth to be too porous and flimsy, so I use a couple cloth napkins that I got at Target or something for not a lot of money.
My instructions are basically the same as those on the other site, but slightly rearranged- I soak mine first- for a solid 8 hours. You might get away with 6, but in my experience 8-10 is better. Then I rinse the rice, usually more than the 2-3 times they call for. You want the water to run fairly clear (it probably won't get 
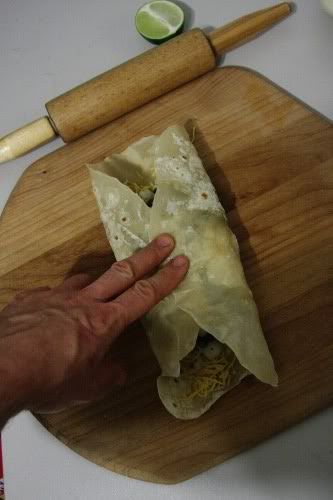
totally clear, though). Also, I don't think it takes 45 minutes like they say- mine's usually ready in 25-30. Once you've made it a couple times you can usually tell by looking whether it's done or not, but you can always taste it while it's steaming to find out. You'll know when it's done. It won't separate too easily with a fork and will be nice and chewy (and translucent). When it's done, if you take it off the stove and immediately flip the whole thing over into a large mixing bowl, most, if not all of it, will just plop right out of that cloth and into the bowl, leaving a nice easy-to-rinse-clean cloth. You'll want to cover it though, so it won't dry out. Now comes the fun part- take as much as you want and put it into a very large bowl- (I tend to just leave it all in that same stainless mixing bowl and eat out of that) then add the following-
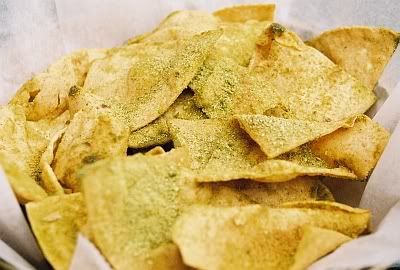
peanut sauce
fine grain sea or kosher salt
granulated garlic
chili garlic sauce

the order isn't super important, but I usually go wet before dry- makes it much easier to mix. Even the amounts aren't all that critical. I once made this for a friend and added by sight only- didn't taste even once to test it before handing her the bowl. The result? Success!
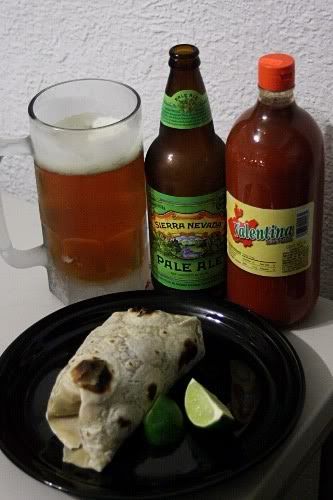


Heaven. In a bowl.

That's what you've got right there, my friend. Heaven in a bowl, I kid you not.


*To my knowledge, Ruby Tuesday no longer uses pre-cooked chicken. It was a short-lived, failed experiment. But that's their M.O., anyway. Along with all the other franchises.
Cheap bastards, I hate 'em.

Tuesday, February 26, 2008

Olé! Pozolé!

Grab your sombrero and break out that bottle of Cabo Wabo that you've been saving for a special occasion, 'cause it's time for some Pozolé! Er, is it "Posolé"? Or "Pozole"? Or "Posole"? Maybe it's "Mexican Chicken Soup"? Or "Mexican Pork Stew"? Ah, who cares? Call it what you want, just don't neglect to make yourself some, and soon. (Hat and tequila optional.) This stuff is not to be missed! It is soooooo gooooood! In fact, if I were somehow forced to limit my soup choices to only one kind for the rest of my life... well, it wouldn't be Pozolé, actually, it would be Pho. But if I could have two choices, then it would definitely be Pho and Pozolé, that's for sure! I love Mexican food, and Pozolé has in it all the flavors that I associate with good Mexican food- white corn, jalapeno, tomato, cilantro, lime, and cumin, just to name a bunch. It's like Mexico in a bowl, or something. In fact, if it's not the national dish of Mexico, it should be. Somebody get me Felipe Calderon on the phone, we'll straighten this out right now.
I got my first taste of Pozolé awhile back at work. One of the guys happened to bring some in that he'd gotten from one of the many Mexican stores/restaurants in the area. I didn't really like working with that guy. I'm glad he's not there anymore, to be honest, but when he brought that soup in that day and offered me some, he certainly caused me to overlook a lot of the reasons I didn't like working with him. I'm still glad he's gone; but I'm glad he worked there, too. Anyway, I'd never had it before, and didn't even know what it was, but when I got home I did some looking around on the internet and managed to find a recipe for something that sounded like it might be it. So I asked the boss to order some hominy so we could try it out, and a couple days later I brought the recipe in to give it a go. Now at Sweeney's, where I work, we have a Soup of the Day, which we sometimes offer as part of our daily special. So we have to make sure we have enough on hand to get through the day. And since this is Pozolé we're talking about here, I knew we'd need kind of a lot; I don't know, maybe 20 servings or so. But if you look at the recipe, it's only written for 4 servings. Hmm.... So this is going to entail math or something? Jeez, I just wanted to make some soup here, not calculate Fermat's Last Theorem. So I pretty much just gave the recipe a quick read-through to see what it called for and get an idea of how to do it and then tossed it aside. (I really do have a hard time following recipes.) I posted the link above mainly as a reference. You really don't need it. Pozolé is just one of those foods that are really flexible and kind of hard to make wrong. So let's get to it, shall we?

Ok, as I said, Pozolé is really flexible- meaning there's lots of different ways to make it and still call it Pozolé. So some of these ingredients can be considered optional, and you can use others that may not be called for in a particular recipe. I'm just going to list a bunch here that I think would be good, not that I would necessarily use all of them myself. Think of it as an ingredient smorgasbord. Some ingredients, obviously, are not optional, like the hominy. The recipe link I posted above says that if you can't find hominy you can substitute frozen corn kernels. I wouldn't go that far, myself. The flavor is too different, not to mention the appearance. (If you've never had hominy, it's flavor is like that of corn tortillas.)

Hominy
Pork, shredded
Chicken, shredded
Celery
Onions
Chicken stock, preferably homemade
Various chilis
Garlic
Cumin
Salt
Cilantro
Lime juice
Oregeno
Chili powder
Cayenne
Mushrooms
Diced tomatoes
Black pepper
Avocado
Paprika

Did I miss anything? I know on the Pozolé wiki page they mention cabbage, lettuce and radish as garnishes also. I listed pork and chicken for the meats- my understanding is that it's commonly made with either. My first taste of it was with chicken, but when I make it for myself I usually go with whatever's cheaper, since I'm kind of broke. It can also easily be made completely vegetarian and still be just as awesome tasting.

Chances are, you'll have to go with canned hominy, instead of dried. It's pretty hard to find, for some reason. Some people think the dried might taste better than the canned- I'm not so sure. (I know that when I make that Hummus I posted about earlier, canned chick peas taste exactly the same as the dried.) But I do happen to have some dried hominy, so one of these days when I get around to trying it out, I'll post an update here with my opinion on the matter. In the meantime canned will do just fine- however- brand does make a difference! At work we've been using Bush's- the same brand that makes the baked beans- and it's been very good; very tasty. But I happened to have a can of Juanita's on hand at home-


so I made a batch with that. Noticeable difference in quality, with the Juanita's being not nearly as good as the Bush's, and not very good in general. Sorry Juanita, but it's true.

Now as to the putting-together of it all... easy as pie! Actually, it's even easier than pie. Here's what I do...
I start off with either the chicken or pork, whichever I happen to be using, and cook it off in the oven; but I don't just cook it as is, although you could and it would still be good. I like to marinate mine in that guajillo salsa I told you about in a previous post. Oh yes. Major tastiness right there. Just coat it all up good in that stuff, place it on a pan or in a dish, add a little water or chicken stock, and cook on 350 F or so until it's done. It won't take long. You may want to avoid getting on the internet, though, or doing whatever it is you might be addicted to, while it's cooking. You might just forget about it like I did, hehe...


(I used it anyway; it was fine.) While that's in the oven, this would be the time to get the other stuff going. Heat up a large pot- like a stock pot- trust me, this stuff is good good good, and whatever amount you happen to make, you'll wish you had made more, so you might as well go for a lot right off the bat. (Incidentally, it doesn't do terribly well in the freezer, but it'll get eaten long before you need to freeze it anyway.) Add your oil, or butter, or whatever fat you happen to like cooking with. I'm currently using canola since I bought one of those industrial size containers of it at Sam's Club, but I think corn oil would be the obvious choice here. Add whatever veggies you're going to be using (except the diced tomatoes and hominy), along with the chilis and spices, and sauté away. I'd avoid adding the avocados at this point- they're meant as more of a garnish on the finished dish. Here's what mine looks like-


If it looks like I just threw the spices at the pot without so much as even a glance toward any sort of measuring device, well, that's because I did, pretty much. I can't be bothered to go over to my cupboard or drawer, look for the cups and spoons, then come back to what I was doing and evenly and accurately measure stuff out! Who's got time for such nonsense? Not me, that's who. (Hence the name of my blog. Who cares about recipes and such- How's it Taste? Don't worry, it'll be totally fine. This stuff's hard to mess up.)
Anyway, normally my Pozolé is not this red, but I had some smoked paprika that I've been wanting to try out, so I loaded it on.
Once all the veggies are cooked to the desired tenderness level, add the chicken stock and diced tomatoes. Bring just to a boil-

then turn down

way down low

almost off

but not quite.

[Ok, that was just an inside wink to a friend, so maybe not quite that low. Just down to a simmer, then.]

While that's simmering happily away, go check on the protein situation, if you're using any. If it's ready, shred it up. (Assuming you've let it cool enough to handle. Now that I think about it, you may want to take care of this part a little further in advance of the actual soup making part.) At this point, add the meat and hominy, and cook for about 10 minutes more. Right at the end is when you want to add the lime juice and cilantro. Now it's ready!

Garnish with additional lime juice, cilantro, cayenne, avocado, and whatever else makes your mouth water.


                            Olé! Pozolé!


p.s. Deborah over at Taste and Tell recently posted a recipe for Green Posole, (and I saw another new one somewhere else) - I swear I'm not ripping hers off- (hey, mine's red, hers is green! ; ) I've had this post planned since the very beginning; it just takes me awhile to get around to taking care of business.


Sunday, January 13, 2008

John's Addiction: A real-life fairy tale

Once upon a time, in a galaxy far, far away, there lived this kid. Let's call him John, just for story's sake. John lived in a boring little town, in a boring little state, where he ate boring old food. Actually, the food wasn't old, it was just boring; had no kick, you might say. One day, John decided to take a break from his boring routine of doing whatever it was he did, and head down to the local general store- Gordon's Market, it was called- and poke around inside, see if there was some junk food or something he could buy. At some point or other, whether it was on his way in or out I don't know, he happened to look down at the chip rack near the door and noticed a small red bag of something new. Something he hadn't seen before. Something called... "Hot Jalapeño". But because he'd had no prior exposure to the Spanish language, he utterly and completely wrecked the pronunciation of "Jalapeño", pronouncing the first half like the word "gallop", but with a "j", and dropping the tilde off of the "ñ" - resulting in "jallopeeno". (This was a very long time ago, though, and he has since learned his lesson and continues to laugh about it to this day.) "Hot Jalapeño", he thought. "Intriguing." (He knew they must really be hot, as there were little red flames coming off of the word "hot" on the bag.) Now, keep in mind that due to his surroundings and what-not, his tastebuds were the equivalent of that ninety pound weakling who gets sand kicked in his face by the bully on the beach in those old Charles Atlas ads. But, he was still young and foolish enough to not be aware of this. Plus they were only 99 cents! So he bought himself a bag and went on his way to wherever the heck he ended up going that day. Along the way, he started in on the chips, but got no further than two or three in. All of a sudden,
his mouth was on fire!
And he was in love...
Fast forward nearly 20 years. Hot Jalapeño chips have been MIA for well over a decade, and John is now a tired old man, embittered by years of searching for a suitable replacement. Searching, but never finding. It's just been one disappointing wannabe after another. Either no heat, or crappy flavor, but mostly a combination of the two. Sure, there's those Tostito's with Hint of Lime, which are really quite tasty, (addicting, almost) but even they can't compare with the legendary Hot Jallopeenos.
Fast forward a couple more years. John had previously played around with making his own version of Hot Jalapeño by taking some random packet of ground peppers he'd gotten hold of and, borrowing a page from Tostitos' cookbook, mixed in the spice packet from a Shrimp-Lime Ramen noodle package, and then sprinkled that on some chips and baked them in the oven. Not all that great. But they did have potential. It was at this point in time that Fate smiled upon John. And so he smiled back and asked her what she was doing later that night. She slapped his face and called him rude, saying that she was just trying to be polite, but that if he must know, she had a date. With Destiny. (It figures...) So with that, John cashed in what little karma he had saved up, bought himself another beer, and headed home to plot his next move. On the way home he happened to run into Fate's younger half-sister, Luck, with whom he'd had an on-again, off-again relationship for years. Taking a chance, he smiled at her. And... and she smiled back! And thus began...
a new legend...


John's Addiction

Award-winning Jalapeño-lime tortilla chips.
(scroll down about 1/4 of the page. I'm under the snack/sweet heading)


Ok, first off, I really do put that much spice mix on my chips. I like 'em with flavor and I don't skimp on it the way all the commercial chip makers do. I didn't add more just for the photo, nor did I spend all day with a professional photographer getting just the right shot, and then fixing it up even more in Photoshop. This is how they look every time I make them. Personally, I think these chips are pretty much unbelievable. And I think you will too. I've already shared them with all my friends locally; now I want to share them with my out-of-town friends. So if you're on my mutuals list over on Stumbleupon and would like to try them, just contact me in one way or another and tell me where to send them, and I'll ship 'em on out! (On me, of course.)
Plan on it taking me about 3 weeks to mail them.

If you're
not on my mutuals list, well... better luck next time? No... just contact me with an offer that I can't refuse; I'm sure we can work something out.

Wednesday, January 2, 2008

Peasant food

You really can't go wrong with this one. Frank's Red Hot kicks major ass.

Cook up some pasta- any kind will do (al dente, if you please).
Turn on your cast iron skillet and fry up said pasta in loads of butter and a couple hefty pinches of salt and pepper, until it's all crunchy and brown and burned in places. Toss into a bowl and douse with Frank's Red Hot. Crack open your favorite soda and prepare for tastebud Nirvana.

The simplest food really is the best.