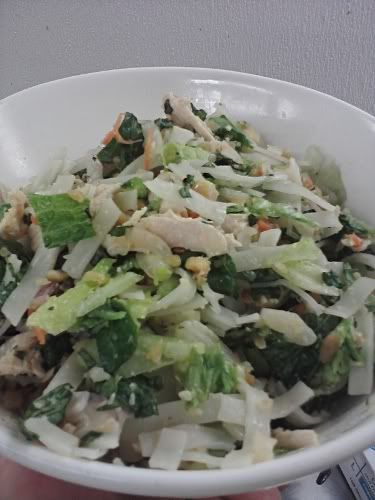
Wednesday, December 29, 2010

Hangover Relief Recipe

Had a little too much to drink last night? Or maybe planning to have a little too much to drink one of these nights? Well my friend, I do believe I have the solution for you. And yes, it actually works. Or at least it did for me- like a freaking miracle- the one time I tried it (two nights ago). Obviously further testing is required, but I have enough experience with alcohol- with too much alcohol- to know quite well how it affects me. And it affects me pretty easily. I'm pushing 40 and have found that even just a couple beers within an hour of going to bed, even if I don't feel even a little intoxicated, and I'm at least looking at a headache in the morning. The ravages of age... However, through past experience, research, and just asking other drinking friends, I've found that one thing that seems to help alleviate a hangover pretty well and pretty consistently, is electrolytes. The stuff you get in Gatorade and other sports drinks that you're supposed to replenish after a strenuous workout (or strenuous night of drinking). Recently, coconut water has been making the rounds as a good hangover relief- supposedly it's got a higher concentration of key electrolytes in it than other electrolyte-laden beverages. And that may be true, but I can tell you that it's also a lot more expensive than those other beverages, and it's definitely an acquired taste. To me it tastes exactly like the milk that's left over in the bowl of a sugary cereal (like frosted flakes, or something). Exactly like that. But, small price to pay if it works, right? Well that got me thinking- if electrolytes are key (and my past experiences drinking Powerade the next day, as well as similar stories I've heard from other people tell me that this is in fact true), then what exactly are electrolytes, and how can I get more of them in me, short of drinking more Gatorade or coconut water? So I started looking around online and found that electrolytes include: sodium, magnesium, potassium, bicarbonate (from baking soda) and calcium. I don't know if sugar is considered an electrolyte exactly, but I know that you need a certain amount of it during intense workouts to keep your blood sugar level up and maintain performance levels. So anyway, I decided to try and come up with my own electrolyte drink using some of those ingredients I'd read about and loosely based on this recipe for a homemade sports drink. Here's what I came up with, followed by how well it worked for me:

1 can of 100% fruit juice concentrate + 4 cans of water
1T Epsom salt
1/4t kosher salt
...
1 Potassium Gluconate tablet (550 mg, 90 mg Potassium, i.e. 3% DV. Found in the vitamin aisle.)

First off, I probably don't need to mention this, but I'd stay away from o.j, or other high-acid juices. And you definitely want 100% juice, no added sugar. I used grape juice; nice and neutral. The Epsom salt is where you get the Magnesium. You could also take a Magnesium tablet instead, and I'll probably do that in the future, but I used the Epsom salt this time around because I just happened to have some on hand, so figured I'd save a few bucks by not buying the magnesium tablets. In any case, Potassium and Magnesium tablets are fairly inexpensive- around $5/100-150 tablets, so definitely way cheaper in the end than drinks like Gatorade/Powerade/coconut water. Also, I think the key here is in prevention- don't wait until the next day when you're already super dehydrated and hung over to drink this up- drink it after you're all done drinking for the night (or even during. Just try to get some in you before you pass out/fall asleep). As far as the taste goes, it tastes somewhat similar to, but still better than, Gatorade/Powerade. I'm guessing it's the Magnesium that does that, so if you went with the Magnesium tablet instead of the Epsom salt, you could probably eliminate that altogether.

So here's my experience: two nights ago, I ended up getting a little drunk. Actually, a lot drunk. Like really, really drunk. Started off with beer, then switched to vodka later on. And mixing alcohols like that is pretty much guaranteed to leave me feeling some regret in the morning. Plus, I stayed up until between 4 and 5 in the morning. A pretty heavy night overall. On the rare occasion when I do drink that much, I always try to drink plenty of water in between, and especially before I head off to bed, to try and stay at least a little hydrated. But I got sidetracked and had little to none that night. I also try to take a couple Ibuprofen before heading to bed to help mitigate the pounding headache I know I'll have in the morning. But that night I forgot that as well. I did, however, remember to take a few large swigs of this homemade electrolyte drink and take 1 Potassium tablet before I crawled into bed. I woke up approximately 8 hours later- no trace of a headache, no trace of nausea. Nothing. I was a little groggy still (probably partly because I'm not used to staying up till past 4 a.m.) but fairly clear-headed and I remember thinking that it just hasn't kicked in yet, but it surely will. Except that it never did. Not the pounding headache or awful retching the contents of my stomach out, anyway. The only real hangover effect I felt was that I was very, very tired, almost fatigued, and had to lay back down for a nap a few hours after getting up. That always happens to me anyway after a night of drinking like I had, but not having an extreme headache and nausea to go along with it definitely made it much more bearable. Though I would almost expect to be that tired (even after 8 hours' sleep) if I'd stayed up that late and hadn't had anything to drink. So that was my experience with this hangover relief recipe. While it could, possibly, have been just a coincidence that I woke up feeling relatively fine after all that drinking (I've heard of it happening sometimes with other people), my past experience tells me that that's highly unlikely. So while I don't very often get quite that loaded, I think I'm going to stick with what worked next time I have a night of drinks planned. (I may also add some calcium to the mix too, since that was also listed as a key electrolyte.) I'd be interested in hearing in the comments how well this recipe works for you if you try it out, or any other methods you've tried that work really well. (Just remember- drink it the night before! And also, get drink/get drunk responsibly! Don't be like the guy we had at work the other day who got too tanked and tried to go someplace he wasn't supposed to and ended up falling down a steep flight of stairs, punching a hole in the wall at the bottom with his head.


)

Friday, December 17, 2010

Rockin' The Burrito Casbah

The humble bean and cheese burrito- mediocre convenience store freezer fare? Not when you make it yourself from scratch! Behold! The homemade tortilla, homemade refried beans, the homemade jalapeño salsa! One bite of this and even the girliest girl will slobber all over herself to get some more.


I humbly submit to you that I. Freaking. Rock.


*****

I had this for dinner last night and tonight. Both times I was freaking out at how delicious it was. And dead simple to make too (especially if you make up a large batch of tortilla dough and refried beans in bulk in advance, but even if you don't, only slightly more work; and the payoff is huge). I never, ever would have thought a bean and cheese burrito could be so good. Usually when I make burritos I go for chicken, or beef, or bacon, but I've had a huge bag of pinto beans lying around for awhile now and my pressure cooker just waiting for a chance to get used, so I finally made up a batch of beans and threw this thing together. It's almost too easy to make; you really can't do it wrong. As for the refried beans, there's recipes all over the place on how to make them, but I don't bother with any of them. Here's how I do mine- cook off a large batch using your preferred method. Mine would be the pressure cooker. If you don't have one, I can't recommend them highly enough. You can take unsoaked beans and have them completely done and ready to go in under 30 minutes! And that includes the time waiting for the water to come to a boil and build up pressure, as well as the slow method of releasing pressure (running the pot under cool water in the sink). So get yourself a large amount of cooked and slightly cooled pintos and throw them in the food processor. Add in a little of the cooking liquid, some oil, and whatever seasonings you think you might like in whatever amounts seem good. I tend to go very light on the salt since the salsa already has plenty in it, but here's what I tend to use:

Jalapeño powder
Granulated garlic
Mexican oregano
Lime juice
Epazote (a Mexican herb, kind of similar to oregano)
Black pepper
Cumin

and whatever else I've got lying around that sounds like it might be good. (Chipotle powder is excellent, and I've found that a pinch or two of cinnamon adds a really nice touch as well.) You'll want it just a little on the thin side, since it'll thicken up as you cook it. Whip it all up and then toss it in a pot with as much cheddar as you like (I recommend setting up some sort of double boiler so it doesn't all stick to the pan on the bottom) and then it's pretty much good to go. You definitely want the homemade tortillas for this. They're just so much better than store-bought. There's quite a few recipes out there for them, and they're all more or less the same. I tend to use this one a lot, but this one looks good too. I've never made them with the baking powder though, so I'm not sure what sort of a difference that makes. The dough freezes really well too- I usually make up a double batch and then roll them out into roughly golf-ball-sized portions and then freeze them on a sheet tray, then toss them into a zip top bag. As far as cooking them goes, an extra large cast-iron skillet would be great, but all I've got is a wok. Seriously. Works just fine, though. As far as the salsa goes, THIS recipe is where it's at! So, so good. I make mine slightly different, though- for one, I'm not a fan of serranos, so I use all jalapeños, and I don't strain mine, either. Seems like a waste. Once it's ready I just blend it all up with my stick blender and call it good. No, make that call it great, actually. I freaking love this salsa. If you decide you want to go with a store bought variety though, Valentina is pretty damn good, and Tapatio goes pretty well on burritos too.


Here are those links again-

Flour tortilla 1
Flour tortilla 2
Vinegar based hot sauce


Give it a whirl. I think you'll be surprised at how good a bean and cheese burrito can really be. I know I was.

Monday, December 6, 2010

Moroccan Chicken Sandwich


Tasty!

I want to start off with a disclaimer: I've never been to Morocco, or even eaten at a Moroccan restaurant here in the States. I have no actual hands-on experience with 'true' Moroccan food whatsoever- just my own experiments at home that resulted from a whole bunch of hunting around online for Moroccan recipes. So if you ever find yourself ordering a sandwich at a Moroccan restaurant- if they even have sandwiches on the menu- it will probably be nothing like this one. But calling it a 'Moroccan-Inspired Chicken Sandwich' sounded kind of dumb. (And besides, it's made with Ras el Hanout which is a 'true' Moroccan spice blend). But none of that really matters, because this sandwich is good. Really, Really Good. You (and all your friends) will like it, of that I'm sure. I'm also sure that you've never had a sandwich quite like this before. You know how I'm sure? Because I Googled 'Moroccan Chicken Sandwich' and found only a few things, none of which was even remotely like this. The closest one I've been able to find was this one. Not really anything like mine, which is also a whole lot messier. Easily one of the messiest sandwiches I've ever eaten (you'll need extra napkins, and a spoon wouldn't hurt either).

Here's the short list of what you'll need:
(specifics after the jump)

Boneless Chicken Breast
Cardamom Mayo
Ras El Hanout
Flatbread
Coconut Milk
Dried Fruit
Toasted Almonds
Cilantro
Diced Tomatoes

Optional, but not really, because they're totally amazing and easy to make. So if you do choose to make them optional, just remember that they're highly recommended:

Preserved Lemons


Ok, let's start with the Ras el Hanout, a blend of spices that is used extensively in Moroccan cooking. After that trip down the spice aisle at Target that I mentioned in the previous post, I started hunting around online for Moroccan recipes, paying close attention to the spices used, and I found a boatload of recipes for Ras el Hanout. You can certainly buy it many places nowadays, but I think it's better (and way cheaper!) to make your own, whether it's your own personal blend, or from a recipe you found on the internets. And being a blend, there are about as many variations of it as there are people who use it. I never did try a single one of the ones I found, though; because while they're all similar, they're all quite different too- some called for cumin and paprika, while others left out the cardamom (!) or coriander. There wasn't really a whole lot of consensus, which is totally fine and makes perfect sense, so I took a bunch and tried to come up with my own, based on the whole of what I found. First, here are the ones (that I can remember) that I based mine on -

Cyber Kitchen
Kayotic Kitchen
Cannellette
Chow
The Epicentre

(The link that I posted above to the Moroccan Grilled Chicken Sandwich also has a recipe for Ras.)

A few used saffron, which I would have liked to have tried, but it's just too expensive for me ($18/3 grams, or $106/oz. at Spice Barn, the cheapest place I've found). But I'm happy with what I came up with nonetheless, although I still consider it a 'working' recipe' (meaning that it works great for me, but I plan on tweaking it a lot in the future- maybe less pepper, definitely more cardamom).

My version includes most of the usual stuff, plus some more:

paprika, cumin, fennel, ginger, turmeric, kosher salt, cinnamon, garlic powder, coriander, allspice, cardamom, nutmeg, cloves.

A couple notes: I generally recommend toasting most of your spices first- adds a nice richness to the flavor. It's kind of hard to taste-test a spice blend of this sort as you're making it, since it really needs some sort of vehicle to bring out the flavors of the spices that are in it. If you were to taste it straight out of the bowl (which I always do when trying new blends) it would probably taste like dirt. Bitter dirt. And you would be thinking that it couldn't possibly taste good on anything. But you would be wrong! Try blending it with some honey, or coconut milk and dried fruit which is what I do in this recipe.

So that's the Ras. Now comes the Cardamom Mayo! This stuff is just flat-out delicious. I have no idea how I came up with it or what, if any, inspiration I had for it. There must have been some rhyme or reason for it, but then again, maybe not; maybe I was just experimenting and got lucky, I really don't remember. I did try making it once with whole-milk yogurt, thinking that would be a little more true-to-style, but didn't really like it. Mayo is preferred (homemade mayo is especially preferred. I'll post a link at the end to a nearly foolproof homemade mayo recipe I found).

Cardamom Mayo

3/4 c. mayo
1T ground coriander
1T ground cardamom
Zest of 1 lemon, juice of 1 half
1T honey
pinch salt/pepper
sprinkle cinnamon/cayenne

Definitely don't skip the cayenne, but be careful about adding too much- the excess heat isn't the issue, it's just that the flavor of the cayenne overpowers and ruins all the other flavors. Less really is more.
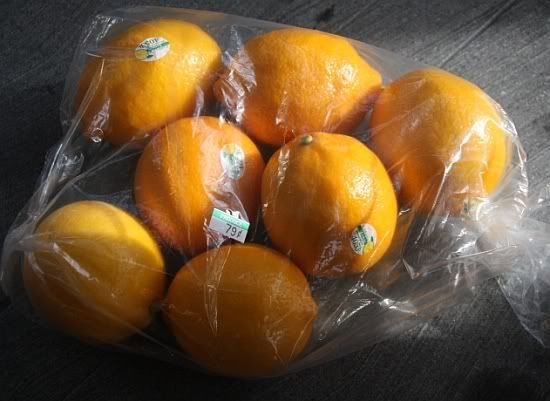
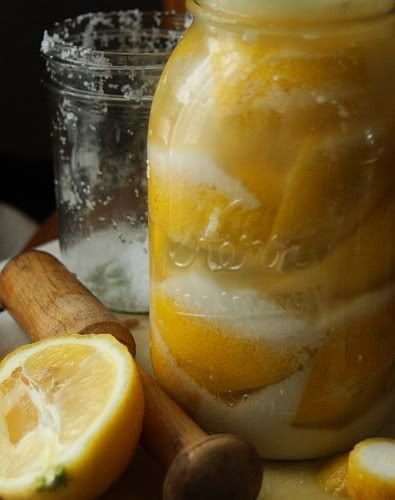

Preserved Lemons

You can buy commercially made preserved lemons, if you don't feel like making your own, or need some in a pinch, but I've heard that they're very expensive. But they're so easy to make on your own, not to mention dirt cheap, that there's really no reason not to. Pretty much all you really need, besides lemons and salt, is time (they're ready in about 6-8 weeks). I'm going to skip the recipe here, but here are a couple links to recipes I've used:

Tony Tahhan

Sippity Sup

Tony's is the first one I used and it's dead simple. Sippity's recipe calls for adding some aromatics. I made a batch using the exact recipe, minus the bay leaves because I didn't have any; honestly, though, I didn't really notice a difference. Not that it's not worth doing, I just think I'd add more of everything it calls for. But one thing I especially like about the recipe, is that she has a photo of them sitting in a large glass jar, held under the juice with a small plate. It seems obvious now, but since all the other recipes I've seen call for using mason jars, if you've never made any before, then you might subconsciously conclude that you need a mason jar to make preserved lemons. Well, follow her example and use what you've got. I actually have several jars of the stuff in my fridge, but I also have a 1-gallon Rubbermaid pitcher of them too. It was a lot easier to make them- and it's also easier to remove them- but the downside is that I also have a 1-gallon Rubbermaid pitcher of them in my fridge, which is probably more than I'll ever be able to use. Seriously, a little goes a long way- 1 piece (1/4 lemon) is easily enough for 2 or 3 servings.
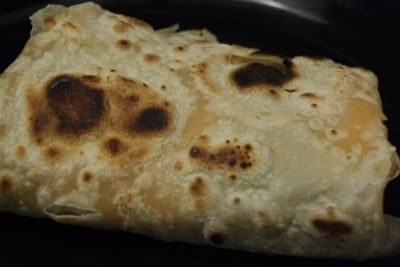
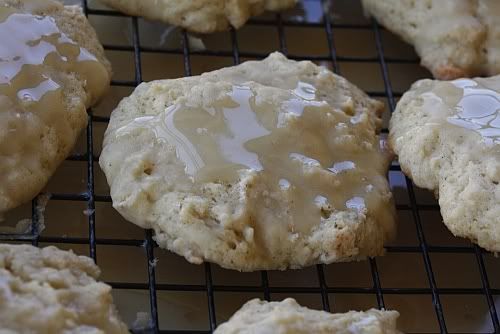
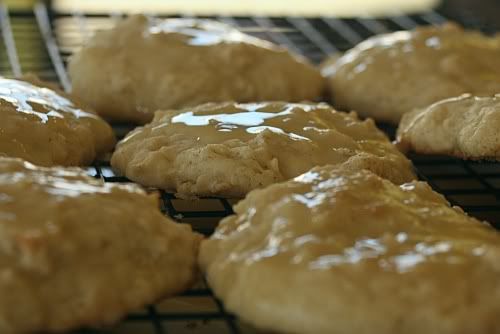
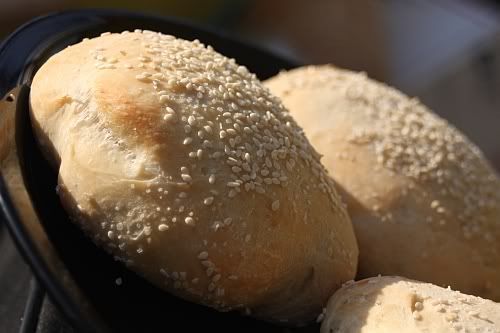
Flatbread

If you know of a decent store-bought kind that you like, go for it; if not, I found this one over at Allrecipes awhile back and have been using it ever since (I always skip the garlic, though). The flatbread you see in the photos was made with this recipe.

Ingredients:
1 (.25 ounce) package active dry yeast
1 cup warm water
1/4 cup white sugar
3 tablespoons milk
1 egg, beaten
2 teaspoons salt
4 1/2 cups bread flour
2 teaspoons minced garlic (optional)
1/4 cup butter, melted
Directions:
1. In a large bowl, dissolve yeast in warm water. Let stand about 10 minutes, until frothy. Stir in sugar, milk, egg, salt, and enough flour to make a soft dough. Knead for 6 to 8 minutes on a lightly floured surface, or until smooth. Place dough in a well oiled bowl, cover with a damp cloth, and set aside to rise. Let it rise 1 hour, until the dough has doubled in volume.
2. Punch down dough, and knead in garlic. Pinch off small handfuls of dough about the size of a golf ball. Roll into balls, and place on a tray. Cover with a towel, and allow to rise until doubled in size, about 30 minutes.
3. During the second rising, preheat grill to high heat.
4. At grill side, roll one ball of dough out into a thin circle. Lightly oil grill. Place dough on grill, and cook for 2 to 3 minutes, or until puffy and lightly browned. Brush uncooked side with butter, and turn over. Brush cooked side with butter, and cook until browned, another 2 to 4 minutes. Remove from grill, and continue the process until all the naan has been prepared.

I don't know about the golf ball size measurement because I weigh mine out now. I've found that 3-3 1/2 oz. works really well for me. It's always tempting to make them bigger so I can have a bigger sandwich, but it never really works out in practice. You can only fill them up so much before everything falls apart and makes an even bigger mess than it otherwise would. Also, while an oiled grill on high probably works great, I get fantastic results from cooking mine in a dry wok on medium.

I hate when recipes call for yeast by the packet because I buy mine in bulk. I have a scale, so if they list the weight, it's not really a problem, but if you also use bulk yeast and don't have a scale, let me save you a step:

1 packet of yeast is approx. 2 1/2 t.


Putting it all together
Boneless Chicken Breast
Cardamom Mayo
Ras El Hanout
Flatbread
Coconut Milk
Dried Fruit
Preserved Lemons
Chopped, Toasted Almonds
Cilantro
Diced Tomatoes

(I don't have exact amounts for any of this, but figure that you're only going to be able to use about 3-4 oz. of chicken breast per sandwich.)

Start by adding coconut milk and water to a medium sized saucepan, over medium heat- use a 1:1 ratio, or even more, of water to coconut milk (say, 1-1/2 cans of water per can of coconut milk). It may seem rather thin now, but it'll thicken up 
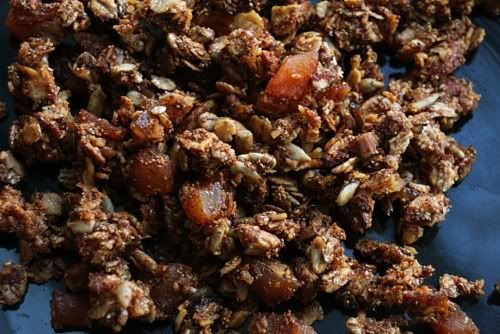
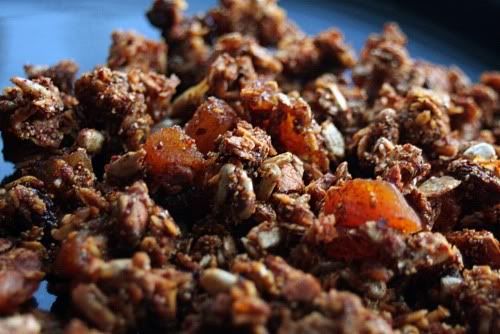
a lot as it cooks. Add in as much or as little Ras el Hanout as you like. I like a lot. I don't even measure it- I keep mine in a wide-mouth jar and just shake a bunch in until it looks good. Taste it and see (note that it might seem like it needs a little... 'something;' sugar, maybe? That's where the dried fruit, and later on, cardamom mayo come in). When it's to your liking, add in your raw chicken, either sliced very thinly or diced, 1 piece of minced preserved lemon peel, and a handful or so of chopped dried fruit. I've used figs, raisins, dates, and apricots; each one adds its own unique take on the flavor of the final dish and I like them all. Raisins have the added benefit of being small enough that you don't have to chop them. (And in case you missed my last post- Walgreens, of all places, has really high quality, really cheap ($1/box) dried fruit. At least the one in my neighborhood does, but I'm pretty sure the rest have the same supplier.) You'll probably have to turn the heat down to low because the mix will thicken considerably and start to bubble and splatter a lot. Now would be a good time to spoon out a piece of the chicken and take a bite to see if it's done. No, I'm kidding. You should probably wait several minutes until it at least 
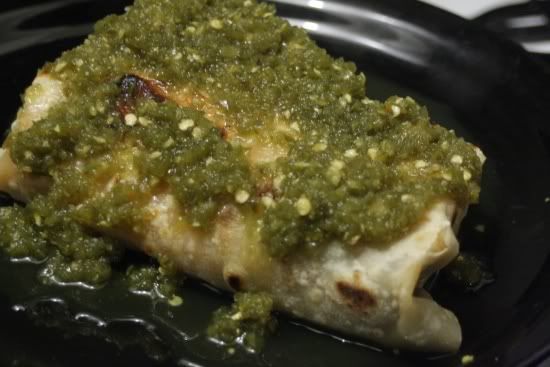
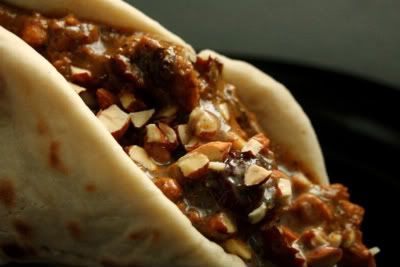
looks like it's cooked, then spoon out a piece and maybe set it on a cutting board or something, to slice it open and check for sure. And unless you're using really large, thick pieces (not recommended) it really doesn't take long at all, maybe 7-10 minutes. When you've decided that it is in fact ready, take a piece of freshly made/heated flatbread and spoon a bunch of the chicken/fruit mix into a line down the center of it (try to drain off most of the coconut milk beforehand; it's going to be plenty messy as it is without it). Add some diced tomatoes, a spoonful of cardamom mayo, a sprinkle of the almonds, and then the cilantro. In that order.


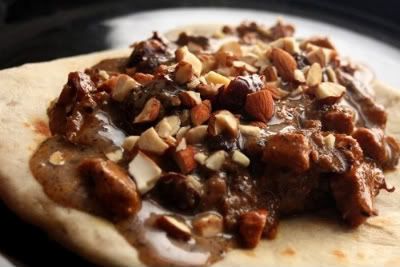
Fold it into a taco shape and prepare yourself for one of the tastiest, messiest sandwiches you've ever had.

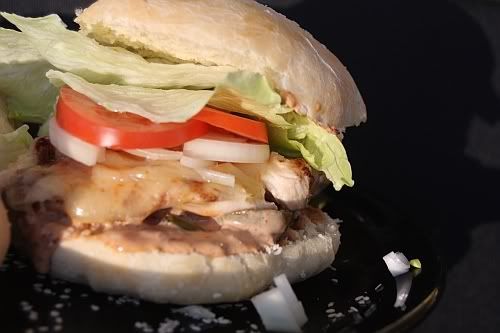
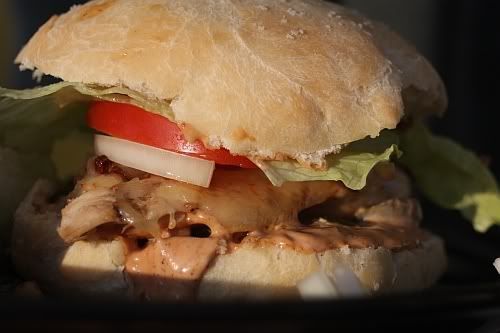
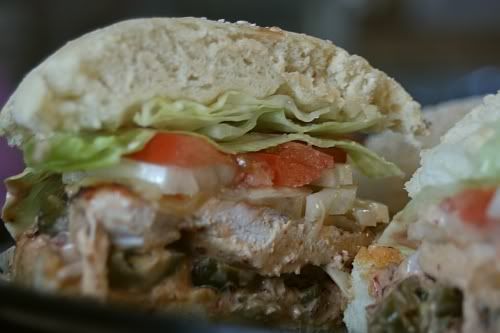
Variation: If you're planning a bbq or something, or just don't feel like going the messy route, this will also make a great 'regular' sandwich- just make a marinade out of some Ras and oil and lemon juice/preserved lemon and then coat some chicken breasts with it and marinate for awhile before tossing on the grill. Goes great on a regular hamburger bun with Lettuce, Tomato, and Onion, and also the cardamom mayo, almonds and cilantro. Maybe a slice of Muenster as well.

This is a great recipe for homemade mayo that I found (you'll need an immersion blender). When I was getting ready to make it for the first time I remember thinking that there's no way this would work. No Way. But it did! In fact, it works fantastic! No more super slow drizzling of oil, no need for a food processor. Once all the ingredients are in your mixing vessel, it literally takes about 5-7 seconds to whip up a batch. Keep in mind, though, that room temperature ingredients are key. The only time this didn't work for me was when my egg was close to- but not quite at- room temp.

***

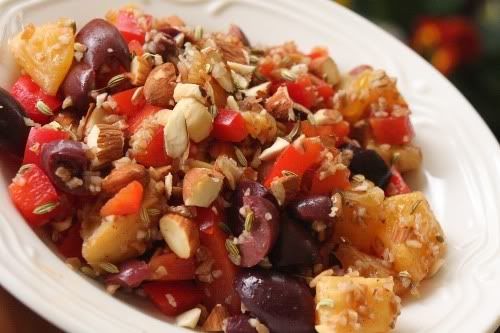
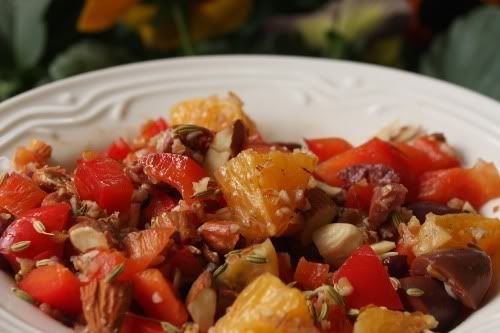
Yes, I realize there's no cilantro or tomatoes on the sandwich in these photos- that's because even though there's a grocery store only a mile and a half from my house, when you don't have a car, you have to learn to make some sacrifices. In this case, I sacrificed the cilantro and tomatoes. The sandwich was still awesome. In no case, however, should you ever sacrifice the cardamom mayo or almonds. They're an integral part of the sandwich. If you don't have any on hand, hold off on making this until you do. And if you're allergic to eggs or almonds? Well, it's worth whatever reaction you might have. If you're deathly allergic, however- well, at least you'll die with a smile on your face.


The plate's not as dirty as it looks. I swear.

Monday, November 8, 2010

Moroccan-Spiced Granola

It all started with a trip down the spice aisle of my local Target store awhile back. I almost never buy my spices at the grocery store since they're so much more expensive than online (links at the end) or even at my local co-op (some of the grocery stores in my area have a decent bulk section where you can get spices a little cheaper than the spice aisle, but the quality isn't quite as good as what you'd find online, not to mention the selection far more limited). Anyway, as I was walking down the spice aisle, I happened to notice these little colorful cardboard containers of stuff so I stopped to check them out. One of them was called Moroccan Tagine. Sounded interesting, so I read the back of the package. It called for mixing the spice mix with stuff like chicken, coconut milk, dried apricots, diced tomatoes and some other stuff. So then I started reading the list of ingredients in the spice mix and was really happy to see that everything in it was actually listed, i.e. no generic 'spices' listing. I figured if I was going to pay too much for a packet of spices I at least wanted to know everything that was in it so that if I liked it I could try to come up with my own version for less. So I bought it and made the recipe that was on the back. It was pretty good and I've always planned on making it again using my own version of spices, but I've just never gotten around to it. I did, however, start looking around online for Moroccan spice blends and recipes. I found various recipes for Ras El Hanout and Preserved Lemons, but never would have imagined that that trip down the spice aisle at Target would have led to coming up with the salad that I posted about recently, or today's recipe. (Oh and stay tuned for the Moroccan Chicken Sandwich I have coming next month- it's freakin' delicious.)


Moroccan-Spiced Granola


This recipe is the result of only the third time I've made the stuff, but I tweaked it a little each time and I'm pretty happy with the result. I think at this point the only thing I might change overall is to add some more almonds to the mix. (It's kind of a long list of ingredients, but it's still a pretty simple recipe.) It's definitely a different flavor for granola, one that I don't expect to be seeing at my co-op anytime soon, but I like trying different things. If you feel the same way, give it a go.


1 c rolled oats (or wheat, or barley)
3/4 c chopped toasted almonds
1/2 c unsweetened shredded coconut
1/3 c sunflower seeds
3/4 c chopped dried fruit (I used 1/2 c apricots, 1/4 c raisins)
1/4 c granulated orange peel
2T paprika
2T sumac
1 1/2 T ea. cardamom/coriander/cinnamon (ground, of course)
3/4 t ginger
1/4 t cloves
1/2 t allspice
1/2 t cayenne

***

1/2 c honey
1T lemon juice
1T sugar
1/4 t kosher salt
1/8 t baking soda
1/2 preserved lemon
1T coconut oil


Mix all the dry ingredients thoroughly in a stainless mixing bowl. Combine the baking soda, salt, sugar and the wet ingredients in a small saucepan and heat to a simmer, stirring occasionally to break up the preserved lemon (I had good results just using a wooden spoon, but I'd imagine a wire whip would work even better. Or you could just chop them up with a knife beforehand, which I didn't think of doing). Should be ready in under 10 minutes, but I'm thinking letting it bubble away on low for a little while longer will really help infuse the honey with the preserved lemon flavor. Once you decide it's ready, just pour the honey mixture over the dry stuff and blend thoroughly. Spread out on a greased cookie sheet and bake on 225 F for about 20-25 minutes, stirring halfway through. It'll still be pretty soft when it first comes out, but I wouldn't go longer than 25 minutes, otherwise the fruit tends to harden. Once it cools, it should get nice and crunchy, but if it's not crunchy enough for you, you can always throw it back in the oven for a bit.
(I forgot to make a note of how many cups this ends up making, but I used the 11 1/2 x 11 1/2 tray from my toaster oven, greased with coconut oil, and it mostly fit on that- there was a little overflow, but mainly because the tray is only 1/2 inch deep.)


Pretty darn good as it is, but I've been eating it mostly as a breakfast cereal. Damn tasty that way. Probably good in yogurt and ice cream too.

Ok, some notes-

1. When I compare this recipe to other granola recipes I've seen- this one has a lot of spice mix overall. It's definitely not overpowering on the spices (at least, I don't think so) but there is kind of a heavy coating of the stuff; my recipe calls for only one cup of rolled grain with entire tablespoons of some spices, whereas other recipes I've seen call for 2-3 cups of rolled grain with mere teaspoons of spice. So if you're not sure about using so much, I'd recommend mixing up all of the spices separately from the oats, fruit, nuts, etc. the way it's called for and then start by adding half or whatever amount looks good to you. Me, I'm really happy with the way it came out and plan only minor tweaks and edits.

2. Sumac- I don't really know how to describe it's flavor other than that it's tart; it has kind of a vinegar-y, sourdough-starter flavor to it. If you can't find it locally, you can always get it at the spice links I'll be posting at the end. I hate to say that it's 'optional' but if you don't want to/can't buy any, it probably won't radically change the outcome.

3. Baking soda- I'm not really sure it's necessary. I just put it in there because when I've made nut brittle and similar stuff in the past it always called for it, so I figured it might help with the crunchiness factor a little bit. Up to you.

4. Cayenne- At only 1/2 teaspoon, I really don't think this is too much, even for your friends with wimpy taste buds. It really is a mild, mild heat. I highly recommend not leaving it out.

5. Preserved Lemon- I wasn't really sure about this at first, so I left it out of my first two attempts at making this, but now that I've tried it, I can't recommend it enough. It really, really adds a nice, unique flavor to it that you pretty much can't get any other way. They do sell commercial preserved lemons, if you happen to live in a large, ethnically diverse city, but last I checked they tend to be pretty expensive. They're dirt cheap to make though- all you really need is patience, since they take at least a month (but they last pretty much forever). The granola will be fine without them- but with them, it'll be on a whole new level.

6. Dried fruit- Any combination of your favorite dried fruits will work (probably not Craisins though. I don't think those should really count as dried fruit). I've used figs and dates as well. Oh, and if you have a Walgreens in your area (pretty likely unless you live in a desert cave somewhere) I've found that they have excellent- and I mean excellent- quality dried fruits. They come in little 4-7 oz. boxes for $1, and the brand is Deerfield Farms. Walgreens! Who'da thought, right? But the quality of the figs I've gotten from them absolutely blows away what they're selling (for a lot more $$, I might add) at my local co-op, and they're even better than the stuff I can get at work from US Foods (which I had thought was excellent). It's not just the figs, though; their dates and apricots are excellent too. Worth looking into next time you need some dried fruit.

7. Coconut Oil- I'm not sure it's necessary either; at least not in the honey-lemon mix. I've seen recipes that call for some sort of oil in with the honey/corn syrup/sugar mix, so I went with it. You could probably just as well leave it out. As for greasing the pan, I just went with it for consistency. Pan spray would do fine too.

***

Spice links-

I generally get my spices online from these guys:

Spice Barn

MySpicer

Great American Spice Co.


Spice Barn is my go-to place because their prices are good and so's the quality (on most things, anyway. I can't recommend their honey powder). I really like the other two as well, but be aware that MySpicer tacks on a service charge for orders under $30, in addition to shipping. I'd recommend doing price comparisons on most things for all three too because some have better prices on things than others; there isn't one place that beats out the other two on price for everything.

Tuesday, October 12, 2010

Fresh Thai Rolls (Spring Rolls) Made Easy(er)

I love fresh Thai rolls. Love them. I could eat them as an entire meal for any meal of the day and be happy. But making them kinda sucks. They're not terribly difficult, and in fact it's probably the thought of making them rather than the actual process that sucks, since once I get going it never seems as bad as I thought it would be. Problem is, getting going is the hard part. (Kind of like writing new posts for this blog; I've got plenty of stuff in mind, but actually sitting down to do it never seems to happen.) Anyway, for me the hardest part about making them was always the spring roll wrappers- you dip them in hot water to soften them, but then they always end up folding over themselves or sticking to the work surface with lots of ripples in them, or whatever; basically the wrapper part was always just a pain in the ass. But then I found out one day that it was because I was soaking them for too long (too long being about 5-6 seconds, total). Seems pretty obvious, but for some reason I never caught on, and anytime I talked to someone else who made them, they always had the same problem. It doesn't help that a lot of the recipes you see out there tell you to soak them for too long anyway- I just saw one over on About.com that said to soak them for 30 seconds! Better to go with the one over on Allrecipes.com that says to just dip it in the water for 1 second. That really is all it takes- you basically just want to get it wet, because when you take it out and set it on the table, it's going to keep absorbing the residual water and soften up to just the right amount to make it easy to roll. And, since it'll still be somewhat stiff when you take it out of the water, it'll be completely flat when you lay it on the table, no wrinkles or ripples, no moving the edges around in an effort to get it 'right.' And that's pretty much all I'm going to say about that, because this post isn't exactly about how to make Thai spring rolls- it's more like how to make a Thai spring roll salad. That's right, sort of a cheater's Thai spring roll. I was making myself some one day, marveling at how much easier they were to make now that I wasn't over-soaking the wrappers, when it occurred to me to just mix it all up in a bowl like a salad- everything's exactly the same, just a whole lot quicker and easier to make! I haven't looked back since. I make this a lot now, far more than I ever made actual spring rolls. The following is the recipe that I came up with and tend to always use (I really like it a lot) but there's tons of Thai spring roll recipes all over the internet, so tweak away- there's no 'one' right recipe to make a spring roll. A lot of recipes I've seen call for bean thread noodles, but I like plain old rice noodles in mine; some call for shrimp, I use chicken (more work, but it's cheaper); I typically don't use cucumbers, but they go well in this. Whatever you like. If you've never made fresh Thai rolls before, this recipe should be a good start, though. I think you'll like it.

This is also kind of a large recipe, since we ended up putting the salad on our banquet menu at work. So I had to come up with something to be able to feed a lot of people, and this is it. (I admit it, I'm too lazy to bother sizing it down for just a few people. Usually when I make it for just myself, I don't even follow the recipe anyway, as far as amounts go- I just mix it all up until it tastes how I want. But for the purposes of this blog, and to make it easier for folks who've never tried making these before, here you go) :

Thai Spring Roll Salad

8 oz rice noodle (dry)
1lb boneless chicken breast
1lb chopped romaine (Napa cabbage is also good)
crushed peanuts
fresh mint
fresh basil
(cilantro is good too, but isn't part of the recipe)

Marinade/dressing

2t salt
3/4c sugar
1c rice vinegar
1c fish sauce
1c + 2T water
1-2 t crushed red pepper
1T fresh lime juice
2T chopped garlic
1 lg or 1 1/2 medium carrots, shredded
1/2 onion, sliced very thin

The way I typically do this is to use warm-to-hot water to dissolve the sugar and salt quicker. Then just add everything else to the bowl and mix it up good. Also, you may want to set some marinade aside for extra dressing for the salad.

Cook the chicken breast on a sheet pan in a 350 degree F oven in a sugar/salt water brine (just dissolve equal parts sugar and kosher salt in some water. I don't have an exact amount as I tend to go by how it tastes- just slightly salty/sweet- but I think 1/4 to 1/2 cup each per gallon of water is somewhere in the ballpark). When it's done let it cool a bit, but while it's still warm pull/shred it and toss into the marinade and let set for 1-2 hrs.

Soak the rice noodles in hot water (+/- 190-200 F) until soft (white) about 5-7 minutes, then chop them up as big or small as you like. (They tend to be pretty sticky, so I sometimes add a little oil to lube things up, but only a tiny bit- just the bare minimum.) Add to bowl with the romaine, drain the chicken, mix into salad, toss in mint, basil, crushed peanuts (in whatever amount you like. I didn't really see the point in trying to come up with an amount for this recipe. I like fresh herbs, so I tend to use a lot. Whatever works for you).


(pic taken with my cell phone camera...)

And that's pretty much it. Use the extra marinade as a dressing, if you like, but keep in mind that it tends to wilt the lettuce pretty quickly, so if you're making this awhile ahead of time you'll want to hold off on that (as well as be sure and really drain the chicken thoroughly).

Bon Appetit!

Tuesday, September 7, 2010

Moroccan Sunset Salad

A friend of mine once told me that I'm really good at putting flavor combinations together (or something to that effect) - but I don't think that's true at all. I mean sure, I try and stick to using stuff that works good together- garlic, oregano, and various peppers in one dish, but leave the cardamom and cinnamon for something else. I know what sorts of dishes and flavors I like to eat, so I try and play around with some of my favorite foods and come up with my own sort of spin on them. That's kind of how I came up with this one. I came across a recipe somewhere (thought I had it bookmarked, but I'll be damned if I can find it anywhere now) for an orange-and-red-onion-and-kalamata salad. It consisted of: oranges, kalamatas, red onions, whole cumin seeds, and probably salt and pepper. It was very similar to this one, so it may have had feta in it too. I can't remember what, if anything, else. First time I tried it, it wasn't bad, but I wasn't excited about it, but a bunch of coworkers I made it for really liked it, so I tried it again a couple days later and liked it a lot more that time. This was right around the time that I happened to have some bulgur wheat at work left over from doing a party, so my mind was in salad mode. That, combined with my recent falling in love with cardamom, got me experimenting. The result is this salad. I'm calling it Moroccan Sunset (thanks to my friend Sally for helping me come up with the name).


I'm really, really proud of it, too- so many flavors and textures going on at the same time. It's easy to make, and everything in it is readily available pretty much everywhere.

Here's what you'll need:

1/2 c Bulgur wheat
1 c Orange juice
Orange segments, cut in half
Fresh red bell peppers, diced
Kalamata olives, pitted and chopped
Toasted almonds, chopped
1 1/2 t Ground cardamom
1 1/2 t Chinese 5-spice powder
Whole fennel seeds, toasted
Cilantro

I don't have an exact amount for most things, but it's a salad- kind of hard to mess it up. Generally, though, I use just one orange, 1 pepper, and a handful or two each of the olives and almonds However, since I planned on posting this here, I did try and come up with a workable ratio for the bulgur/o.j./spice mix. I think I succeeded. But before I get to that, let's talk bulgur- unless you have a brand in mind that you really like, I recommend Bob's Red Mill. I've tried the bulk stuff at the grocery store, and my local co-op, and both pretty much sucked. I'm not familiar with other brands as of yet. Once I run out of the Bob's I have on hand, I plan to try Arrowhead Mills, but right now this recipe is written with Bob's in mind.

So- grab yourself 1/2 c of bulgur and stir in 1 1/2 teaspoons each of ground cardamom and 5-spice powder. Stir in the cup of o.j. (watch out for the cinnamon in the 5-spice- it can clump up, but usually mixing it with the bulgur first helps minimize this). Set aside until the bulgur is completely soaked. Usually takes 1 1/2-2 hours at room temp. There'll be some o.j. that's not totally absorbed by the bulgur; I usually add it to the salad at the end.
And that's about as technical as this 'recipe' gets. The rest is pretty much, literally, just throwing it together. Pepper(s) chopped? Almonds toasted? Olives ready to go? Then here's pretty much what I do:

Drain the bulgur (setting aside the leftover o.j. in case you plan on adding it later) and toss it in a medium-size mixing bowl. Add in some of the chopped bell pepper, a handful of chopped olives, a handful of sliced-in-half orange segments. Mix it all up and see how it looks. Add more of whatever you think you need/want more of. I basically just try to have somewhat equal-looking amounts of stuff (yes, I suck as a recipe writer, I know. No cookbook-writing in my future, that's for sure). When it looks good to you, add in a handful or two of toasted and chopped almonds (stay away from those almond sliver things- the convenience is not worth the extra cost and total lack of flavor. Whole raw almonds go for about $5/lb. around here and take about 8-10 minutes in a 400 degree (F) oven). After that, sprinkle with toasted fennel seeds and chopped cilantro (the reason there's no cilantro in the photos is because when I made that particular salad, it was for family members who think that cilantro tastes like soap, so I left it out. But if you like cilantro even a little, you're going to want it in the salad, for sure). Grab yourself a big ol' spoon and dig in. Prepare to be pleasantly surprised and maybe even amazed. This shit's for real.

Tuesday, August 10, 2010

Homemade Tostitos® With Hint Of Lime

Update, 2/28/2013 -
So, if you haven't already seen it in a more recent post, a friend and I are starting a spice blend company, one in which we'll be selling my Tostitos® With Hint Of Lime clone. We came up with the idea for the spice company fairly recently, like 5 months ago or so, and in the process, I thought that this could be one of the blends we'd carry. The thing is, when you're talking about selling a commercial product to the general public it kind of requires you to up your game a little, especially when your standards are higher than average already. So I revisited the recipe to make sure it was as good as I'd remembered (I hadn't made any in awhile). And while I've always been 100% happy with the recipe as listed here, when I tried it with the goal in mind of selling it commercially, it felt like it needed some work. So I tweaked it a tiny little bit, and now, after much taste-testing by me, my business partner, and my coworkers, we feel like it's really ready for Prime Time. The new recipe is not far off from this one at all (we added an anti-caking agent and don't use MSG, even though we both feel it's negative image is vastly overstated), but, for business reasons, I can't really post it here. However, that's not at all to say that this is not a good recipe or close approximation of the commercial stuff. I think it's both, and I leave it here as-is for anyone who loves the commercial stuff as much as I do (or did, until I started making my own). It's not quite as good as the new formula, but it is pretty damn good, and it's also a good starting point for messing around with your own formula, if you're so inclined. (If you're not, I'll be linking to a pretty good new spice company on my front page here soon, where you can buy an excellent clone!)
*****
Tostitos® With Hint Of Lime- pretty much my favorite chip ever (Keystone Snacks used to make a jalapeño tortilla chip back in the 80's- that was actually (gasp!) hot- that was my favorite chip ever, but seeing as they apparently no longer make them, and seeing as I've come up with my own jalapeño-lime variety, the Tostitos® With Hint Of Lime takes the top spot for me now. I hardly ever buy them anymore though, because if I do I have to eat the whole 13 oz. bag in one sitting. Can't stop myself like I can with most other chips (paired with a little Huy Fong Chili-Garlic sauce, which I buy by the gallon, on the side? Heaven). So I probably shouldn't have tried coming up with my own recipe to make them at home. But I did anyway. And y'know what? It's pretty damn good. Surprisingly, it came out on the very first try- no tweaking at all.

Here's the ingredient list:

3/4 c. sour cream powder
1/2 c. + 1T whey powder
1/4 c. + 1t lime juice powder
1T m.s.g. (Optional, I guess. But I really like the stuff, and haven't taste-tested the chips without it, so can't say what/if there's a difference.)
2t salt (I used kosher, as always, but ground it to a powder in my mortar and pestle.)


That's pretty much it- just mix up all of that and you're good to go. Quarter up some corn tortilla chips and deep-fry in small batches until they're done and douse liberally with the stuff. As far as I'm concerned, the taste is almost identical to the store-bought stuff. Other folks might not think so, but I think it's so close that I have no plans to try and tweak the recipe. The main difference that I notice is the texture. The texture of the chip is obviously different, being made at home and all. Not quite as crispy and brittle as the commercial ones, but I can't figure out how to get them that way (not that I care, I think they're fine the way they are). But the other main difference (besides the fact that the homemade ones don't have little green specks like the commercial ones do) is the texture of the seasoning. The commercial variety is more granular than what you'll get with this recipe. I prefer it that way myself, but until I can find a more granular sour cream powder (not likely) I don't see any way to change things. No matter, I'm happy with the result. If you happen to like the commercial variety, give these a try. I think you'll like them too.


Here's where you can find the stuff, if you don't already know:

Sour cream powder can be had at Perfect Pantry ($9/lb.)
Whey powder I got through MySpicer ($3.68/lb.)
Lime juice powder I got through Spice Barn, though The Great American Spice Company has it too, but it's more expensive ~$10/lb. vs. $7 at Spice Barn. The only difference that I can see between the two is on the ingredients list- GAS lists only 100% lime juice. SB lists 'corn syrup solids, lime juice, and lime oil.' I've tasted both directly from the container and can't tell the difference, so in the future I plan on staying with SB, as long as they're cheaper. (All prices were listed were current at the time of this writing.)


(This is the store-bought variety. See those little green specks? They kind of trouble me. What the hell are they? My lime juice powder is nowhere near that green. None of the ingredients listed on the bag say anything about 'green food coloring,' only red and blue. There's no parsley flakes listed. Nothing. 'Natural flavors,' maybe? Like what?! Well, no matter- I'll still eat them (occasionally). They're just too damn good.)

Peeling Garlic

Ok, first off, let me just say that I've been told, numerous times, that I'm a little weird. I know it. I'm fine with it.

Second thing- my preferred way of peeling garlic is just to not do it at all- I like to buy those 1+ lb. containers of already-peeled cloves and just use those. Saves time, and you never end up with all those tiny little cloves that are too small to bother with in the first place (or if you do, so what? They're already peeled). But I just happened to have a sleeve of bulbs that I bought recently at the Asian store that needed using, so I thought I'd share my newest way of peeling garlic. You've maybe seen those E-Z garlic peeler tubes that sell for $6.99 (and could possibly double as a cheap sex toy for men, not that I would know anything about that)? Yeah, I've seen 'em too and I've heard they work really well. I wouldn't know, I'm too cheap to buy one. Plus, my old method for peeling a bunch of garlic was either just to do them individually by hand, or to put all the separated cloves in a stainless steel mixing bowl, cover with another bowl and shake it all like the dickens (my brother learned that trick off of Dinner: Impossible. It works ok, but unless you're doing a whole bunch at once, or just need a decent upper body workout, I'd just stick to doing them by hand). So anyway, having been doing some kitchen wares shopping recently for my new apartment, I was at Bed Bath & Beyond not long ago and saw that E-Z garlic peeler sleeve/sex toy contraption, and it reminded me of something- I just happened to have an old bicycle inner tube sitting around at home that I wasn't doing anything with. Actually, I had already hacked it up a bit for some other project I was working on, but I thought, 'Why not?' and so I gave it a try (after washing it thoroughly, of course). It probably would have been better if I'd not sliced it open lengthwise, but what was done was done, and I didn't have any more. But hey, it works! Generally only a couple cloves at a time, but but you just slap them on at the lower end, fold over the length of the tube, and slide up once or twice.


Once is usually enough, though. The skins are pretty well shredded off of the clove, and all you do is brush them off and throw away.


Again, if I hadn't sliced it open lengthwise, it would probably be even better, since you could fit in as many cloves as the length of the tube would allow and roll 'em like a rolling pin. Anyway, if you're weird and cheap, like me, and don't buy the pre-peeled cloves, unlike me, it's worth considering since an inner tube generally only costs about $2.50. Just remember not to slice it open lengthwise.


***

In unrelated news, do you like Tostitos® with Hint of Lime tortilla chips? I love 'em. So I came up with a recipe for making your own at home. They're really good. Hopefully that post will be up later today. If not today, then soon (sometime this week). Stay tuned.

Tuesday, August 3, 2010

How to kill fruit flies.


See that? That right there is a fruit fly drowning pool. And that is how you get rid of the fruit flies in your home. Safe, cheap, easy, and fairly quick.

Here's what you do- take some small container (I used a 1/4 c measuring cup) fill it to just below the rim with apple cider vinegar (I like to use 50/50 cider vinegar and water- cuts down on the strong vinegar smell, but still attracts the flies like a magnet). Set the cup somewhere kind of nearby where the fruit flies are at, but still out of the way of stuff, and kind of away from wherever it is they happen to want to be (usually around the kitchen sink or trash can, in my case) - because remember, this will attract them, so you want to attract them away from a busy area. I set mine under the sink, near the trash can, which is where they happened to be anyway, but it was still out of my way. Anyway, once you've got it in place, take a bottle of ordinary dish soap and add just a single drop to the center of the cup. My bottle of dish soap is kind of big and tends to dispense way too much at one time, even when using it for doing dishes, so I filled a small pump bottle that works beautifully. Alternately, you could dip a toothpick or something in the soap and let a drop fall of of that into the center of the cup of vinegar. (I've actually tried coating a toothpick in the soap and then dipping it right into the vinegar, but I found that letting a drop fall in seems to work better for some reason.) What the soap does is break the surface tension of the liquid- fruit fly goes down to take a drink, falls in and drowns! Obviously it takes a little time for it to kill them all completely- depending on how bad your situation is, it could take several days to get rid of them all (or longer, if you've got it really bad like we do at work every spring). But generally I've found that after the first night of setting out the trap, I get well over half of whatever's flying around my kitchen, and then the other half is usually gone in the next day or two. I think I counted about 17 in this picture, and the trap was set out for less than 12 hours. I've seen a couple more flying around the kitchen area, but that's it. Fruit flies are cautious- but also stupid. If you set one of these traps out and watch them as they get attracted to it, generally what you'll see is that they hang around the edge of the cup for awhile, then walk on down to the edge of the vinegar to inspect, then walk back up to the edge of the cup, then walk around the edge of the cup and back on down to the vinegar. It goes on and on like that for awhile, but eventually they can't seem to help themselves, and even when it's obvious that a couple dozen of their buddies are clearly dead at the bottom of the drink, they'll still go on in for a taste, and end up joining their buddies. It's only a matter of time.

One of the (many) things I really like about this method, unlike using toxic chemical sprays to kill them, is that there's no dead flies lying around your kitchen waiting for you to clean them up later- you just dump them down the drain/toilet, lickety-split. Cider vinegar isn't the only thing that works, obviously. They really, really love balsamic vinegar (but even the cheap stuff is more expensive than cider vinegar, plus you can't see how many you've caught). Red or white wine work well too, but again, more expensive than cider vinegar. There are other, similar methods to this one that will work too- making a paper cone and setting it into a jar with cider vinegar in the bottom as bait, as described here and other places, but I much prefer this method- simpler, and they're already dead so you don't have to try and drown them yourself once you've caught them.

Monday, June 14, 2010

Curry Chickpea SoupStew (maybe with chicken, maybe not)

So awhile ago at work I made a Curry Chickpea Chicken Stew, and it went over pretty well- I was asked for the recipe (even though I didn't- and still don't, really- have one) we sold a bunch, people liked it, I liked it. It was good. And the next day I came on here and wrote something about it and mentioned plans to actually do a post about it at some point in the next couple weeks. This was like 4 months ago. Today, after many starts and stops, I'm finally getting around to doing some sort of post about it. But it's not quite the same as the stuff I made at work that day. For the stuff I made at home, for this post, I didn't have any chicken thawed out, so that right there is kind of a big difference. I've made it a couple more times at work since, always without any kind of recipe, and so it's just different every time. I'm such a lousy food-blogger. Really, I almost never use a recipe when I cook, and when I do use a recipe, I can't stick to it- I just toss stuff in without measuring it. A lot of times I just go by sight when I add something, tasting it later to see whether it was enough or too much. Kind of hard to post recipes for other people to actually try out when that's your m.o. Which is why I call this blog How's it Taste? - because I generally don't use, or at least follow, recipes when I cook. I cook by how things taste when I'm throwing it all together. But for this dish I figured I'd at least try and write it down as I went so at the end I could somehow edit it together into a recipe that I could post here. Well, it didn't quite go as planned. Never does. For me, throwing something together in the kitchen, especially a soup-type dish like this, is... well, it's hard to describe. Alchemy is one word that comes to mind, but I'm not sure if even that's accurate. I do go by taste, of course, but for a few things I don't even bother- it's like I'm on autopilot; I just go by sight and experience, and taste it at the end. And more often than not, that works quite nicely. But when I actively try and put together a recipe, like I did for this one, it throws off my cooking mojo. Things just don't come together as smoothly as they should because I'm so focused on writing stuff down and creating a recipe that I can't really focus on just cooking. And I make so many minor adjustments along the way that it's kind of hard to keep up with myself sometimes. After adding several dashes and pinches and shakes of stuff, you tend to lose track of just how much of a particular ingredient you added. (Might be easier if I had a friend with a video camera who could act as my assistant and record me actually making something, but that's a long ways off.) I actually do have a (partial) recipe for this dish today, which I'll post (not that it's going to matter; you'll see) but from here on out, I give up on trying to actually come up with recipes for the stuff I make. If I've got one (and I do for a couple things coming up) I'll post it, but if I don't then I'm just going to write about whatever it is that I'm making/eating and how I went about doing it. Like I said, lousy food-blogger, but hey, I like to cook and eat, and I like to share it with others, and so this is one way for me to be able to do that, as well as being some sort of record for myself of what I was cooking/eating during a particular time period. But generally, I plan on posting 'recipes' pretty much the way I cook- here's the list of stuff, here's about how I did it, plain and simple. I realize that lowers my standing in the food-blogging world (what kind of food blogger doesn't post recipes? Hell, even the No-Recipes food blog is full of recipes.) Truth be told, I don't give a shit. I like to cook, and I think I (mostly) make good stuff. Not everything's a winner, obviously. And sometimes the stuff I make at work that I think is just 'ok' gets rave reviews, while the stuff I think is rave just gets ok reviews. Go figure. Oh, and photos too- I like photography but don't take nearly enough photos, so having food that needs to be photographed gives me an excuse to bust out the camera. Also, it helps me to improve my photo-taking skills, even if only very slowly. Take the following photo, for example-


I just noticed something about this photo the other day that for some reason I'd never noticed before in other, similar photos. Something that I really can't stand and that I think makes it a crappy photo. Notice anything? Sure, the colors don't really pop out, and the left side of the bowl is cut off, and you can see soup sloshed around the sides of the bowl. None of that offends me, at least not much. No, the thing I really hate about this photo is that damn spoon! I've done a bunch of photos like this in the past, and for some reason always felt the need to add in an eating utensil, like anyone would forget to use it if they actually made the dish and my photo didn't show one or something. I don't know why I never noticed this before, but the spoon does absolutely nothing good for the photo, and in my opinion actually takes a lot away from it. Maybe it's just me, maybe I'm doing something wrong, but I don't know- I just think the addition of an eating utensil really detracts from the photo, and I plan on never doing another photo like this on my blog again.

Anyway, let's make some stew.

Here's what I came up with for the recipe (feel free to skip it; I always do)

1 camote* (438mg for this particular one)
2 orange bell peppers
1 lg-ish onion (300-something mg, I forgot to write it down)
eyeballed the minced garlic (maybe 1/3 c.)
few pinches kosher salt
ground black pepper (1t, tops)
couple T coconut milk powder added to the garbanzo juice
2 heaping T turmeric
2 scant T grated ginger
1/4 (heaping) c. curry powder
1 T cumin
2 heaping T ground coriander

*camote = sweet potato, but I just like saying camote (cah-mo-tay).

So that's the basic recipe I started to come up with for the Curry Chickpea Stew I made at work that one day. Notice I forgot to write down garbanzo beans, even though I mentioned the juice. Now you see why I don't/can't use recipes when I cook? So let's just back up and start over here. If I was going to make this today, for me, for you, for the Soup of the Day at Sweeney's, here's how it'd go:

When I make Curry Chickpea (possibly with Chicken) SoupStew, it changes every time, but the basics are generally the same- got to have curry (duh) onions, garlic, orange or yellow bell peppers, garbanzo beans, and lemon-ness (usually in the form of ground coriander, but I also like to add fresh lemon juice, especially at the end). Other stuff that I usually (but not always) add are: ground ginger, cinnamon, diced fresh tomatoes, camote, coconut milk, chicken, etc.
So, assuming I'm just cooking enough for myself here, here's what I'd grab:

(I'm going to skip using specific amounts. Just go with the flow and adjust however you see fit.)

Diced onion
Fresh, minced garlic
Olive oil
Fresh ginger (or dry, if I didn't have fresh)
Cinnamon
Coconut milk
Cooked garbanzo beans (canned or homemade, both are good)
Ground coriander seed
Fresh lemons
Curry powder
Turmeric
Kosher/sea salt
White sugar
Cayenne
Fresh ground black pepper
Orange bell peppers, diced
Diced fresh tomatoes
Boneless chicken breast
Chicken stock
Garbanzo bean flour
Fresh cilantro (garnish)

I think that's it. Depending on what else I've got in my spice drawer I might add some other stuff, but I'm so disorganized right now that I don't even know what's in there. Everything's scattered. (Really looking forward to getting my own place...)

Putting it all together:

Heat up a large (6 qt. or so) pot, get the olive oil going nice and hot and toss in the garlic, (fresh) ginger, onions, and peppers. Hit it with a dash of salt and pepper and cook over medium/med-high until soft (don't brown). As far as the chicken goes, I do it different almost every time, depending on how much time/motivation I have. Sometimes I'll cook it in a simple salt/sugar brine in the oven and shred it into the soup later on, other times I'll dice it up raw and cook it right in the pot with the veggies, which is probably how I'd do it this time. (In which case, I'd rinse the diced chicken first in water, then toss it in the pot at about the same time as all the veggies.) Once the veggies have softened and the chicken is at least mostly cooked, I add a little of the garbanzo bean juice, turmeric, more s/p, lots of ground coriander seed, lots of curry powder, a squeeze of lemon juice, heavy pinch of sugar (for balance) cayenne, couple dashes of cinnamon, a can of coconut milk, and some water or preferably chicken stock. Stir it all up good, give it a taste (once the chicken, if using, is fully cooked) and adjust as necessary. (How simple is that!) At this point, I like to add a little more fresh lemon juice, and maybe some lemon zest to finish things off. If you want to thicken things up a bit, garbanzo bean flour makes a nice thickener. You can buy garbanzo bean flour (Besan) at most any grocery store nowadays- Bob's Red Mill is a good quality, if pricey, brand that's pretty much available nationwide. However, there are other options- I got a large bag of Besan at my local grocery store for less than the price of a similar amount of dried garbanzo beans, so if you live in a large metro area you're almost certain to be able to find similar deals.


Also, if you have any Middle Eastern or other Ethnic stores in your area, they'll likely have Besan fairly cheap. Otherwise, you can also take some dried garbanzo beans and put them on a sheet pan in a 350 degree (F) oven and bake for 20 minutes or so (might be longer, I can't remember exactly). After that, they blend up nicely in a coffee grinder. Lastly, Amazon sells just about everything you could ever want, so you can always check there.
Add cilantro for a wonderful, delicious garnish. Green onions are nice, too. Use both, if you've got them.

This stuff is delicious and easy to make. (Recipes? We don't need no stinkin' recipes, dammit!) So give it a go- vegetarian or otherwise; I think you'll love it.


Tuesday, May 25, 2010

Caaaaaaaaaaaaaake!

Orange Sour Cream Cake with orange icing, to be specific. No, not my recipe, but I've been eating a lot of it lately, and it's really good but it needs a couple tweaks. Plus, I feel like if I don't post something now, I'm just going to keep procrastinating and then it'll be almost a year later before I post something again. It's not that I don't have stuff that I can write about here- oh, I've got stuff, alright; really tasty stuff. But I've been busy, and I procrastinate a lot. Hopefully once I get into my new apartment things will get better. And hopefully I'll have better lighting. The lighting here sucks. Anyway, back to the cake.

I took a couple photos of mine, which I'll add here later but not right now, but here's their recipe-

Orange Sour Cream Cake

3 cups all-purpose flour
1/2 tsp. salt
1 tsp. baking soda
1 tsp. vanilla
8 oz. butter
1 1/2 cup sugar
3 large eggs
1 cup sour cream
1/2 cup fresh orange juice
3 tablespoons fresh orange zest

Orange Icing

1 1/4 cups powdered sugar
1 tsp. zest
2-3 tablespoons orange juice
Preheat oven to 350, prepare pans by greasing them and dusting with flour.
For the cake, begin by creaming together the sugar and butter. Slowly add the sour cream, eggs and vanilla until thoroughly combined. In a separate bowl, sift together the dry ingredients. Slowly add dry ingredients, mix until smooth. Add orange juice and zest, mix to combine. Place into prepared pans. If baking in 1 pan, bake for about 1 hour or until cake tests done. If baking in 2 pans, bake for about 30-35 minutes or until cakes test done.


Not much need be changed, but my version ended up with an extra half-cup or so of sour cream by accident- not sure if it affected it for better or worse, but if anything, I suspect it was for the better. But the main modifications that I made were these-

Where it calls for orange juice- try substituting orange juice concentrate, instead. I made it according to the original recipe the first time (minus the zest, because I'm just not a zest fan, really) and while it was good, and orange-y even, it wasn't orange-y enough. Trust me, use the concentrate. Also, even though I left out the zest (well, I did add one orange's worth, which probably wouldn't even be noticeable) I did happen to find some dried orange peel that I bought awhile ago and forgot I had, so I added a whole bunch of that! I don't remember how much, maybe half a cup? Third of a cup? Something like that. Actually, I think what it was, was a quarter of a cup to slightly less than half of the cake mix- to compare one with and one without, I divided it into two cakes, one being larger than the other, and added the quarter cup to the smaller one; so it would've ended up being something like a half-cup total. Or something like that. It was a lot, that's all I know. And after comparing the two, the one with the dried orange peel was clearly the winner in taste. Much more orange flavor. I'm not sure how much flavor difference there is between dried orange peel and fresh orange zest, but I'm guessing the d.o.p. is a lot more concentrated. Not to mention a lot less work than the zest. So I highly recommend buying that and using it instead of the zest. Then again, I'm biased because I really didn't use (much) zest at all. Still, that's my game plan from here on out.

Orange icing...

Hmmm... what to say..? Again, I left the zest (and this time, also the d.o.p.) out of this one, so I don't know how much of a difference it would have made, but I gotta say, the recipe as they have it here- 1 1/4 cups of powdered sugar to 2-3 T o.j.? Waaay to overpoweringly sweet. I couldn't do it. Just couldn't do it. I tweaked it a lot and messed around with it aplenty, and in the end I just ended up going with 1. a bunch of powdered sugar, 2. a pinch of salt, 3. o.j. concentrate, and 4. fresh squeezed lemon juice (about half a lemon). Basically I started with the sugar in a bowl, added the salt, then kept adding the concentrate until it got to about the consistency I wanted. Then added some lemon juice for balance. It was pretty good too, actually. But I think next time I'm just going to try out some straight o.j. concentrate; maybe add a pinch of salt (and a pinch of baking soda to counteract the acidity) but not much else.

Overall, this cake is delicious and very much worth your time. And the author was right- it does make a perfectly good (great, in my opinion) breakfast. Give it a try!

Tuesday, April 13, 2010

My Big Food Blogger Rant

(I was going to tack this on as part of another post, but I decided it warrants a separate post all on its own.)

I read a few food blogs regularly, and am always scanning for new ones, so I've read a great many food blogs over the last couple years, and one thing that completely irritates the pants off of me is the absolute overkill of step-by-step photos. You know what I'm talking about. And probably you already have in mind one or two food bloggers who do it constantly. You know, the photo showing the bowl of flour that you have to mix the baking soda into, with the teaspoon full of baking soda hovering over it waiting to be dropped in- 'Now I'm getting ready to add in the baking soda! Now I'm actually adding it in! [new photo, showing it falling in] Now I'm tap-tap-tapping the spoon on the edge of the bowl! [new photo showing the tap-tap-tap] Now I'm setting the spoon on the counter with the other dirty utensils! [new photo showing the dirty utensils] Now I'm reaching for the wire whip!' [New photo...] And so on, and so on, and so on, with one photo after another showing each. and. every. little. unnecessary. step; utilizing a dozen photos when one or two at most will suffice. Should some freak miracle occur and this post somehow finds its way to a food blogger or two who does that sort of thing, I would just like to say this:

Please. Stop.

It's unnecessary, at best. It hurts the readers' eyes. It doesn't add anything to the post. You can do better. You know who you are.

Monday, March 29, 2010

Lemon-Cardamon-Buttermilk Cookies

...with lemon-buttermilk-vanilla glaze.


Dang, those just sound good, don't they? They do to me, anyway. Because I really, really like cardamom. (And they are good. I highly recommend that you try them.)

Basically this is a slight modification of the Buttermilk Cardamom Cookie recipe I found over on Sugarcrafter. As I mentioned in the previous post, I misread the recipe and thought they were lemon-buttermilk-cardamom cookies, and as a result, ended up with several pounds of Meyer lemons, one or two of which I ended up using in the recipe. I also used powdered buttermilk, instead of liquid for this recipe, including the glaze. Oh, and speaking of buttermilk, here's my understanding of it: buttermilk- the real kind- is the liquid that separates from the solid when you're making butter. It's not sour at all, like the stuff you buy in the carton at the store. That stuff is, as I understand it, cultured skim milk (I'm not exactly sure what kind of culture it is, though). And the powdered buttermilk is basically just that- the real buttermilk in powdered form. I haven't really used it a lot in baking or cooking, so I don't know how it compares to the liquid stuff, but I plan to use it a lot more whenever a recipe calls for the liquid kind, as it keeps for a whole lot longer. Most of the time when I've used the liquid stuff in the past, I end up throwing half of it out due to it being past the expiration date. Anyway, let's make some cookies!

Over on Sugarcrafter, she wrote that several people told her, “These are…different.” Now, when people say that I take it to mean that they don't like what they're eating, but they don't exactly dislike it, either. Mostly they're just not sure what to make of it. I haven't tried the recipe in it's exact original form, only my modified version, and I have to say, these are different, but in a really good way. I really, really like these cookies, and will definitely make them again (maybe even today or tomorrow) and would make them for friends too. They are, as SC says, 'soft and fluffy, almost cake-like,' which I didn't think I'd like at first because I prefer my cookies a little more crumbly, but after the first cookie, I really got hooked on them. They reminded me of some sort of fast food/gas station type of coffee cake pastry, only better, which led me to later try a sprinkling of cinnamon on top. The result? Success! (Makes me feel a little better about having forgotten the candy sprinkles.)


Here's the original recipe-

Cookie:
  • 1/2 cup sugar
  • 1/4 cup Butter
  • 1 egg
  • 1 1/4 cups flour
  • 1/4 tsp baking soda
  • 1 tsp ground cardamom
  • 1/4 tsp salt
  • 1/4 cup + 1 Tbsp buttermilk

Vanilla glaze:

  • 2 cups powdered sugar
  • 3 Tbsp buttermilk
  • 1 tsp vanilla extract

My main modification to the cookie part was that I increased the amount of cardamom. I just eyeballed it, but I think it was about 1 1/4- 1 1/2 t, and of course, the powdered buttermilk and Meyer lemon juice- so instead of 5 T liquid buttermilk, I used 1 T powdered + 1/4 c. Meyer juice, + 1 T water (I'm sure 5 T juice would've been fine, but since it was my first time making it, and using Meyers in general, I wanted to be a little careful. Looking back, it's not like 1 T is going to push things overboard, I know).
For the glaze, it just seemed like way too much for the amount of cookies, so I cut it in half. And in reality, if you make the glaze using the amounts in the original recipe, you will have a whole lot left over- but that's not a bad thing at all, since I found myself using what little glaze I had leftover to dunk my cookies in, all the while wishing I hadn't halved the recipe. So I don't recommend cutting it in half. But I did, and here's kind of how it went-

1c powdered sugar
1t powdered buttermilk
1 1/2T Meyer lemon juice
1t double-strength vanilla extract

You might be thinking that a whole teaspoon of double-strength vanilla could be too much for a half-order of the glaze recipe. You might be right. It's not that the vanilla flavor was too strong- I love that flavor- but the alcohol part of it was a little too strong. Don't get me wrong, I like my alcohol too, but it didn't really work in this case. So I had to do a little bit of reworking- not a problem really, I think this is where I'm best- adding and tasting, and adding again until it tastes the way I want it to. But of course that makes it hard to come up with an actual recipe to post somewhere or share with friends, since I don't really measure any of it out. I think I ended up adding about another tablespoon of buttermilk powder, and the juice of a whole Meyer. Possibly a little more powdered sugar too, I can't remember. But anyway, here's the thing- it's super easy to make and hard to mess up. Skip the actual recipe- just use it as a guideline:

Powdered sugar
Powdered buttermilk
Meyer lemon juice
Vanilla extract

Mix it all up in whatever proportion tastes right to you. That's generally how I do it, and that's what I plan on doing next time. One thing to note, and you can kind of see this in the photo, is that the powdered buttermilk, being sort of an off-white color, has the unfortunate effect of making the glaze look like a glaze of a whole different kind. It's especially bad when you have it all over your fingers after swirling your cookie in a plate of leftover glaze, but try and overlook this when you're eating these cookies.

By the way, here's a recap with my changes, along with the rest of the recipe:
  • 1/2 cup sugar
  • 1/4 cup Butter
  • 1 egg
  • 1 1/4 cups flour
  • 1/4 tsp baking soda
  • 1 1/4-1 1/2 tsp ground cardamom
  • 1/4 tsp salt
  • 1 Tbsp powdered buttermilk + 5 T Meyer lemon juice

Cream the butter and sugar together.
Add in the egg.

In a large bowl, whisk together the flour, baking soda, cardamom, and salt.
Add the buttermilk and flour mixture to the butter mixture gradually.

Drop on a lightly greased baking sheet and bake on 375 F for about 10-12 minutes, then let cool on a rack before adding the glaze/sprinkles (don't forget to try them with a dusting of cinnamon!)


Monday, March 22, 2010

Oh My(er)...

All I wanted was a lemon. Just one. Just a regular one. It was for a lemon-cardamom cookie recipe that I'd found that I wanted to try out (Oh, and cardamom? I love that shit! I only recently started using it, but I now use it a lot. Got a couple cool recipes using it that I plan on posting on here, too). So today on my way home from a short jog, I stopped in the little grocery store around the corner from my house and as I was walking by the 'Reduced for quick sale' cart that was right across from the regular lemons, all it took was a split-second glance-


"Holy crap, are those Meyers? In the 'Reduced for quick sale' cart?" Why, yes. Yes they were Meyer lemons. Several bags of them, with several lemons each (7, I found out later) all for the unbelievable price of 79 cents per bag. I grabbed 3 bags right up without a thought. It's not like I needed them. But for that price, I wasn't going to turn them down. No way. Especially not after I bought over 2 kilos a couple weeks ago at another grocery store because they were clearly marked as being 99 cents/lb. but when I looked at my receipt the following week, after I had already cut them all up for preserved lemons, I found out that I actually paid $3.99/lb. Which was an average price, I guess, but I probably wouldn't have bought so much if I'd known that. Anyway, I've been really getting into preserved lemons a lot lately. They're all the rage these days. Haven't had a chance to try any of them out yet, but I've been making a lot of them. I already have a couple 'regular' jars-


...and a single jar of the spiced kind, plus two jars of preserved myers. Now I have about 20 more Myers that I need to use. No hay problema, I'll figure something out. Probably preserve them (in a big-ass pitcher, since I'm out of jars).

The funny part of this all is that if I'd actually read that cardamom-lemon cookie recipe at some point before leaving the house today, I'd have seen that it didn't even call for lemons- because it was actually for buttermilk-cardamom cookies! Well, I actually did read it (awhile ago) and she mentions lemon flavor a few times in it- from the buttermilk- so I guess I just remembered it wrong when it came time to go to the store. So, big oversight on my part results in big Meyer lemon windfall, yay! Here's the recipe that I used for the buttermilk-cardamom-lemon cookies. I modified mine slightly- added more cardamom, (because I love that shit!) used powdered buttermilk instead of the liquid kind, but also Meyer lemon juice instead of just plain water for rehydrating the the buttermilk powder. Also used Meyer lemon juice in the glaze. Haven't tried them yet. I'll report back here when I do.

Tuesday, February 16, 2010

My most favoritest chicken sammich ever.

Oh hell yeah...


You see that? That's what a chicken sandwich should look like. Or a burger, for that matter. Pretty much any kind of sandwich. In fact, that's what a real sandwich does look like- messy; falling over; sesame seeds falling off; toppings spilling out. Not all perfect and cookie-cutter like the pics in chain restaurant menus and on tv. But whatever, we all know this already. So, let's talk about this sammich, shall we? I'm not sure who came up with it. But it's what we tend to eat at work most days. In fact, I eat it- on average- 4 days a week for lunch, and have been for at least the past year, and I'm not the least bit tired of it. Not even close. It's dead simple, too. So simple, in fact, that it doesn't even sound all that exciting or praise-worthy, or even worthy of a blog post. It almost sounds like an average chicken sandwich, albeit one with a little kick to it.

But it's not.

Ignore it at your peril. It's your loss if you do.


(check out that homemade bun action!)

But if you're interested, read on...


So like I said, I've been eating it an average of 4 days a week for lunch for at least the past year and am not the slightest bit bored with it. It's just so damn good. (Worth firing up the grill in the wintertime for, that's for sure!) And fairly quick and easy to make. All the ingredients are pretty much available anywhere. Homemade-bun-action is not necessary (I don't bother at work, but I've made them at home a couple times- I plan on doing a post on them here at some point). Ingredients are as follows-

Chicken breast
Lettuce, Tomato, Onion (LTO, as we say at work)
Nacho-sliced pickled jalapeños
Chipotle peppers in adobo sauce
Mayonnaise
Hamburger bun (Duh, right? But I've used plain old white bread before- a 'decent' quality, of course- when I didn't have any buns, and I have plans to use hoagie buns next. Mostly because I need to use them before I have to toss them.)
American cheese

And that's it. Now, I know a lot of folks turn their nose up at the lowly American cheese. And I know that it's sort of 'ghetto' in the foodie world. But it really works on this sandwich. It really does. Don't believe me? Go on, then. Try it and see. You'll be surprised. (C'mon, one time won't hurt. You know you want to.) Oh, and full disclosure here, the cheese used on the sandwich in these particular photos was Muenster. Muenster is one of my favorites (you should totally try it on pizza instead of Mozzarella!) but in the case of this sandwich, I actually prefer the American, I must say. I just used Muenster because I had it, and didn't have any American. Muenster rocks the grilled cheese sandwich, but for this sandwich, trust me- use American. Ok, let's put it all together...

First things first, though. You should really marinate the chicken in some sort of marinade, or at least brine it to help keep it tender and juicy. As far as a marinade goes, I really like this one, even though it was originally meant for steak. I tried it once with steak and didn't think it lived up to its name, but then again, I'm not much of a red meat eater anymore. Most of the meat I eat nowadays is chicken, so I tried it on that and liked it very much. But if you don't want to bother with making that up, then a simple brine of sugar/salt water does wonders. I usually dissolve 4-6 T each of sugar and salt (kosher, of course) per gallon of water and allow the chicken to soak in that for about an hour. Now when it comes to cooking, the chicken is really best grilled. Grilled over an open flame, that is, be it gas or charcoal. But if you don't have a grill, or if it's wintertime where you live (as it is here) and you don't feel motivated to fire the thing up, I have cooked the chicken under the broiler in my oven, as well as on one of those indoor electric grills (though not the 'Foreman' type- a review is planned for the future). Both worked sufficiently well, though grilling over open flame is definitely preferred.

While the chicken is cooking, make up some delicious chipotle mayo (if you don't already have some. It keeps for quite awhile in the fridge, so can be made well in advance). Although there really is no specific 'recipe' for chipotle mayo- you basically just chop up the can of chipotles (or run through the food processor/blender) and mix with mayo until it tastes the way you want- the general ratio I use is one can of chipotles (~ 7 oz./200 grams) to 4 cups mayo. You can throw the whole mix in the food processor and mix it all that way, if you like, but I've found that mayo doesn't stand up to a blender very well. It tends to un-emulsify. Lately, I've just been using a knife to chop the peppers by hand, and mix them into the mayo with a wire whip.

Before I go any further, I just want to point out the obvious- not all brands of chipotle in adobo/jalapeño slices are created equal. Not by a long shot. At work, we use Casa Fiesta chipotles, and Pasado (or El Pasado, I can't remember which it is) jalapeños, both of which are excellent, but neither of which I've seen in stores around here. So these are my picks, based on what I've found around my area-


San Marcos jalapeños are excellent, as are La Costeña chipotles. However- and this to me is very weird- San Marcos chipotles are not so good (I'd use them if I couldn't find something else I liked) and La Costeña jalapeños are downright yucky. Totally mushy, no crunch at all. I took one bite and threw the can away. (I would not use them if I couldn't find something else I liked.) Other brands I've tried that suck are Mrs. Renfro's, and Bakers and Chefs (Sam's Club). No offense to either of those brands, I have no doubt they make other quality products, but their jalapeño slices are just plain yucky. If you're not sure, it's best to try different brands until you find something you like. Just buy the smallest size available, one or two brands at a time until you hit the jackpot. I like the San Marcos jalapeños so much that I went out and bought one of those #10 size cans of them (around 4 lbs./1.8 kg, I think).

***


Mmmmm.... homemade hamburger buns!

I'm trying out different recipes for homemade burger buns. This one was pretty good, but I've only tried it once or twice. I want to make it at least one more time, as well as try out some of the others I've found before posting a review about them.


There's really not much else to say here- melt the cheese on the chicken, spread a generous amount of chipotle mayo on the bun (preferably homemade) add the jalapeños, lettuce, tomato, and onion, and prepare for a flavor explosion.