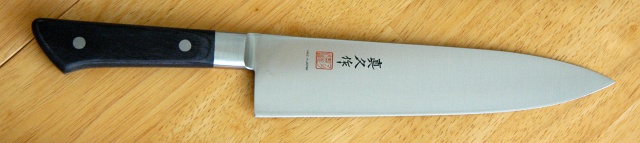
Ok, I thought I'd share my recent experiences with a couple chef knives that I've tried out recently. The first one was the Mac Mighty 8.5". Mac lists it for $155 on their website, others sell it for about $120, and I paid $95 for mine through someplace or other. Northwestern Cutlery, I think was the name. Anyway, here's what I think, in a nutshell- I'd say it's over-rated. Not that it's not worth buying- maybe it is, for some people. But Mac knives have gotten a lot of hype that I just don't think they live up to (at least not this model). The main thing for me was that it went dull after about a month of normal usage, which seemed rather quick. I don't mean that it just lost its edge and needed a good honing; honing did nothing for it at this point and it needed to be actually sharpened. Which my brother was kind enough to do for me on his 3-sided oilstone even though I have a Chef's Choice sharpener for asian knives that I've been wanting to test out. (Oh well, I think he just wanted to give his stone a workout.) On the plus side, the knife was apparently easy enough to sharpen. Also, I wish the handle was a little bigger- I thought it was pretty small, overall. Smaller, even, than the handle on my cheapo Farberware blade. Overall, I'd probably give this knife a B-. Maybe a C+. Somewhere in that vicinity. Wouldn't say it's a bad knife overall, but probably not something I'd recommend to someone.
Next up we have the RH Forschner Victorinox 40521 Fibrox 10-in. Chef's Knife. The good folks over at Cook's Illustrated (the Consumer Reports mag of the food world) did a knife review back in 2002 and gave the Victorinox 8-in. knife an Editor's Choice. And on their website you can find the following quote,
"Update: January, 2007 During the last two years, we have published or updated four reviews of chef's knives. During this time, our recommended knife has been and continues to be the Forschner Victorinox Fibrox 8-inch chef's knife."
Which leads me to believe that the good folks over at Cook's Illustrated are a bunch of baloney-eating chumps.
I read the original article when it first came out, but being that it was about 6 years ago, I don't really remember much about it, so I don't know exactly what their testing methods were, but I'm pretty sure that they were not very much inline with "real world" usage.
I've been working in commercial kitchens for about 8 or 9 years now, and most kitchens use knives that are very, very similar looking to the Victorinox. Same type of handle, same style, same feel; pretty much the same knife, except with a different name. And typical restaurant knives tend to be pretty crappy in quality- they go dull in a couple days or so, are hard to sharpen, etc. They're like that because most restaurants are not in the business of offering a dining experience to their customers, as they would have you believe- the fact is, most restaurants are in the business of being penny-pinching tightwads, and they'll often do whatever it takes to maintain their death-grip on those copper Lincolns. And one of the most common ways to save some scratch is to get the cheapest knives they can. They don't say Victorinox on the handle, but they look and feel almost exactly the same. And I knew that before I bought mine. I knew I was taking a chance. But I figured, "Hey, it's only 30 bucks; if it works, great. If not, chalk it up to experience." And now I'm more knowledgeable and experienced than before, and it only cost me $30! (I'm going to try and return it, by the way, but I'm not sure if Amazon will let me- it has scuff marks on the blade from the constant honing I had to do.) Now, I can see why the guy over at Cooking for Engineers rated it pretty well because he described exactly what he did to test the knives. His tests were pretty good at guaging out-of-the-box sharpness, but don't really address real-world constant use conditions. Fair enough, he never set out to do that. But the good folks over at CI have been recommending the Victorinox for years (and still do!). Surely they have enough experience by now to know that that knife is a piece of crap. I'm serious- I knew in about an hour of light-duty use that this knife was not going to cut the mustard (and I almost mean that literally; it does not hold an edge. At all.). And I thought the knives we use at work were bad- at least they stay sharp for about a day and a half. Maybe two. (One hour with the Victorinox was all it took for me to know!) I still really hate those work knives. But my choices are limited, as I explained in the previous post- I want a 10-in. blade, at least 2-in. wide, no bolster, large handle. Basicially, I want a knife like the ones we use at work, but one that will stay sharp for a little while. Not that easy to find. I did come across this custom knife maker in Canada, but being custom-made, you know they're going to be pricey. I'm just not ready to spend $400+ on a knife. (I don't know that they actually cost that much, but I'm guessing it's at least that much.) I don't know, I'm seriously considering buying a bench grinder and just bringing a knife home from work each night or two to sharpen it myself (which I do not recommend anyone doing, ever). They may only stay sharp for a day or two, but seeing as how we only send them out for sharpening every two weeks, it'd be a big improvement. The search continues...
Hey, stay tuned for some good stuff coming up- it's been a busy, busy week for me with work and stuff, so I'm behind even more than usual (I normally try and post about every two weeks) but I do have some tasty stuff in store, including a chicken taco recipe that will
Knock. Your. Socks. Off.
Don't like tacos? I don't care- you'll love these. (I don't care if you're allergic to tacos- these will cure that allergy with just one bite.)
I can't say for sure when that post will be going up, but hopefully pretty soon.
P.S. Thank you so much for taking time out to read this.

Because recipes are for jerks.* (Some thoughts on food; and other stuff.)
Monday, May 19, 2008
Tuesday, May 6, 2008
Blades of Glory (Part II)
Since this post is going to be about chef knives, I tried and tried to think of a cutting-edge joke or jokes to throw into it, but it was a bust. Nothing. My wit is just not very sharp, dammit. Sorry.
Anyway, about that chef knife you're considering buying. Sure can get confusing, can't it? The choices are almost overwhelming. And it seems like there are more and more brands popping up all the time, especially with Food Network stars coming out with their own labels or endorsing some such brand or other. So where to begin? Which one should you invest your hard-earned cash in? Well, I can't decide that for you, but I have done a little research, as well as having a little experience of my own, having worked in commercial kitchens for quite some time now, so I think I can offer some general guidelines here to help you decide.
It's quite simple, actually, which means that it's often overlooked- you really have only two things to consider- Blade, and Handle. You want a good, sharp, quality blade to handle the business end of things, but you need to make sure the handle is comfortable in your hand too, or else you either won't end up using your knife, or you'll use it, but probably wince in regret every time you do. So basically, do not buy a knife at all without having previously handled it at some point, either in-store, or having used a friend's. Pretty much any kitchen store will have a cutting board for just such purposes and will allow you to slice and dice your air-vegetables. I was seriously tempted one time to ask the salesperson if they'd let me bring in some carrots or something to actually cut up, but I decided not to. Chopping invisible produce at the store is certainly better than nothing, but not the same as actual use. If you've got your eye on a particular knife and know someone who has that same one, definitely ask to try it out. Besides the hands-on, you can also get their opinion of the knife and what they like and don't like about it.
Different people hold their knives in different ways when using them. I tend to hold mine with my hand choked up on the handle, like this:
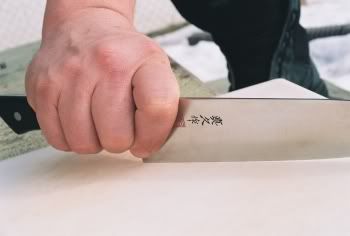
(not my hand)
How you hold your knife is something to keep in mind when considering the handle. (And the blade as well- if you often hold your knife like that, you want a blade wide enough to allow for that without having to decide between cramped or cut fingers.) I've found that most people who work in commercial kitchens, (whether you call us cooks, chefs, or just the greasy, sweaty grunts who serve up heart attacks on a plate) tend to hold their knives in this way. And what that tends to do is cause blisters and calluses on your hand, because the knife makers, with their hundreds of years of knife making experience and tradition, always decide to make the back edge of the blade nice and square, with rigid corners. And while that might look nice, especially when referring to my chin, it doesn't feel very nice on your hands. So one custom knife maker that I recently read about makes his knives with rounded edges on the back. And while a custum-made knife is not necessary for most people, you can customize whatever knife you do decide to go with by using some fine-grit automotive sandpaper from your local auto parts store. (The back edge of your blade probably won't end up being nice and glittery-shiny like it was when you bought it new, but if you tend to hold your knife in the manner described and are tired of the calluses, I think it's a trade-off in your favor. Your hands will thank you. Not to mention your significant other.)
Ok, so the handle aspect is pretty much taken care of- basically you want something that fits well and is comfortable in your hand- now on to the slightly less simple aspect of the Blade.
Knives can generally be categorized into two main groups- German-made, and Japanese-made. (There are others, of course, but these are the two biggies.) Now, from all the online reading and poking around I've done, the general consensus is that while German steel is good, Japanese steel is far superior. Which makes sense when you think about it. Take movies, for example. Who gave us the Samurai movie? The Ninja movie? The Japanese, of course! Now I haven't seen every single ninja movie ever made, but I'm pretty sure that in every single one somebody gets cleanly sliced in half from top to bottom with one fell swoop of the sword. One fell swoop! Clearly the Japanese take their steel very seriously. What do the Germans got? Das Boot? I haven't seen that one, but I'm pretty sure that noone gets cleanly sliced in half from top to bottom with one fell swoop of the sword. Noone. I doubt if there's even a sword in the movie. Possibly a knife, but no sword.
Score: Japanese 1, Germans 0
But maybe things aren't quite so cut-and-dried. Or maybe they are; I don't really know, since I haven't tried every single brand of knife out there. But I have done a lot of reading and poking around on the internet, and the general consensus of people who are really into knives is that:
Score: Japanese 1, Germans 0
(or actually, more like Japanese 5, Germans 1)
Plus, if you're of the opinion that you get what you pay for, and that more expensive=better quality, then clearly the Japanese win this one. I've seen prices for Japanese knives as high as $1,275.00 for a 270 mm (just over 10.5 inches) chef knife. (And that was on sale!) Ok, so those knives are all hand-made. Probably not a fair comparison, but as far as I know Misono knives aren't all hand-made and they have a 10.5 in. for $240.30. Yikes, this is starting to sound expensive, isn't it? Well, I'm generally of the opinion that you get what you pay for, but that doesn't mean you can't get a really decent chef knife for 100 bucks or less.
First off, a couple quick thoughts on Japanese knives. Many of them use Damascus steel (or at least Damascus-style steel) It has a distinctive pattern that looks like this Katana, by Calphalon. Apparently it rusts more easily than "regular" steel. Not really a problem if you take care of your knives anyway, and don't leave them wet or lying in a wet sink, but it does require a bit more attention to care. Also, I did try out a Shun knife at my local Williams-Sonoma store, and my first thought was that the blade felt a little brittle. Supposedly that Calphalon "Will not chip, crack or peel", but it's something to keep in mind when considering which knife to buy. Obviously, noone wants to drop their knives, but sometimes it happens- and if that blade is a little more brittle and does end up chipping, that can be a very expensive "oops". Other Japanese knives, like Mac and Global, do not use the Damascus-type steel.
Now, something very important to consider when deciding on a knife is:
Bolster? Or no Bolster?
What's a bolster, you ask?
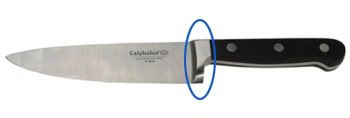
I've highlighted it here- it's that extra thick part of the blade that connects to the handle. Not all knives have them. Many do. Why? And what difference does it make? Well, I'm not sure why knife makers add them- they're not necessary at all. A selling point, is my guess. They tell you things like it adds weight and balance to the knife to get you to think it's a good thing to have. Well, the knife makers at Global will tell you that a knife can be perfectly balanced without a bolster. And if the weight of my entire bronze-tanned, well-chiseled right arm pressing down on that blade is not enough to accomplish the task at hand, then I don't know what good a couple extra ounces of steel is going to do. But I know of something else that it will do, and that is hinder sharpening, as well as offset the curve of your blade when you do sharpen it. I admit bolstered knives do look nice, but the manufacturer must believe that you're never going to have to sharpen that knife, even once. Here's what Holley Knives has to say about bolstered knives:
"Nearly all forged German branded knives have a bolster that extends all the way to the blade. This is not a good thing for those of us who have to sharpen them. Every time your knives are professionally sharpened, the bolster must be ground back to the level of the knife edge. Some professionals skip this step. We don’t. Fixing the bolster can take as much time as sharpening the knife itself and if not done properly it will mar the knife or worse, interfere with it in use."
Indeed. Here's a photo of a bolstered knife I own after a couple sharpenings on an electric sharpener:
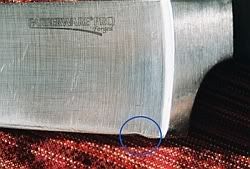
It's got that little groove in the blade now because the bolster gets in the way of the guard on the sharpener and the knife can't be insterted all the way in. Not as much of a problem if you sharpen by hand on a stone, but you still have the issue of that bolster not being in alignment with the rest of the blade- you need to grind that down as well, in order to keep it's edge even with the edge of the blade. Otherwise you'll have the same situation you see in the photo. It's not just a matter of appearance. If the edge of the bolster extends further than the edge of the blade, even slightly, then it will interfere with your cutting and chopping, and in a big way. Most people don't realize this. And of course, the knife makers aren't about to tell you. They want you to buy their pretty, shiny, "well-balanced" knives.
Just something to consider when considering a knife.
Something else to keep in mind is blade length and width. A minor issue, but maybe not for some. The average length for chef knives seems to be about 8 inches. Not sure what the width is, but I think the standard is slightly less than 2 inches at the widest point. For most people that works fine. But not everyone. Like me, for instance. The average 8 in. chef knife works well for me at home, but when I'm at work, I really, really need about a 10 in. blade. And it has to be a minimum 2 in. wide. Not 1 7/8. A full 2 inches. 2 1/2 would be best, but those are tough to find. Usually if you do find one they end up being the cheapo ones that you get in restaurant supply stores that go from razor sharp to butter-knife dull in about a day and a half, and are difficult to sharpen as well. Again, this is where some hands on usage proves invaluable. If you have very little knowledge about what you really need or want in a chef knife, something you may want to consider doing is buying one of those $10 restaurant supply store knives- just to try it out at home for awhile and get a feel for what you're really looking for in a good chef knife. And what you're looking to avoid.
Ok, time for some useful links, and then my final summary.
Cooking for Engineers tested and rated 11 different chef knives. It's an informative read. You get an idea of what's out there for knives and how they stack up against one another. Surprisingly, Henckels and Wusthof rated fairly low in all tests, never breaking out of the Serviceable category. Seems pretty objective, but I wouldn't rely solely on their results. Remember, hands on.
The eGullet Forums have a great page on Knife Maintenance and Sharpening. Covers the basics of Steel, Knife Edge, Sharpening, and Maintenance. Very thorough, but a very easy read.
And then for pretty much everything you ever wanted to know, and more, about all things knives, there's BladeForums. Very exhaustive. Maybe a little too exhaustive. Or maybe just exhausting. There's a lot of info there.
Ok, final thoughts.
Do some research. Check out reviews online, ask salespeople and friends what they use and recommend. Especially ask people who cook for a living what they use and recommend, as well as what they don't recommend. And ask why.
Try before you buy. (Unless you've got money to burn, because you might get burned if you don't.)
Generally, you get what you pay for, but more expensive doesn't always mean better. Depends on what your needs are. Note how well the $30 Forschner knife did in the Cooking for Engineers tests, not to mention that Cook's Illustrated (the Consumer Reports of cooking magazines) gave it high marks (Editor's Choice or some such thing).
Decide what it is you're looking for in a knife, and how you're going to use it. 8-in. chef knives are fine for me at home, but tend to hinder me at work.
Bolster? Or no Bolster?
Here's what I think- arm yourself with all the information you can, and in the end, when you decide you're ready, if you go with a reputable brand, at a reputable retailer, and pay a decent amount (not too much, but not too little either) - you'll be just fine.
Thanks for reading.
Anyway, about that chef knife you're considering buying. Sure can get confusing, can't it? The choices are almost overwhelming. And it seems like there are more and more brands popping up all the time, especially with Food Network stars coming out with their own labels or endorsing some such brand or other. So where to begin? Which one should you invest your hard-earned cash in? Well, I can't decide that for you, but I have done a little research, as well as having a little experience of my own, having worked in commercial kitchens for quite some time now, so I think I can offer some general guidelines here to help you decide.
It's quite simple, actually, which means that it's often overlooked- you really have only two things to consider- Blade, and Handle. You want a good, sharp, quality blade to handle the business end of things, but you need to make sure the handle is comfortable in your hand too, or else you either won't end up using your knife, or you'll use it, but probably wince in regret every time you do. So basically, do not buy a knife at all without having previously handled it at some point, either in-store, or having used a friend's. Pretty much any kitchen store will have a cutting board for just such purposes and will allow you to slice and dice your air-vegetables. I was seriously tempted one time to ask the salesperson if they'd let me bring in some carrots or something to actually cut up, but I decided not to. Chopping invisible produce at the store is certainly better than nothing, but not the same as actual use. If you've got your eye on a particular knife and know someone who has that same one, definitely ask to try it out. Besides the hands-on, you can also get their opinion of the knife and what they like and don't like about it.
Different people hold their knives in different ways when using them. I tend to hold mine with my hand choked up on the handle, like this:
(not my hand)
How you hold your knife is something to keep in mind when considering the handle. (And the blade as well- if you often hold your knife like that, you want a blade wide enough to allow for that without having to decide between cramped or cut fingers.) I've found that most people who work in commercial kitchens, (whether you call us cooks, chefs, or just the greasy, sweaty grunts who serve up heart attacks on a plate) tend to hold their knives in this way. And what that tends to do is cause blisters and calluses on your hand, because the knife makers, with their hundreds of years of knife making experience and tradition, always decide to make the back edge of the blade nice and square, with rigid corners. And while that might look nice, especially when referring to my chin, it doesn't feel very nice on your hands. So one custom knife maker that I recently read about makes his knives with rounded edges on the back. And while a custum-made knife is not necessary for most people, you can customize whatever knife you do decide to go with by using some fine-grit automotive sandpaper from your local auto parts store. (The back edge of your blade probably won't end up being nice and glittery-shiny like it was when you bought it new, but if you tend to hold your knife in the manner described and are tired of the calluses, I think it's a trade-off in your favor. Your hands will thank you. Not to mention your significant other.)
Ok, so the handle aspect is pretty much taken care of- basically you want something that fits well and is comfortable in your hand- now on to the slightly less simple aspect of the Blade.
Knives can generally be categorized into two main groups- German-made, and Japanese-made. (There are others, of course, but these are the two biggies.) Now, from all the online reading and poking around I've done, the general consensus is that while German steel is good, Japanese steel is far superior. Which makes sense when you think about it. Take movies, for example. Who gave us the Samurai movie? The Ninja movie? The Japanese, of course! Now I haven't seen every single ninja movie ever made, but I'm pretty sure that in every single one somebody gets cleanly sliced in half from top to bottom with one fell swoop of the sword. One fell swoop! Clearly the Japanese take their steel very seriously. What do the Germans got? Das Boot? I haven't seen that one, but I'm pretty sure that noone gets cleanly sliced in half from top to bottom with one fell swoop of the sword. Noone. I doubt if there's even a sword in the movie. Possibly a knife, but no sword.
Score: Japanese 1, Germans 0
But maybe things aren't quite so cut-and-dried. Or maybe they are; I don't really know, since I haven't tried every single brand of knife out there. But I have done a lot of reading and poking around on the internet, and the general consensus of people who are really into knives is that:
Score: Japanese 1, Germans 0
(or actually, more like Japanese 5, Germans 1)
Plus, if you're of the opinion that you get what you pay for, and that more expensive=better quality, then clearly the Japanese win this one. I've seen prices for Japanese knives as high as $1,275.00 for a 270 mm (just over 10.5 inches) chef knife. (And that was on sale!) Ok, so those knives are all hand-made. Probably not a fair comparison, but as far as I know Misono knives aren't all hand-made and they have a 10.5 in. for $240.30. Yikes, this is starting to sound expensive, isn't it? Well, I'm generally of the opinion that you get what you pay for, but that doesn't mean you can't get a really decent chef knife for 100 bucks or less.
First off, a couple quick thoughts on Japanese knives. Many of them use Damascus steel (or at least Damascus-style steel) It has a distinctive pattern that looks like this Katana, by Calphalon. Apparently it rusts more easily than "regular" steel. Not really a problem if you take care of your knives anyway, and don't leave them wet or lying in a wet sink, but it does require a bit more attention to care. Also, I did try out a Shun knife at my local Williams-Sonoma store, and my first thought was that the blade felt a little brittle. Supposedly that Calphalon "Will not chip, crack or peel", but it's something to keep in mind when considering which knife to buy. Obviously, noone wants to drop their knives, but sometimes it happens- and if that blade is a little more brittle and does end up chipping, that can be a very expensive "oops". Other Japanese knives, like Mac and Global, do not use the Damascus-type steel.
Now, something very important to consider when deciding on a knife is:
Bolster? Or no Bolster?
What's a bolster, you ask?
I've highlighted it here- it's that extra thick part of the blade that connects to the handle. Not all knives have them. Many do. Why? And what difference does it make? Well, I'm not sure why knife makers add them- they're not necessary at all. A selling point, is my guess. They tell you things like it adds weight and balance to the knife to get you to think it's a good thing to have. Well, the knife makers at Global will tell you that a knife can be perfectly balanced without a bolster. And if the weight of my entire bronze-tanned, well-chiseled right arm pressing down on that blade is not enough to accomplish the task at hand, then I don't know what good a couple extra ounces of steel is going to do. But I know of something else that it will do, and that is hinder sharpening, as well as offset the curve of your blade when you do sharpen it. I admit bolstered knives do look nice, but the manufacturer must believe that you're never going to have to sharpen that knife, even once. Here's what Holley Knives has to say about bolstered knives:
"Nearly all forged German branded knives have a bolster that extends all the way to the blade. This is not a good thing for those of us who have to sharpen them. Every time your knives are professionally sharpened, the bolster must be ground back to the level of the knife edge. Some professionals skip this step. We don’t. Fixing the bolster can take as much time as sharpening the knife itself and if not done properly it will mar the knife or worse, interfere with it in use."
Indeed. Here's a photo of a bolstered knife I own after a couple sharpenings on an electric sharpener:
It's got that little groove in the blade now because the bolster gets in the way of the guard on the sharpener and the knife can't be insterted all the way in. Not as much of a problem if you sharpen by hand on a stone, but you still have the issue of that bolster not being in alignment with the rest of the blade- you need to grind that down as well, in order to keep it's edge even with the edge of the blade. Otherwise you'll have the same situation you see in the photo. It's not just a matter of appearance. If the edge of the bolster extends further than the edge of the blade, even slightly, then it will interfere with your cutting and chopping, and in a big way. Most people don't realize this. And of course, the knife makers aren't about to tell you. They want you to buy their pretty, shiny, "well-balanced" knives.
Just something to consider when considering a knife.
Something else to keep in mind is blade length and width. A minor issue, but maybe not for some. The average length for chef knives seems to be about 8 inches. Not sure what the width is, but I think the standard is slightly less than 2 inches at the widest point. For most people that works fine. But not everyone. Like me, for instance. The average 8 in. chef knife works well for me at home, but when I'm at work, I really, really need about a 10 in. blade. And it has to be a minimum 2 in. wide. Not 1 7/8. A full 2 inches. 2 1/2 would be best, but those are tough to find. Usually if you do find one they end up being the cheapo ones that you get in restaurant supply stores that go from razor sharp to butter-knife dull in about a day and a half, and are difficult to sharpen as well. Again, this is where some hands on usage proves invaluable. If you have very little knowledge about what you really need or want in a chef knife, something you may want to consider doing is buying one of those $10 restaurant supply store knives- just to try it out at home for awhile and get a feel for what you're really looking for in a good chef knife. And what you're looking to avoid.
Ok, time for some useful links, and then my final summary.
Cooking for Engineers tested and rated 11 different chef knives. It's an informative read. You get an idea of what's out there for knives and how they stack up against one another. Surprisingly, Henckels and Wusthof rated fairly low in all tests, never breaking out of the Serviceable category. Seems pretty objective, but I wouldn't rely solely on their results. Remember, hands on.
The eGullet Forums have a great page on Knife Maintenance and Sharpening. Covers the basics of Steel, Knife Edge, Sharpening, and Maintenance. Very thorough, but a very easy read.
And then for pretty much everything you ever wanted to know, and more, about all things knives, there's BladeForums. Very exhaustive. Maybe a little too exhaustive. Or maybe just exhausting. There's a lot of info there.
Ok, final thoughts.
Do some research. Check out reviews online, ask salespeople and friends what they use and recommend. Especially ask people who cook for a living what they use and recommend, as well as what they don't recommend. And ask why.
Try before you buy. (Unless you've got money to burn, because you might get burned if you don't.)
Generally, you get what you pay for, but more expensive doesn't always mean better. Depends on what your needs are. Note how well the $30 Forschner knife did in the Cooking for Engineers tests, not to mention that Cook's Illustrated (the Consumer Reports of cooking magazines) gave it high marks (Editor's Choice or some such thing).
Decide what it is you're looking for in a knife, and how you're going to use it. 8-in. chef knives are fine for me at home, but tend to hinder me at work.
Bolster? Or no Bolster?
Here's what I think- arm yourself with all the information you can, and in the end, when you decide you're ready, if you go with a reputable brand, at a reputable retailer, and pay a decent amount (not too much, but not too little either) - you'll be just fine.
Thanks for reading.
Monday, April 21, 2008
Blades of Glory (Part I)
Our topic du jour in this installment of How's it Taste is knives. Ask any cook, professional or otherwise, and they'll tell you that the single most important item in the kitchen is a good quality knife. Ok, I just made that up. I actually have no idea what they'd tell you. I certainly wouldn't tell you that. I mean, a good knife is important, to be sure, but what good is the best knife in the world without a cutting board to go with it? Your "blade of glory" would get dull in no time flat, and then where would you be, Mr. Smartypants? And what about some good pots and pans to put the food in once it's ready to cook? Or a stove to cook it on? Or, or, or...? Uh, anyway, I guess the point I'm trying to make here is that while there really is no MVP in the kitchen, a really good knife is important. Very important. You really don't want to skimp on quality here. But have you checked out the knife section of your local Bed Bath & Beyond lately? The choices are almost overwhelming. How are you supposed to know what to buy? You could do a little online research. But be careful- there's a ton of information out there; some good, some bad, a lot of it conflicting. So I've done my own bit of research and I'm going to offer my-2-cents-worth here, and hopefully clear some things up a bit. More likely, I'll just add to the confusion, but whatever. Going to give it a shot anyway.
The first thing I want to look at is the ever-popular Knife Block Set.
Don't get one.
Seriously, do not waste your time or money on buying one of these things. They're popular because they're relatively cheap- if you were to buy each item individually it would cost a lot more than the entire set at once. So it seems like you're getting a good deal. In reality, though, it's like that old Andy Griffith episode where Aunt Bee went out and bought a freezer's worth of food that neither she nor anyone else would eat, just because it was so cheap. The key selling point here is "if you were to buy each item individually..." But you wouldn't buy each item individually because most of them you really don't need. And even if you did buy each one separately, you wouldn't need to get all of them from the same brand name. Let's take the OXO Good Grips Professional 14-Piece Knife Block Set for example, found on Amazon for about $80.
Includes:
8-inch chef knife
8-inch slicer
3-1/2-inch parer
5-inch utility
4-inch Santoku
8-inch bread
sharpening tool
6 steak knives
wood block
For starters, you should avoid those wooden knife storage blocks anyway because, while convenient, they're very unsanitary. Sure, you clean the knife before you put it in the block, but that doesn't mean dust and dirt and germs can't get in those little slots anyway. Just how are you supposed to clean inside of them? There are better, cleaner ways to store your knives- magnetic knife racks, knife sheaths, or even just in a large plastic container (like an open silverware tray) in a separate drawer, away from curious kids' hands.
Now let's look at the knives. Man, where do I start? In this set you have six distinct knives, plus six steak knives. Would you seriously need to buy all of these, separate or otherwise? Let's set aside the steak knives for a minute; I've worked in commercial kitchens for 7 or 8 years now, and 99% of the time the only two knives we've ever needed were a chef knife and a bread knife. Granted, commercial and home kitchens have different needs, so let's look a little more closely, starting with the top of the list.
8-inch chef knife. You do need one of these. For some people, like me, this is probably the only knife we'll ever need. Count this one in.
8-inch slicer. What exactly are you going to be slicing that you can't slice with an 8-inch chef knife? Count this one out.
3-1/2-inch parer. Do you make a lot of apple pies? If so, do you peel the apples? If you answered "yes" to both you can probably say "yes" to this knife, but- do you really need to pay more for an Oxo Good Grips 3-1/2-inch parer? Probably not. You can probably find something decent at the dollar store.
5-inch utility. What, exactly, are you going to be cutting, chopping, dicing, de-boning, etc., that you can't cut, chop, dice, de-bone, etc., with an 8-inch chef knife? Unnecessary. You can safely count this one out.
4-inch Santoku. This one is doubly useless. I honestly don't see why Santoku knives are so darn popular. I tried one once- hated it. The only good reason I can think of for their popularity is the hollow-ground edge, but guess what? They make hollow-ground chef knives too. You need a good curve on the edge to be able to rock the blade. Generally, the edge of a Santoku blade is too flat to do any real dicing or chopping (Oxo's isn't bad, but 4-inches? That's a toy, not a knife). Santokus are better for top-to-bottom slicing. But I don't want to slice. I want to rock. Can you imagine if Dee and the boys had sung "I wanna slice", instead of "I wanna rock"? I can't either. Y'know why? Because it's unimaginable, that's why. And so is using a 4-inch Santoku.
8-inch bread knife. Surely you need one of these, right? I mean, didn't I say myself we use them in commercial kitchens too? I guess I did say that. But- the main reason commercial kitchens use bread knives at all is because they generally use the absolute cheapest quality knives they can find- you can easily cut bread, even the crusty baguette kind, with a good, sharp chef knife. But restaurants don't often use good, sharp chef knives, so they need bread knives to help out. But do you, in your home kitchen, really need a bread knife? Do they even make bread that's not pre-sliced anymore? I'm pretty sure it comes that way, straight out of the oven, nowadays. Ok, so maybe you go for the good stuff, the artisan kind. Or maybe you're a rebel and make your own. Again, do you really need a bread knife? Wouldn't you rather get all primal and just tear it apart with your teeth?
(NOM-NOM-NOM!)
Or you could do like Jesus and the disciples and break that shit.
Ok, so the bread knife is a possibility. But even if you do decide to "buy it separately", you probably don't need to go for same quality as for your chef knife. Again, dollar store to the rescue.
Sharpening tool. Ok, just to clarify, it's actually a honing steel. Or honing tool, if you get the ceramic kind. They don't actually sharpen knives, they just realign the edge. You do need one of these. But not one from the dollar store. Mainly, though, because those are too short. You want one that's at least 12 inches long. (12 inches referring to the length of the steel, not the total length.) Oxo has one on Amazon for $15. It says the overall length is 18 inches, so I'm guessing the steel is actually 12, with 6 for the handle. Check out this 5 1/2 minute youtube clip with Alton Brown that covers the basics of sharpening and honing. Just don't believe his lies about the best knife being the one that's the most comfortable in your hand. Normally he's pretty right on, but he really missed the mark on this one. You do want a comfortable handle, but you also want quality steel. And you can have both, for a reasonable price. (I think it's worth noting that he happens to use and recommend Shun knives on his show. I'm sure the handles are comfortable, but I've seen others that I think are more comfortable and cost less. And since Food Network never showcases brand names, what do you want to bet that he also didn't pay for his Shun knives?) When I hone a knife, I do it the way they show here, rather than the way they show in the video. I'm just a little nervous about sliding a knife towards my hand, slowly or not. (Oh, and you can sharpen knives yourself at home, despite what he says.)
Lastly we have the 6 steak knives. And again, you don't need to buy the best quality when it comes to steak knives. The dollar store may be a little too cheap in this case, but you can get a decent set for not a lot at your local department store. So what are we left with that you will actually need?
8-in. chef knife -- $??
Honing tool -- $15
Storage tray --$1
Set of steak knives -- $10
(Optional)
Bread knife -- $1
Paring knife -- $1
Minus the chef knife, you can get everything you really need (plus a couple extra you probably don't) for $28, leaving you about $50 for your chef knife. Even Oxo only charges $20 for theirs. So by not buying them in the block set you not only save money, but end up with more counter space and less clutter in your kitchen. The price difference is even more pronounced if you decide to go with a higher end knife set like this $350 18-piece "gourmet" knife set by Wusthof. Separately, their chef knife goes for about $100. So $128 instead of $350. (And c'mon, do you really need a separate knife for your sandwiches? And tomatoes? Hey, at least their Santoku is 6-1/2 inches. Incidentally, I've seen some sets that include a "boning" knife. Now when was the last time you found yourself saying, "Dang, now where did I put that boning knife of mine?").
Oh, remember when I said you should avoid those wooden knife blocks altogether? This one might be an exception worth making.
Coming up in Part II I'll have my thoughts on chef knives, as well as some useful links on knives and knife sharpening.
Tuesday, April 8, 2008
Southwest Steak Sammich
Mmmmm, my mouth is watering just thinking about this. It's super tasty! (Of course it is, otherwise I wouldn't post it.) Not surprisingly, it's also made with our old friend the guajillo. I think of the guajillo as the Hugely Underrated Actor of the chile world. Think Jeff Daniels, John C. Reilly, or Bill Pullman, or whoever else you think is awesome but not nearly as famous as they should be. That's the guajillo. I think I've mentioned before that I think it's going to explode on the scene in a big way, though. Pace has come up with a salsa that uses them. However, I've been told it's not as good as mine. No surprise there. They really should have consulted me for advice first. No surprise there, either, though; nobody ever listens to me.
Anyway, let's get this Sammich show on the road, shall we?
This came about as a result of one of those happy accidents. I was experimenting at work, trying to come up with I-don't-know-what; something. I ended up with a sort of salsa. It wasn't bad by itself, but not good enough to use solely as a salsa. It needed some support. So I had this idea that I'd marinate some steak in it overnight and make sort of a Philly cheesesteak sandwich. Which I did, and it was excellent. The original was just the marinated steak, onions, mushrooms, mayo, and mozzarella on a hoagie bun, but with some input from some of my coworkers, it evolved slightly into what it is today. You're going to love it, trust me. There is a little bit of prep involved, namely the marinade, so it's not like you can just throw this together in ten minutes, but it's super easy to do, and you can make up the marinade in bulk and freeze it, and once that step is out of the way, it will take about 10 minutes to do! I've only tried this with steak, but I'm sure it will go well with any other meat, and maybe even tofu, if you're the vegetablearian type.
On to the marinade!
I do have a recipe for this, just not with me right now, and even though I know you don't need one because you've been reading this blog and you know that recipes are for jerks, I'll come back and post it in a day or two anyway. If I don't forget.
But for now...
bunch of guajillos, stemmed
salt
brown sugar
lime juice
water
That's it! Just chop them up roughly and cover with a couple inches of water. The chopping part isn't exactly necessary, I just do it so they'll sit better in the pan- Guajillos are kind of long and tend to stick out of the water in all sorts of different directions if you leave them whole. Add a couple pinches of salt, a small handful of brown sugar, and the juice of one or two limes. Once the salt and sugar are dissolved it should have sort of a raisin-y taste to it. Adjust as necessary. Then just cook until you think it's done. I usually reduce it by about half. Next, blend it in your blender, or in the pot with your handy-dandy immersion blender. (If you don't have one of those things, you need one. Trust me.) Sometimes at this point, I'll throw in a jalapeno or two, but it's your sammich today- make it however you like! Now your marinade is done! Make sure it's cooled down (actually, you might want to do that before you add it to the blender- could end up with a big mess, otherwise.) and add the protein. This stuff goes a looooong way, though- 2 Tbs will easily cover a pound of meat. Let it marinate overnight, or at least 6 hours, and then gather up the following players-
Hoagie bun
onions
mushrooms
colby-jack cheese
chipotle mayo
anything else you think would go good on a Philly-style sandwich
First off, about the chipotle mayo- I'm sure they sell commercial stuff, but I wouldn't waste my money. It's too easy to make on your own (not to mention most likely cheaper) using your favorite regular mayo and a can of chipotle peppers. Simply take one can of chipotles in adobo sauce and add to 4 cups regular mayo. You can chop up the peppers by hand with a knife and then add to the mayo, or just blend the whole thing in a food processor. I'd avoid using a blender- it can easily break down the mayo into oil. At least, that's what happens to us at work. Then again, our blender only has two speeds- super fast, and supersonic. I'd still avoid the blender. Also, I found a recipe for chipotle mayo from scratch awhile back, but haven't gotten around to trying it yet, so I won't post it here right now, but it might be worth looking into. A quick search on the Food Network's website should turn something up. Even if you don't want to bother with all that, just using a good quality regular mayo, mixed with the chipotles is really, really good. I used to really not like the flavor of chipotle at all, until The Amigos at work started making this stuff and one day just for the heck of it I tried it. Now I love the stuff.
Break out the fry pan, melt some butter, add the steak and veggies and a pinch of salt and pepper and cook until done. (Normally I don't like well-done steak, but in this case med-rare doesn't seem to cut it for some reason.) Toast your bread, slather on the chipotle mayo, add the meat and veggies and cover liberally with cheese. Lots and lots of cheese. Then pop the whole thing in a hot oven for a few minutes to melt said cheese. Alternately, you can just add the cheese to the steak/veggies mix while it's in the fry pan. We do that a lot at work, and it works well. Except we cook ours on a flat-top, not in the fry pan, but you get the idea.
It's quite messy, so have plenty of napkins handy.
I kind of like to eat mine with a knife and fork. However you choose to do it, I think you'll agree...
this one rises far above the level of "sandwich".
Truly, once you've had this one, you've had yourself a Sammich.
Friday, March 21, 2008
Thai Peanut Sauce
Boy howdy, have I got the goods for you today! This is it right here, folks. This is The One. I'm fairly certain that no matter what I happen to come up with after this, even if I live to be a hundred, it will not be as good as this stuff. And it's not so much the peanut sauce itself, although it is excellent, as what you're going to do with it when it's ready. More on that later. For now, though...
It all started one day many years ago when I was living in Chicago...
Ah, y'know what? Never mind all that. Let me just sum it up-
Years ago, I discovered Thai Peanut Sauce (and sticky rice!).
And for a long time I used store-bought peanut sauce. This stuff, to be exact-
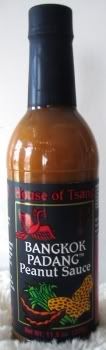
And it's actually very good. The only downside is that it's quite expensive- $4+ for about 11 oz. So after awhile I tried looking online for a recipe to make it at home, but I really couldn't find one. I mean, I found a bunch, but none of them sounded any good. Try it- do an online search for "Thai Peanut Sauce" and see what comes up. I think you'll be as disappointed as I was. Not to worry, though, you've come to the right place this time! And I even have an actual recipe for it, although as always, I encourage you to use it as a guideline only. The only reason I even worked one up is because at Sweeney's, where I work, they have a Thai Chicken Pasta dish- basically just chicken and linguine tossed in a peanut sauce- yeah, I know, "Thai" in name only. Anyway, shortly after I started working there, the boss tried my peanut sauce and liked it much better than the one they were using (no surprise there) so he told me to come up with a recipe that we could use at work, or else he'd fire me and I'd have to go back to working in those culinary coal mines known as franchise restaurants (yes, I'm thinking of you specifically, Ruby Tuesday, with your pre-cooked chicken!*). Ok, he wasn't quite that blunt about it, but I didn't want to take any chances, y'know? Sweeney's = good, franchise chains = coal mines in the 1800s.
So anyway, here's the recipe we use at work:
10 T garlic
10 T ginger
12 c coconut milk
12 c peanut butter
1 3/4 c packed brown sugar
1 1/2 c fish sauce
chili garlic sauce
juice from 3 limes + 1/2 c tamarind juice
Ok, let's break it down a little. First off, I know this is a lot. But I didn't resize it for several reasons- 1. I'm really bad at math. (And it took me a really long time to come up with those measurements specifically for work so I figure since I put so much effort into it, it should stay as is, y'know?) 2. You'll want a lot of this stuff on hand, believe me. 3. It keeps for quite awhile in the fridge, but even better, it freezes well, so you can just make a whole lot at once and not have to worry about it again for awhile. There's a few more reasons too, but that should suffice for now.
Ok, remember, this recipe should only be used as a guideline. At work we need a recipe for the sake of consistency. And because I can't really get the guys there to grasp the idea of "this is how it should taste, so just keep adjusting it until it tastes like this". It never seems to work out very well. So we use a recipe. (Or, they do. I do it my way, which is better.)
To start things off, I usually use more garlic and ginger than what's called for; usually around 12 Tbs. Also, at work we use water instead of coconut milk (that's what I used originally, but coconut milk is sooo much better. Don't skip it if at all possible.) Mince up the garlic and ginger nice and fine (make sure to use fresh garlic, not the stuff in the jar!) and heat it in some oil over medium- sesame oil is best for this. But you don't want to saute it- i.e. don't cook it till it's brown, just till it's nice and fragrant. Then add the coconut milk, fish sauce, peanut butter, chili sauce, and brown sugar. Heat over low. And I mean low. Peanut butter will overcook very easily, and when it does the oil separates and it looks all nasty and can't be made to look un-nasty, so take your time with this. If you're using an electric stove, be sure and set it on the lowest setting. Also, if you use a wire whip to stir it, it will blend up nice and smooth in no time. Just keep cooking over low until it's as thick as you'd like it to be. It doesn't take long at all. I usually make mine to about the consistency of a thick ketchup. (Keep in mind that you'll be adding lime and tamarind juice at the end.)
About that chili garlic sauce... I use, and highly recommend, this stuff-
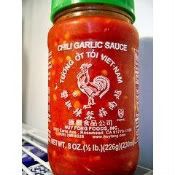
made by Huy Fong Foods. It's fairly readily available, even in small-town stores. How much you use is totally up to you. I didn't include a specific amount in the recipe because at work we use crushed red pepper, but I really, really recommend that you don't skip using this. It's too good. (I buy it by the gallon.) Luckily for me, I live in a town with one of the largest Hmong populations in the U.S. so Asian food stores are more common than Starbucks around here.
As for the brown sugar- when the recipe says "packed", it means packed- as tight as you can get it in there. And here's a tip- just pack it once and then weigh it out, then next time you make it you don't have to bother with all that cramming into the measuring cup! (I believe 1 3/4 c weighs about 14-16 oz.) I also prefer dark brown sugar to light.
As for the fish sauce, the main thing to look for is a minimum of ingredients- water, fish, salt. A lot of brands have sugar added, but in my experience, it's not very noticeable in most. The online Asian store ImportFood.com mentions 4 they like a lot. I found Three Crabs brand to be very sweet. I'd avoid using it, at least for this recipe. I personally don't like it at all (supposedly it's quite popular, though) and it's pretty expensive which is another reason I don't use it. I've used both Squid brand and Golden Boy a lot and can definitely recommend both.
Once you get the peanut sauce to the thickness you'd like, turn off the heat and add the juice of 3 limes plus 1/2 c. tamarind juice. How do you get tamarind juice? Chez Pim has a tip near the bottom of her post on pad thai. In a nutshell, you take a block of Tamarind Paste-

and soak it in 4 cups of hot water until soft, then strain. If you have to, in a pinch you can use cranberry juice- it's taste is pretty darn close. Just don't tell Pim I said that- she's kind of a purist and all and might rip me a new one. Actually, now that I think about it, maybe you should tell her. After all, she's kind of a big name in the food blog world and if she rants about me on her blog... (even bad publicity is still publicity, is all I'm sayin'.)
Also, I find that adding just a little o.j. to the mix at the end really adds a nice touch.
I think that about sums things up. If you can't find any of the ingredients in your area, ImportFood.com has everything you need, and there are other online Asian stores as well.
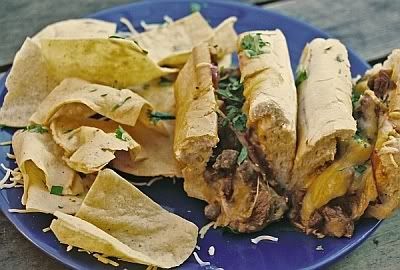
Now, on to the real star of the show- sticky rice! If you've not had this before, you really need to add this to your list of Things To Do Before I Die. And then get to it ASAP. Not just any ol' sticky rice from any ol' asian restaurant, though. Try it my way first. Seriously, if you could scoop up all of Heaven and plop it in a bowl to eat, it would taste like this. I am not lying or exaggerating. Not even a little. The name "sticky rice" is kind of a misnomer, though; it's not really "sticky" in the sense that you think of when you picture regular rice that's been overcooked. "Chewy rice" would be a more accurate way to describe it. But I guess that doesn't sound as cool, does it? Yeah, let's stick with Sticky.
I'm going to try and sum this up quick. (Or you can look Here. I swear I'm not trying to plug ImportFood.com- it's just a convenience for me, since they're the main one I'm aware of, but there are other Asian food sites online to order from as well. I encourage you to check them out.)
Sticky rice is also known as "glutinous rice" and "sweet rice". When it's dry, it looks kind of like a smaller version of puffed rice cereal-

When cooked, it becomes more translucent-
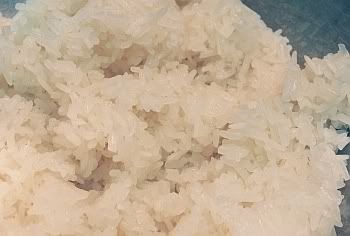
(it won't have that pinkish hue- that's just from the light in the room,
and I never got around to correcting it in Photoshop)
You don't have to cook it in a bamboo steamer, or if you want to get really food-nerd about it, one of those sticky rice steamer baskets (which I have, of course). You can use a regular colander and pot. You will need some sort of cheesecloth-type fabric to line the basket with, though. I've found regular cheesecloth to be too porous and flimsy, so I use a couple cloth napkins that I got at Target or something for not a lot of money.
My instructions are basically the same as those on the other site, but slightly rearranged- I soak mine first- for a solid 8 hours. You might get away with 6, but in my experience 8-10 is better. Then I rinse the rice, usually more than the 2-3 times they call for. You want the water to run fairly clear (it probably won't get totally clear, though). Also, I don't think it takes 45 minutes like they say- mine's usually ready in 25-30. Once you've made it a couple times you can usually tell by looking whether it's done or not, but you can always taste it while it's steaming to find out. You'll know when it's done. It won't separate too easily with a fork and will be nice and chewy (and translucent). When it's done, if you take it off the stove and immediately flip the whole thing over into a large mixing bowl, most, if not all of it, will just plop right out of that cloth and into the bowl, leaving a nice easy-to-rinse-clean cloth. You'll want to cover it though, so it won't dry out. Now comes the fun part- take as much as you want and put it into a very large bowl- (I tend to just leave it all in that same stainless mixing bowl and eat out of that) then add the following-
peanut sauce
fine grain sea or kosher salt
granulated garlic
chili garlic sauce
the order isn't super important, but I usually go wet before dry- makes it much easier to mix. Even the amounts aren't all that critical. I once made this for a friend and added by sight only- didn't taste even once to test it before handing her the bowl. The result? Success!
Heaven. In a bowl.
That's what you've got right there, my friend. Heaven in a bowl, I kid you not.
*To my knowledge, Ruby Tuesday no longer uses pre-cooked chicken. It was a short-lived, failed experiment. But that's their M.O., anyway. Along with all the other franchises.
Cheap bastards, I hate 'em.
It all started one day many years ago when I was living in Chicago...
Ah, y'know what? Never mind all that. Let me just sum it up-
Years ago, I discovered Thai Peanut Sauce (and sticky rice!).
And for a long time I used store-bought peanut sauce. This stuff, to be exact-
And it's actually very good. The only downside is that it's quite expensive- $4+ for about 11 oz. So after awhile I tried looking online for a recipe to make it at home, but I really couldn't find one. I mean, I found a bunch, but none of them sounded any good. Try it- do an online search for "Thai Peanut Sauce" and see what comes up. I think you'll be as disappointed as I was. Not to worry, though, you've come to the right place this time! And I even have an actual recipe for it, although as always, I encourage you to use it as a guideline only. The only reason I even worked one up is because at Sweeney's, where I work, they have a Thai Chicken Pasta dish- basically just chicken and linguine tossed in a peanut sauce- yeah, I know, "Thai" in name only. Anyway, shortly after I started working there, the boss tried my peanut sauce and liked it much better than the one they were using (no surprise there) so he told me to come up with a recipe that we could use at work, or else he'd fire me and I'd have to go back to working in those culinary coal mines known as franchise restaurants (yes, I'm thinking of you specifically, Ruby Tuesday, with your pre-cooked chicken!*). Ok, he wasn't quite that blunt about it, but I didn't want to take any chances, y'know? Sweeney's = good, franchise chains = coal mines in the 1800s.
So anyway, here's the recipe we use at work:
10 T garlic
10 T ginger
12 c coconut milk
12 c peanut butter
1 3/4 c packed brown sugar
1 1/2 c fish sauce
chili garlic sauce
juice from 3 limes + 1/2 c tamarind juice
Ok, let's break it down a little. First off, I know this is a lot. But I didn't resize it for several reasons- 1. I'm really bad at math. (And it took me a really long time to come up with those measurements specifically for work so I figure since I put so much effort into it, it should stay as is, y'know?) 2. You'll want a lot of this stuff on hand, believe me. 3. It keeps for quite awhile in the fridge, but even better, it freezes well, so you can just make a whole lot at once and not have to worry about it again for awhile. There's a few more reasons too, but that should suffice for now.
Ok, remember, this recipe should only be used as a guideline. At work we need a recipe for the sake of consistency. And because I can't really get the guys there to grasp the idea of "this is how it should taste, so just keep adjusting it until it tastes like this". It never seems to work out very well. So we use a recipe. (Or, they do. I do it my way, which is better.)
To start things off, I usually use more garlic and ginger than what's called for; usually around 12 Tbs. Also, at work we use water instead of coconut milk (that's what I used originally, but coconut milk is sooo much better. Don't skip it if at all possible.) Mince up the garlic and ginger nice and fine (make sure to use fresh garlic, not the stuff in the jar!) and heat it in some oil over medium- sesame oil is best for this. But you don't want to saute it- i.e. don't cook it till it's brown, just till it's nice and fragrant. Then add the coconut milk, fish sauce, peanut butter, chili sauce, and brown sugar. Heat over low. And I mean low. Peanut butter will overcook very easily, and when it does the oil separates and it looks all nasty and can't be made to look un-nasty, so take your time with this. If you're using an electric stove, be sure and set it on the lowest setting. Also, if you use a wire whip to stir it, it will blend up nice and smooth in no time. Just keep cooking over low until it's as thick as you'd like it to be. It doesn't take long at all. I usually make mine to about the consistency of a thick ketchup. (Keep in mind that you'll be adding lime and tamarind juice at the end.)
About that chili garlic sauce... I use, and highly recommend, this stuff-
made by Huy Fong Foods. It's fairly readily available, even in small-town stores. How much you use is totally up to you. I didn't include a specific amount in the recipe because at work we use crushed red pepper, but I really, really recommend that you don't skip using this. It's too good. (I buy it by the gallon.) Luckily for me, I live in a town with one of the largest Hmong populations in the U.S. so Asian food stores are more common than Starbucks around here.
As for the brown sugar- when the recipe says "packed", it means packed- as tight as you can get it in there. And here's a tip- just pack it once and then weigh it out, then next time you make it you don't have to bother with all that cramming into the measuring cup! (I believe 1 3/4 c weighs about 14-16 oz.) I also prefer dark brown sugar to light.
As for the fish sauce, the main thing to look for is a minimum of ingredients- water, fish, salt. A lot of brands have sugar added, but in my experience, it's not very noticeable in most. The online Asian store ImportFood.com mentions 4 they like a lot. I found Three Crabs brand to be very sweet. I'd avoid using it, at least for this recipe. I personally don't like it at all (supposedly it's quite popular, though) and it's pretty expensive which is another reason I don't use it. I've used both Squid brand and Golden Boy a lot and can definitely recommend both.
Once you get the peanut sauce to the thickness you'd like, turn off the heat and add the juice of 3 limes plus 1/2 c. tamarind juice. How do you get tamarind juice? Chez Pim has a tip near the bottom of her post on pad thai. In a nutshell, you take a block of Tamarind Paste-
and soak it in 4 cups of hot water until soft, then strain. If you have to, in a pinch you can use cranberry juice- it's taste is pretty darn close. Just don't tell Pim I said that- she's kind of a purist and all and might rip me a new one. Actually, now that I think about it, maybe you should tell her. After all, she's kind of a big name in the food blog world and if she rants about me on her blog... (even bad publicity is still publicity, is all I'm sayin'.)
Also, I find that adding just a little o.j. to the mix at the end really adds a nice touch.
I think that about sums things up. If you can't find any of the ingredients in your area, ImportFood.com has everything you need, and there are other online Asian stores as well.
Now, on to the real star of the show- sticky rice! If you've not had this before, you really need to add this to your list of Things To Do Before I Die. And then get to it ASAP. Not just any ol' sticky rice from any ol' asian restaurant, though. Try it my way first. Seriously, if you could scoop up all of Heaven and plop it in a bowl to eat, it would taste like this. I am not lying or exaggerating. Not even a little. The name "sticky rice" is kind of a misnomer, though; it's not really "sticky" in the sense that you think of when you picture regular rice that's been overcooked. "Chewy rice" would be a more accurate way to describe it. But I guess that doesn't sound as cool, does it? Yeah, let's stick with Sticky.
I'm going to try and sum this up quick. (Or you can look Here. I swear I'm not trying to plug ImportFood.com- it's just a convenience for me, since they're the main one I'm aware of, but there are other Asian food sites online to order from as well. I encourage you to check them out.)
Sticky rice is also known as "glutinous rice" and "sweet rice". When it's dry, it looks kind of like a smaller version of puffed rice cereal-
When cooked, it becomes more translucent-
(it won't have that pinkish hue- that's just from the light in the room,
and I never got around to correcting it in Photoshop)
You don't have to cook it in a bamboo steamer, or if you want to get really food-nerd about it, one of those sticky rice steamer baskets (which I have, of course). You can use a regular colander and pot. You will need some sort of cheesecloth-type fabric to line the basket with, though. I've found regular cheesecloth to be too porous and flimsy, so I use a couple cloth napkins that I got at Target or something for not a lot of money.
My instructions are basically the same as those on the other site, but slightly rearranged- I soak mine first- for a solid 8 hours. You might get away with 6, but in my experience 8-10 is better. Then I rinse the rice, usually more than the 2-3 times they call for. You want the water to run fairly clear (it probably won't get totally clear, though). Also, I don't think it takes 45 minutes like they say- mine's usually ready in 25-30. Once you've made it a couple times you can usually tell by looking whether it's done or not, but you can always taste it while it's steaming to find out. You'll know when it's done. It won't separate too easily with a fork and will be nice and chewy (and translucent). When it's done, if you take it off the stove and immediately flip the whole thing over into a large mixing bowl, most, if not all of it, will just plop right out of that cloth and into the bowl, leaving a nice easy-to-rinse-clean cloth. You'll want to cover it though, so it won't dry out. Now comes the fun part- take as much as you want and put it into a very large bowl- (I tend to just leave it all in that same stainless mixing bowl and eat out of that) then add the following-
peanut sauce
fine grain sea or kosher salt
granulated garlic
chili garlic sauce
the order isn't super important, but I usually go wet before dry- makes it much easier to mix. Even the amounts aren't all that critical. I once made this for a friend and added by sight only- didn't taste even once to test it before handing her the bowl. The result? Success!
Heaven. In a bowl.
That's what you've got right there, my friend. Heaven in a bowl, I kid you not.
*To my knowledge, Ruby Tuesday no longer uses pre-cooked chicken. It was a short-lived, failed experiment. But that's their M.O., anyway. Along with all the other franchises.
Cheap bastards, I hate 'em.
Tuesday, February 26, 2008
Olé! Pozolé!
Grab your sombrero and break out that bottle of Cabo Wabo that you've been saving for a special occasion, 'cause it's time for some Pozolé! Er, is it "Posolé"? Or "Pozole"? Or "Posole"? Maybe it's "Mexican Chicken Soup"? Or "Mexican Pork Stew"? Ah, who cares? Call it what you want, just don't neglect to make yourself some, and soon. (Hat and tequila optional.) This stuff is not to be missed! It is soooooo gooooood! In fact, if I were somehow forced to limit my soup choices to only one kind for the rest of my life... well, it wouldn't be Pozolé, actually, it would be Pho. But if I could have two choices, then it would definitely be Pho and Pozolé, that's for sure! I love Mexican food, and Pozolé has in it all the flavors that I associate with good Mexican food- white corn, jalapeno, tomato, cilantro, lime, and cumin, just to name a bunch. It's like Mexico in a bowl, or something. In fact, if it's not the national dish of Mexico, it should be. Somebody get me Felipe Calderon on the phone, we'll straighten this out right now.
I got my first taste of Pozolé awhile back at work. One of the guys happened to bring some in that he'd gotten from one of the many Mexican stores/restaurants in the area. I didn't really like working with that guy. I'm glad he's not there anymore, to be honest, but when he brought that soup in that day and offered me some, he certainly caused me to overlook a lot of the reasons I didn't like working with him. I'm still glad he's gone; but I'm glad he worked there, too. Anyway, I'd never had it before, and didn't even know what it was, but when I got home I did some looking around on the internet and managed to find a recipe for something that sounded like it might be it. So I asked the boss to order some hominy so we could try it out, and a couple days later I brought the recipe in to give it a go. Now at Sweeney's, where I work, we have a Soup of the Day, which we sometimes offer as part of our daily special. So we have to make sure we have enough on hand to get through the day. And since this is Pozolé we're talking about here, I knew we'd need kind of a lot; I don't know, maybe 20 servings or so. But if you look at the recipe, it's only written for 4 servings. Hmm.... So this is going to entail math or something? Jeez, I just wanted to make some soup here, not calculate Fermat's Last Theorem. So I pretty much just gave the recipe a quick read-through to see what it called for and get an idea of how to do it and then tossed it aside. (I really do have a hard time following recipes.) I posted the link above mainly as a reference. You really don't need it. Pozolé is just one of those foods that are really flexible and kind of hard to make wrong. So let's get to it, shall we?
Ok, as I said, Pozolé is really flexible- meaning there's lots of different ways to make it and still call it Pozolé. So some of these ingredients can be considered optional, and you can use others that may not be called for in a particular recipe. I'm just going to list a bunch here that I think would be good, not that I would necessarily use all of them myself. Think of it as an ingredient smorgasbord. Some ingredients, obviously, are not optional, like the hominy. The recipe link I posted above says that if you can't find hominy you can substitute frozen corn kernels. I wouldn't go that far, myself. The flavor is too different, not to mention the appearance. (If you've never had hominy, it's flavor is like that of corn tortillas.)
Hominy
Pork, shredded
Chicken, shredded
Celery
Onions
Chicken stock, preferably homemade
Various chilis
Garlic
Cumin
Salt
Cilantro
Lime juice
Oregeno
Chili powder
Cayenne
Mushrooms
Diced tomatoes
Black pepper
Avocado
Paprika
Did I miss anything? I know on the Pozolé wiki page they mention cabbage, lettuce and radish as garnishes also. I listed pork and chicken for the meats- my understanding is that it's commonly made with either. My first taste of it was with chicken, but when I make it for myself I usually go with whatever's cheaper, since I'm kind of broke. It can also easily be made completely vegetarian and still be just as awesome tasting.
Chances are, you'll have to go with canned hominy, instead of dried. It's pretty hard to find, for some reason. Some people think the dried might taste better than the canned- I'm not so sure. (I know that when I make that Hummus I posted about earlier, canned chick peas taste exactly the same as the dried.) But I do happen to have some dried hominy, so one of these days when I get around to trying it out, I'll post an update here with my opinion on the matter. In the meantime canned will do just fine- however- brand does make a difference! At work we've been using Bush's- the same brand that makes the baked beans- and it's been very good; very tasty. But I happened to have a can of Juanita's on hand at home-
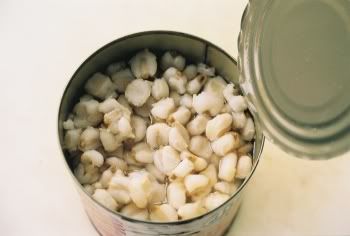
so I made a batch with that. Noticeable difference in quality, with the Juanita's being not nearly as good as the Bush's, and not very good in general. Sorry Juanita, but it's true.
Now as to the putting-together of it all... easy as pie! Actually, it's even easier than pie. Here's what I do...
I start off with either the chicken or pork, whichever I happen to be using, and cook it off in the oven; but I don't just cook it as is, although you could and it would still be good. I like to marinate mine in that guajillo salsa I told you about in a previous post. Oh yes. Major tastiness right there. Just coat it all up good in that stuff, place it on a pan or in a dish, add a little water or chicken stock, and cook on 350 F or so until it's done. It won't take long. You may want to avoid getting on the internet, though, or doing whatever it is you might be addicted to, while it's cooking. You might just forget about it like I did, hehe...
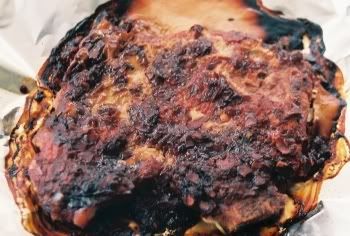
(I used it anyway; it was fine.) While that's in the oven, this would be the time to get the other stuff going. Heat up a large pot- like a stock pot- trust me, this stuff is good good good, and whatever amount you happen to make, you'll wish you had made more, so you might as well go for a lot right off the bat. (Incidentally, it doesn't do terribly well in the freezer, but it'll get eaten long before you need to freeze it anyway.) Add your oil, or butter, or whatever fat you happen to like cooking with. I'm currently using canola since I bought one of those industrial size containers of it at Sam's Club, but I think corn oil would be the obvious choice here. Add whatever veggies you're going to be using (except the diced tomatoes and hominy), along with the chilis and spices, and sauté away. I'd avoid adding the avocados at this point- they're meant as more of a garnish on the finished dish. Here's what mine looks like-
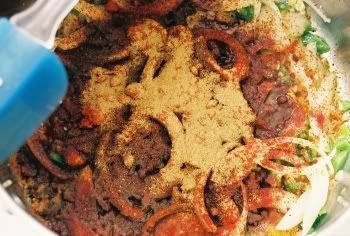
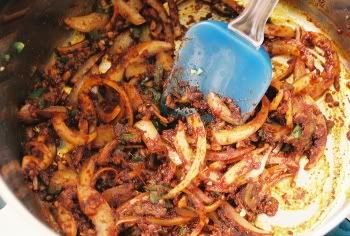
If it looks like I just threw the spices at the pot without so much as even a glance toward any sort of measuring device, well, that's because I did, pretty much. I can't be bothered to go over to my cupboard or drawer, look for the cups and spoons, then come back to what I was doing and evenly and accurately measure stuff out! Who's got time for such nonsense? Not me, that's who. (Hence the name of my blog. Who cares about recipes and such- How's it Taste? Don't worry, it'll be totally fine. This stuff's hard to mess up.)
Anyway, normally my Pozolé is not this red, but I had some smoked paprika that I've been wanting to try out, so I loaded it on.
Once all the veggies are cooked to the desired tenderness level, add the chicken stock and diced tomatoes. Bring just to a boil-
then turn down
way down low
almost off
but not quite.
[Ok, that was just an inside wink to a friend, so maybe not quite that low. Just down to a simmer, then.]
While that's simmering happily away, go check on the protein situation, if you're using any. If it's ready, shred it up. (Assuming you've let it cool enough to handle. Now that I think about it, you may want to take care of this part a little further in advance of the actual soup making part.) At this point, add the meat and hominy, and cook for about 10 minutes more. Right at the end is when you want to add the lime juice and cilantro. Now it's ready!
Garnish with additional lime juice, cilantro, cayenne, avocado, and whatever else makes your mouth water.
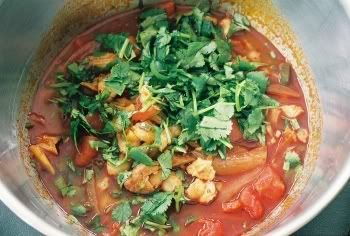
p.s. Deborah over at Taste and Tell recently posted a recipe for Green Posole, (and I saw another new one somewhere else) - I swear I'm not ripping hers off- (hey, mine's red, hers is green! ; ) I've had this post planned since the very beginning; it just takes me awhile to get around to taking care of business.
I got my first taste of Pozolé awhile back at work. One of the guys happened to bring some in that he'd gotten from one of the many Mexican stores/restaurants in the area. I didn't really like working with that guy. I'm glad he's not there anymore, to be honest, but when he brought that soup in that day and offered me some, he certainly caused me to overlook a lot of the reasons I didn't like working with him. I'm still glad he's gone; but I'm glad he worked there, too. Anyway, I'd never had it before, and didn't even know what it was, but when I got home I did some looking around on the internet and managed to find a recipe for something that sounded like it might be it. So I asked the boss to order some hominy so we could try it out, and a couple days later I brought the recipe in to give it a go. Now at Sweeney's, where I work, we have a Soup of the Day, which we sometimes offer as part of our daily special. So we have to make sure we have enough on hand to get through the day. And since this is Pozolé we're talking about here, I knew we'd need kind of a lot; I don't know, maybe 20 servings or so. But if you look at the recipe, it's only written for 4 servings. Hmm.... So this is going to entail math or something? Jeez, I just wanted to make some soup here, not calculate Fermat's Last Theorem. So I pretty much just gave the recipe a quick read-through to see what it called for and get an idea of how to do it and then tossed it aside. (I really do have a hard time following recipes.) I posted the link above mainly as a reference. You really don't need it. Pozolé is just one of those foods that are really flexible and kind of hard to make wrong. So let's get to it, shall we?
Ok, as I said, Pozolé is really flexible- meaning there's lots of different ways to make it and still call it Pozolé. So some of these ingredients can be considered optional, and you can use others that may not be called for in a particular recipe. I'm just going to list a bunch here that I think would be good, not that I would necessarily use all of them myself. Think of it as an ingredient smorgasbord. Some ingredients, obviously, are not optional, like the hominy. The recipe link I posted above says that if you can't find hominy you can substitute frozen corn kernels. I wouldn't go that far, myself. The flavor is too different, not to mention the appearance. (If you've never had hominy, it's flavor is like that of corn tortillas.)
Hominy
Pork, shredded
Chicken, shredded
Celery
Onions
Chicken stock, preferably homemade
Various chilis
Garlic
Cumin
Salt
Cilantro
Lime juice
Oregeno
Chili powder
Cayenne
Mushrooms
Diced tomatoes
Black pepper
Avocado
Paprika
Did I miss anything? I know on the Pozolé wiki page they mention cabbage, lettuce and radish as garnishes also. I listed pork and chicken for the meats- my understanding is that it's commonly made with either. My first taste of it was with chicken, but when I make it for myself I usually go with whatever's cheaper, since I'm kind of broke. It can also easily be made completely vegetarian and still be just as awesome tasting.
Chances are, you'll have to go with canned hominy, instead of dried. It's pretty hard to find, for some reason. Some people think the dried might taste better than the canned- I'm not so sure. (I know that when I make that Hummus I posted about earlier, canned chick peas taste exactly the same as the dried.) But I do happen to have some dried hominy, so one of these days when I get around to trying it out, I'll post an update here with my opinion on the matter. In the meantime canned will do just fine- however- brand does make a difference! At work we've been using Bush's- the same brand that makes the baked beans- and it's been very good; very tasty. But I happened to have a can of Juanita's on hand at home-
so I made a batch with that. Noticeable difference in quality, with the Juanita's being not nearly as good as the Bush's, and not very good in general. Sorry Juanita, but it's true.
Now as to the putting-together of it all... easy as pie! Actually, it's even easier than pie. Here's what I do...
I start off with either the chicken or pork, whichever I happen to be using, and cook it off in the oven; but I don't just cook it as is, although you could and it would still be good. I like to marinate mine in that guajillo salsa I told you about in a previous post. Oh yes. Major tastiness right there. Just coat it all up good in that stuff, place it on a pan or in a dish, add a little water or chicken stock, and cook on 350 F or so until it's done. It won't take long. You may want to avoid getting on the internet, though, or doing whatever it is you might be addicted to, while it's cooking. You might just forget about it like I did, hehe...
(I used it anyway; it was fine.) While that's in the oven, this would be the time to get the other stuff going. Heat up a large pot- like a stock pot- trust me, this stuff is good good good, and whatever amount you happen to make, you'll wish you had made more, so you might as well go for a lot right off the bat. (Incidentally, it doesn't do terribly well in the freezer, but it'll get eaten long before you need to freeze it anyway.) Add your oil, or butter, or whatever fat you happen to like cooking with. I'm currently using canola since I bought one of those industrial size containers of it at Sam's Club, but I think corn oil would be the obvious choice here. Add whatever veggies you're going to be using (except the diced tomatoes and hominy), along with the chilis and spices, and sauté away. I'd avoid adding the avocados at this point- they're meant as more of a garnish on the finished dish. Here's what mine looks like-
If it looks like I just threw the spices at the pot without so much as even a glance toward any sort of measuring device, well, that's because I did, pretty much. I can't be bothered to go over to my cupboard or drawer, look for the cups and spoons, then come back to what I was doing and evenly and accurately measure stuff out! Who's got time for such nonsense? Not me, that's who. (Hence the name of my blog. Who cares about recipes and such- How's it Taste? Don't worry, it'll be totally fine. This stuff's hard to mess up.)
Anyway, normally my Pozolé is not this red, but I had some smoked paprika that I've been wanting to try out, so I loaded it on.
Once all the veggies are cooked to the desired tenderness level, add the chicken stock and diced tomatoes. Bring just to a boil-
then turn down
way down low
almost off
but not quite.
[Ok, that was just an inside wink to a friend, so maybe not quite that low. Just down to a simmer, then.]
While that's simmering happily away, go check on the protein situation, if you're using any. If it's ready, shred it up. (Assuming you've let it cool enough to handle. Now that I think about it, you may want to take care of this part a little further in advance of the actual soup making part.) At this point, add the meat and hominy, and cook for about 10 minutes more. Right at the end is when you want to add the lime juice and cilantro. Now it's ready!
Garnish with additional lime juice, cilantro, cayenne, avocado, and whatever else makes your mouth water.
- Olé! Pozolé!
p.s. Deborah over at Taste and Tell recently posted a recipe for Green Posole, (and I saw another new one somewhere else) - I swear I'm not ripping hers off- (hey, mine's red, hers is green! ; ) I've had this post planned since the very beginning; it just takes me awhile to get around to taking care of business.
Thursday, February 21, 2008
Filler Material
Looks like Robert Irvine is a big fat liar! (Well, maybe not fat, but he's definitely big.) If you've ever watched the Food Network at all, you likely know who Robert Irvine is (or thought you did, hehe...) but just in case you don't know about him, he has a show on there called "Dinner: Impossible", where he "travels the world on culinary assignments" and must produce an entire meal under seemingly impossible, or at least very tough, conditions. It's mildly interesting, I guess. My brother likes it a lot; I'm not a fan. Anyway, apparently he made up a lot of the stuff in his bio, like in his book and elsewhere when he claimed to have worked on the wedding cake for Prince Charles and Princess Diana-
Anyway, I first read about it here. There's another article here. And this is what he looks like.
"It was an English fruitcake that weighed over 360 pounds," he told the Toronto Sun. "I worked on these elaborate side panels, which told the history of the royal Windsor and Spencer families in icing!"
True?
"I was at the school when that was happening," he said. "They made the cake at the school where I was."
Did he help make it?
"Picking fruit and things like that."
Mmm-hm.Anyway, I first read about it here. There's another article here. And this is what he looks like.
Tuesday, February 12, 2008
Sour Grapes
This post isn't really about sour grapes- I just thought that made for a better title than "Sour Pickles". Plus, I don't really like calling these "sour", even though I suppose that's what they are. Call them whatever you want- just try them out. You won't be disappointed. They're super easy, low-fat, low-calorie, they don't take long at all, and are only a little bit addicting.
First, the original recipe, handed down from my grandfather-
PICKLES IN A CROCK.
1 gallon crock
8 cups vinegar
1/2 cup salt
1/2 cup sugar
1/2 cup dry mustard
cucumbers.
mix dry ingredients, add a little vinegar at a time until well mixed, then add remaining vinegar and place in a crock.
wash and dry pickles, put in crock, add a small piece of alum for crispness.
Now as I said, that's the original recipe. My family has made it many times over the years and it always goes over well with everyone who tries it. I highly recommend trying it as-is, not only because it's very good, but also to use it as a sort of flavor reference point for when you start messing around with the ingredients, like I do.
I made these for the first time in a very long time a few months ago, and as I was dissolving it on the stove I tasted the vinegar/spice mix and decided it was a little too vinegar-y. So I added a little more of each of the dry ingredients, not measuring anything out of course, until it tasted about right. A week or so later when they were ready, I tried them out and thought they were pretty much outstanding. So I brought some into work for people to try and they were a big hit. Gave some to my folks one day too- that turned out to be a mistake. My dad loved them, so he gave me some money to buy stuff to make more for him, plus went out and bought some english cucumbers for me to try out as well. I was not expecting all this extra work. I got the recipe from him, after all. Couldn't he have just gone home and made some himself? Maybe asked for some pro tips? The lesson to be learned here is this: whenever you make something that is so good and you know people are just going to love it, make sure you have a recipe on hand to give to them when they ask you to make them some. "Can I make you some? I'll do you one better! Here's the recipe! Now you can make them anytime your little heart desires!" It doesn't matter if you don't actually have a recipe- make one up. Keep it on hand for just such occasions. If you do have one, but it's a "top secret" recipe that you don't want to share with anyone, just give them a fake recipe, something that looks similar, but is actually not at all the same. Then when they try it out and it's not nearly as good as yours they'll think you're just the shit and you'll build up a reputation. Of course, if simply handing them a recipe won't do, like say if they're your parents or something, and trying to brush them off with just a piece of paper will make you look rude and ungrateful for all the cooking they've done for you, there is another option: just don't share your stuff with them. If they don't know you got the goods, they won't know to ask for them, right? Of course, then you'll have to keep the knowledge that you are, in fact, the shit, to yourself, but hey, we all have to make compromises somewhere, right?
Alright, moving on... check out these fine looking cucumbers I picked up at my local Asian grocery store for 75 cents a pound!
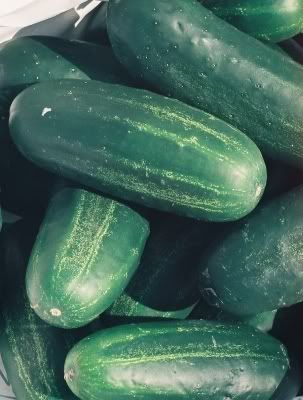
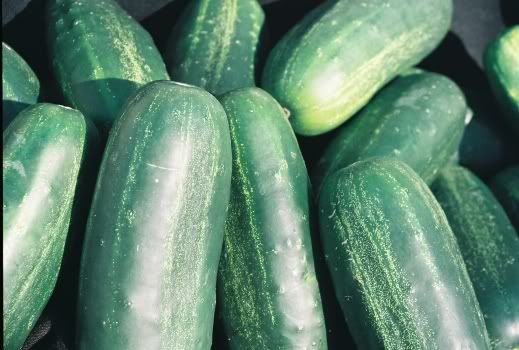
Apparently they're in season all year-round, at least around here anyway. The photos don't really do them justice- they really looked like they were fresh from somebody's garden in the middle of July. But as a matter of fact, I bought them January 21st!
Now, the recipe calls for a "small piece of alum" for crispness. Some people say you shouldn't use alum, that it's bad for you or whatever. I think I read somewhere that if you ingest a couple ounces it will kill you. I don't know. I do know that it's FDA approved, for what that's worth, and that 2 ounces is a lot- accidentally ingesting that much would be like something along the lines of accidentally ingesting an entire bottle of aspirin; it's just not going to happen. If you're still not sure, I'd just recommend doing a little online research and getting all the info you can, then you can make the decision that's right for you. As for me, I use the stuff. (Then again, I also use and love MSG and aspartame.) I've made pickles with and without it, and the difference is huge. Without, they're super soft. Disgusting, in fact. I threw a whole bunch out because of it. With the alum, they're super crunchy, and stay that way for a good two weeks or more. As for a "piece" of alum, the only alum I've been able to find is granulated, and the label doesn't give much in the way of instruction on how to use it. It usually just says "follow the recipe". From my own online research, the consensus is that you shouldn't let the cucumbers (or whatever it is you happen to be pickling) just soak in the alum solution the whole time. A short soak, followed by a rinse, then pickling is what's recommended. So when I make pickles, here's my procedure:
dissolve 1 teaspoon alum in 1 gallon of water.
add rinsed whole cucumbers and let soak for 1/2 hour, then rinse and dry.
For some reason though, the 1/2 hour usually turns into an hour. But that's just me. I'm easily distracted.
As far as the rest of the recipe goes, usually I start off the same as the original recipe- 8 cups vinegar, 1/2 c. each of the dry stuff, but then I just keep adding a little more of each of the dry ingredients until I like the way it tastes. I heat mine on med-low in a pot on the stove- makes the dissolving much faster and easier. Note that if you do it this way, you really need to cool the mix down to room temp (or lower) before adding the cucumbers, or they probably will get mushy, even with the alum. I say "probably" because that's what I've been told repeatedly by my mother, and as any mother will tell you- mothers are never wrong. So I figure better safe than sorry. (I usually use the cool-down time to slice the cucumbers anyway. I used to slice them into rings, but now I prefer spears.) It's hard to say exactly how much extra of the dry stuff I add. I did write it down one time, and I'll post it here, but please don't follow it exactly; you're far better off tasting as you go. (Another reason to keep the heat on med-low- I just dip my finger directly into the mix on the stove and taste it like that. If you find yourself adding more dry mustard, it may clump if you add it directly into the vinegar, but if you sprinkle it on very lightly, it usually mixes in fine. Alternately, you can mix it with a little salt and/or sugar and it will dissolve much easier.)
8 c. white vinegar
8 c. apple cider vinegar
1 1/4 c. dry mustard
1 1/4 c. sugar
1 1/4 c. salt
This recipe will get you two gallons of pickles. I do like to mix apple cider vinegar and white vinegar half and half. It's fun to experiment with different types to see how the flavors differ. I like the flavor profile I get from white vinegar, though, so I always use at least half white. As for salt, they make pickling salt, but I use kosher. My understanding is that pickling salt dissolves better, leaving a less cloudy brine, but the dry mustard will cloud it up anyway, so I say use whatever's cheaper. Dry mustard can be expensive, but most stores have a bulk foods section and you can get it much cheaper that way. As for the container, pretty much anything non-reactive will do fine. Those large Gladware/Rubbermaid/etc. things would probably be great. Me, I recycle the one gallon mayo containers we get at work:
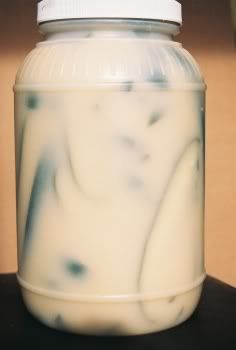
Just stuff it full of cukes, and pour the vinegar mix over and you're pretty much all set. These don't need to cure in the fridge. Room temp is fine. At room temp, they should be ready in about 4 days. At cooler temps, like your basement in the wintertime, or the fridge, it'll take about a week or so.
You simply must try these pickles. They're quick, easy, and delicious!
(And only a little bit addicting.)
First, the original recipe, handed down from my grandfather-
PICKLES IN A CROCK.
1 gallon crock
8 cups vinegar
1/2 cup salt
1/2 cup sugar
1/2 cup dry mustard
cucumbers.
mix dry ingredients, add a little vinegar at a time until well mixed, then add remaining vinegar and place in a crock.
wash and dry pickles, put in crock, add a small piece of alum for crispness.
Now as I said, that's the original recipe. My family has made it many times over the years and it always goes over well with everyone who tries it. I highly recommend trying it as-is, not only because it's very good, but also to use it as a sort of flavor reference point for when you start messing around with the ingredients, like I do.
I made these for the first time in a very long time a few months ago, and as I was dissolving it on the stove I tasted the vinegar/spice mix and decided it was a little too vinegar-y. So I added a little more of each of the dry ingredients, not measuring anything out of course, until it tasted about right. A week or so later when they were ready, I tried them out and thought they were pretty much outstanding. So I brought some into work for people to try and they were a big hit. Gave some to my folks one day too- that turned out to be a mistake. My dad loved them, so he gave me some money to buy stuff to make more for him, plus went out and bought some english cucumbers for me to try out as well. I was not expecting all this extra work. I got the recipe from him, after all. Couldn't he have just gone home and made some himself? Maybe asked for some pro tips? The lesson to be learned here is this: whenever you make something that is so good and you know people are just going to love it, make sure you have a recipe on hand to give to them when they ask you to make them some. "Can I make you some? I'll do you one better! Here's the recipe! Now you can make them anytime your little heart desires!" It doesn't matter if you don't actually have a recipe- make one up. Keep it on hand for just such occasions. If you do have one, but it's a "top secret" recipe that you don't want to share with anyone, just give them a fake recipe, something that looks similar, but is actually not at all the same. Then when they try it out and it's not nearly as good as yours they'll think you're just the shit and you'll build up a reputation. Of course, if simply handing them a recipe won't do, like say if they're your parents or something, and trying to brush them off with just a piece of paper will make you look rude and ungrateful for all the cooking they've done for you, there is another option: just don't share your stuff with them. If they don't know you got the goods, they won't know to ask for them, right? Of course, then you'll have to keep the knowledge that you are, in fact, the shit, to yourself, but hey, we all have to make compromises somewhere, right?
Alright, moving on... check out these fine looking cucumbers I picked up at my local Asian grocery store for 75 cents a pound!
Apparently they're in season all year-round, at least around here anyway. The photos don't really do them justice- they really looked like they were fresh from somebody's garden in the middle of July. But as a matter of fact, I bought them January 21st!
Now, the recipe calls for a "small piece of alum" for crispness. Some people say you shouldn't use alum, that it's bad for you or whatever. I think I read somewhere that if you ingest a couple ounces it will kill you. I don't know. I do know that it's FDA approved, for what that's worth, and that 2 ounces is a lot- accidentally ingesting that much would be like something along the lines of accidentally ingesting an entire bottle of aspirin; it's just not going to happen. If you're still not sure, I'd just recommend doing a little online research and getting all the info you can, then you can make the decision that's right for you. As for me, I use the stuff. (Then again, I also use and love MSG and aspartame.) I've made pickles with and without it, and the difference is huge. Without, they're super soft. Disgusting, in fact. I threw a whole bunch out because of it. With the alum, they're super crunchy, and stay that way for a good two weeks or more. As for a "piece" of alum, the only alum I've been able to find is granulated, and the label doesn't give much in the way of instruction on how to use it. It usually just says "follow the recipe". From my own online research, the consensus is that you shouldn't let the cucumbers (or whatever it is you happen to be pickling) just soak in the alum solution the whole time. A short soak, followed by a rinse, then pickling is what's recommended. So when I make pickles, here's my procedure:
dissolve 1 teaspoon alum in 1 gallon of water.
add rinsed whole cucumbers and let soak for 1/2 hour, then rinse and dry.
For some reason though, the 1/2 hour usually turns into an hour. But that's just me. I'm easily distracted.
As far as the rest of the recipe goes, usually I start off the same as the original recipe- 8 cups vinegar, 1/2 c. each of the dry stuff, but then I just keep adding a little more of each of the dry ingredients until I like the way it tastes. I heat mine on med-low in a pot on the stove- makes the dissolving much faster and easier. Note that if you do it this way, you really need to cool the mix down to room temp (or lower) before adding the cucumbers, or they probably will get mushy, even with the alum. I say "probably" because that's what I've been told repeatedly by my mother, and as any mother will tell you- mothers are never wrong. So I figure better safe than sorry. (I usually use the cool-down time to slice the cucumbers anyway. I used to slice them into rings, but now I prefer spears.) It's hard to say exactly how much extra of the dry stuff I add. I did write it down one time, and I'll post it here, but please don't follow it exactly; you're far better off tasting as you go. (Another reason to keep the heat on med-low- I just dip my finger directly into the mix on the stove and taste it like that. If you find yourself adding more dry mustard, it may clump if you add it directly into the vinegar, but if you sprinkle it on very lightly, it usually mixes in fine. Alternately, you can mix it with a little salt and/or sugar and it will dissolve much easier.)
8 c. white vinegar
8 c. apple cider vinegar
1 1/4 c. dry mustard
1 1/4 c. sugar
1 1/4 c. salt
This recipe will get you two gallons of pickles. I do like to mix apple cider vinegar and white vinegar half and half. It's fun to experiment with different types to see how the flavors differ. I like the flavor profile I get from white vinegar, though, so I always use at least half white. As for salt, they make pickling salt, but I use kosher. My understanding is that pickling salt dissolves better, leaving a less cloudy brine, but the dry mustard will cloud it up anyway, so I say use whatever's cheaper. Dry mustard can be expensive, but most stores have a bulk foods section and you can get it much cheaper that way. As for the container, pretty much anything non-reactive will do fine. Those large Gladware/Rubbermaid/etc. things would probably be great. Me, I recycle the one gallon mayo containers we get at work:
Just stuff it full of cukes, and pour the vinegar mix over and you're pretty much all set. These don't need to cure in the fridge. Room temp is fine. At room temp, they should be ready in about 4 days. At cooler temps, like your basement in the wintertime, or the fridge, it'll take about a week or so.
You simply must try these pickles. They're quick, easy, and delicious!
(And only a little bit addicting.)
Monday, February 4, 2008
Crouts
Quick and easy, crunchy and delicious. You are going to want to make these.
Here's what I use:
butter
brown sugar
white sugar
cinnamon
nutmeg
salt
cayenne
hoagie buns (any sturdy white bread will work. french baguette would probably be better, but ours are usually frozen and I never plan far enough ahead to thaw them out in time.)
I mix in white sugar with the brown to keep it a little more free-flowing, but other than that, there's no particular "way" to do it- just mix up the dry ingredients in a bowl and ask yourself this-
"How's it taste?". Maybe you like a lot of nutmeg. Or none at all. Perhaps you'd like a little ginger, or cloves? Go right ahead! I personally go heavy on the cinnamon, light on the cayenne, and very light on the nutmeg. Don't skip out on using the salt, though. If you're watching your sodium intake, just use a little less, but it really goes well in this. If you're using a coarse-grain salt, I'd recommend grinding it up a little in your thai granite mortar and pestle. (You do have one of those, don't you?) Once you get the mix just the way you want it, cube up that bread and coat it well in the butter you melted earlier. (A plastic squeeze bottle makes a great applicator, by the way.) Then simply toss in as much of the dry mix as you like (I like a lot) and bake in the oven on 300-350 degrees until they're all nice and crunchy. Keep an eye on them, though; all- that sugar can easily burn.
That's pretty much all there is to it! You won't believe how good they are. Sheesh, just writing about them right now makes me want to make some.
A little addon to the B.S. post-
I've heard that apple slices added to the soup as you cook it go very well with it. Haven't tried it as of yet, but it's on my to-do list.
Up Next: Pucker up, baby!
Thursday, January 31, 2008
V.A.W.
What does V.A.W. stand for?
Vegetarian. Assault. Weapon!
Here we have the V.A.W. pictured with three average-sized tomatoes...
Ok, so the average-sized tomatoes are really just average-sized cherry tomatoes. But that's still one big-ass carrot!
Here is a normal carrot...
And here is a normal carrot pictured beside the V.A.W....
I found it at work the other day. Was going to make some soup with it, but then realized it's potential for fending off intruders, so I brought it home instead.
Damn thing weighs over a pound and a half.
Subscribe to:
Posts (Atom)